
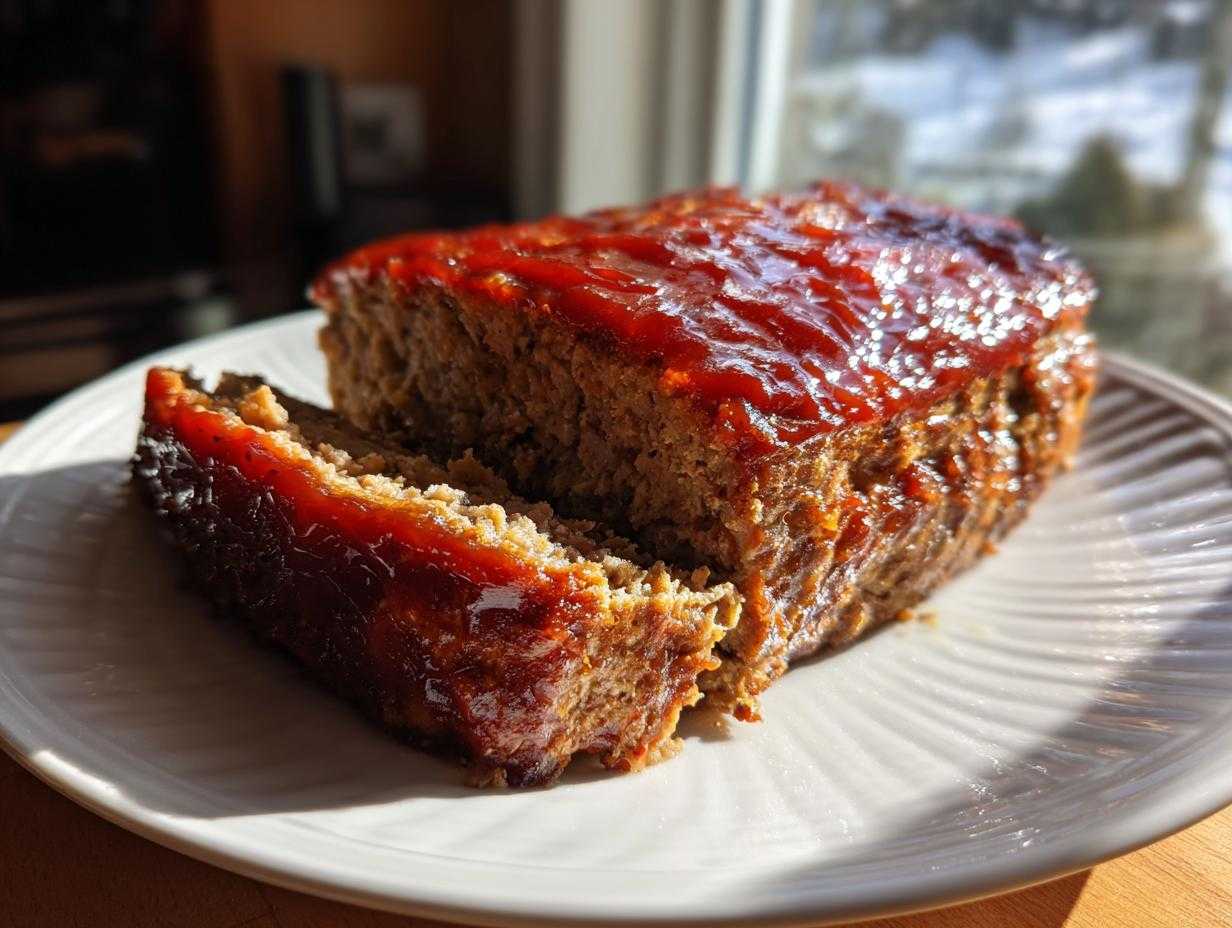
Oh, honey, let’s talk comfort food! There’s nothing quite like realizing you can have the rich, savory flavor of a perfect dinner on the table in just over an hour. Forget the dry, crumbly nightmares you might have made before. I’ve spent literally decades—since I was hauling mixing bowls as a kid—perfecting this specific technique for tenderness. I promise you, this is the Best Classic, Juicy Meatloaf with an Easy Glaze recipe you’ll ever need. It’s the ultimate weeknight meatloaf that tastes like a Sunday dinner, and baking it is almost foolproof.
We aren’t using fancy, obscure ingredients here, either. This is old-school, hearty American cooking updated just enough to guarantee moisture every single time. If you need a super satisfying family dinner that cleans up easily, you’ve landed in the right spot. I’m going to show you exactly how to avoid that dense, dried-out texture that plagues so many folks!
Why This Classic Meatloaf Recipe is a Family Favorite Dinner
When I say this is my go-to Comfort Food Recipe, I mean it. It checks every box for a busy evening meal: it’s simple to put together, cooks mostly unattended, and everyone actually asks for seconds. That’s what makes it a true Family Favorite Dinner staple around here!
Most people fear making meatloaf because they’re scared of the texture. They picture a brick of dry beef. Not us! This recipe prioritizes moisture above all else, making it the Juicy Meatloaf standard in my house. Plus, the fact that it’s an Easy Meatloaf Dinner solution means I can get it into the oven even on the craziest Monday nights.
Achieving the Ultimate Tender Meatloaf Texture
The real secret to a tender loaf lies in how you treat the meat. You’ve got to treat it like you’re making delicate cookies, not mixing concrete! My biggest piece of advice is this: don’t beat the beef up in that bowl. Mix just until you see the last streak of breadcrumb disappear. Overmixing develops the proteins too much, and then you get tough meat.
Here’s a little trick I learned from my Aunt Carol: always soak your breadcrumbs in milk for about five minutes before adding them to the meat. This ensures they plump up and distribute moisture evenly throughout the entire loaf during baking, guaranteeing a softer crumb in every bite. You can even try swapping half the beef for ground pork if you want even more fat content for extra richness!
The Simple, Tangy Meatloaf with Glaze
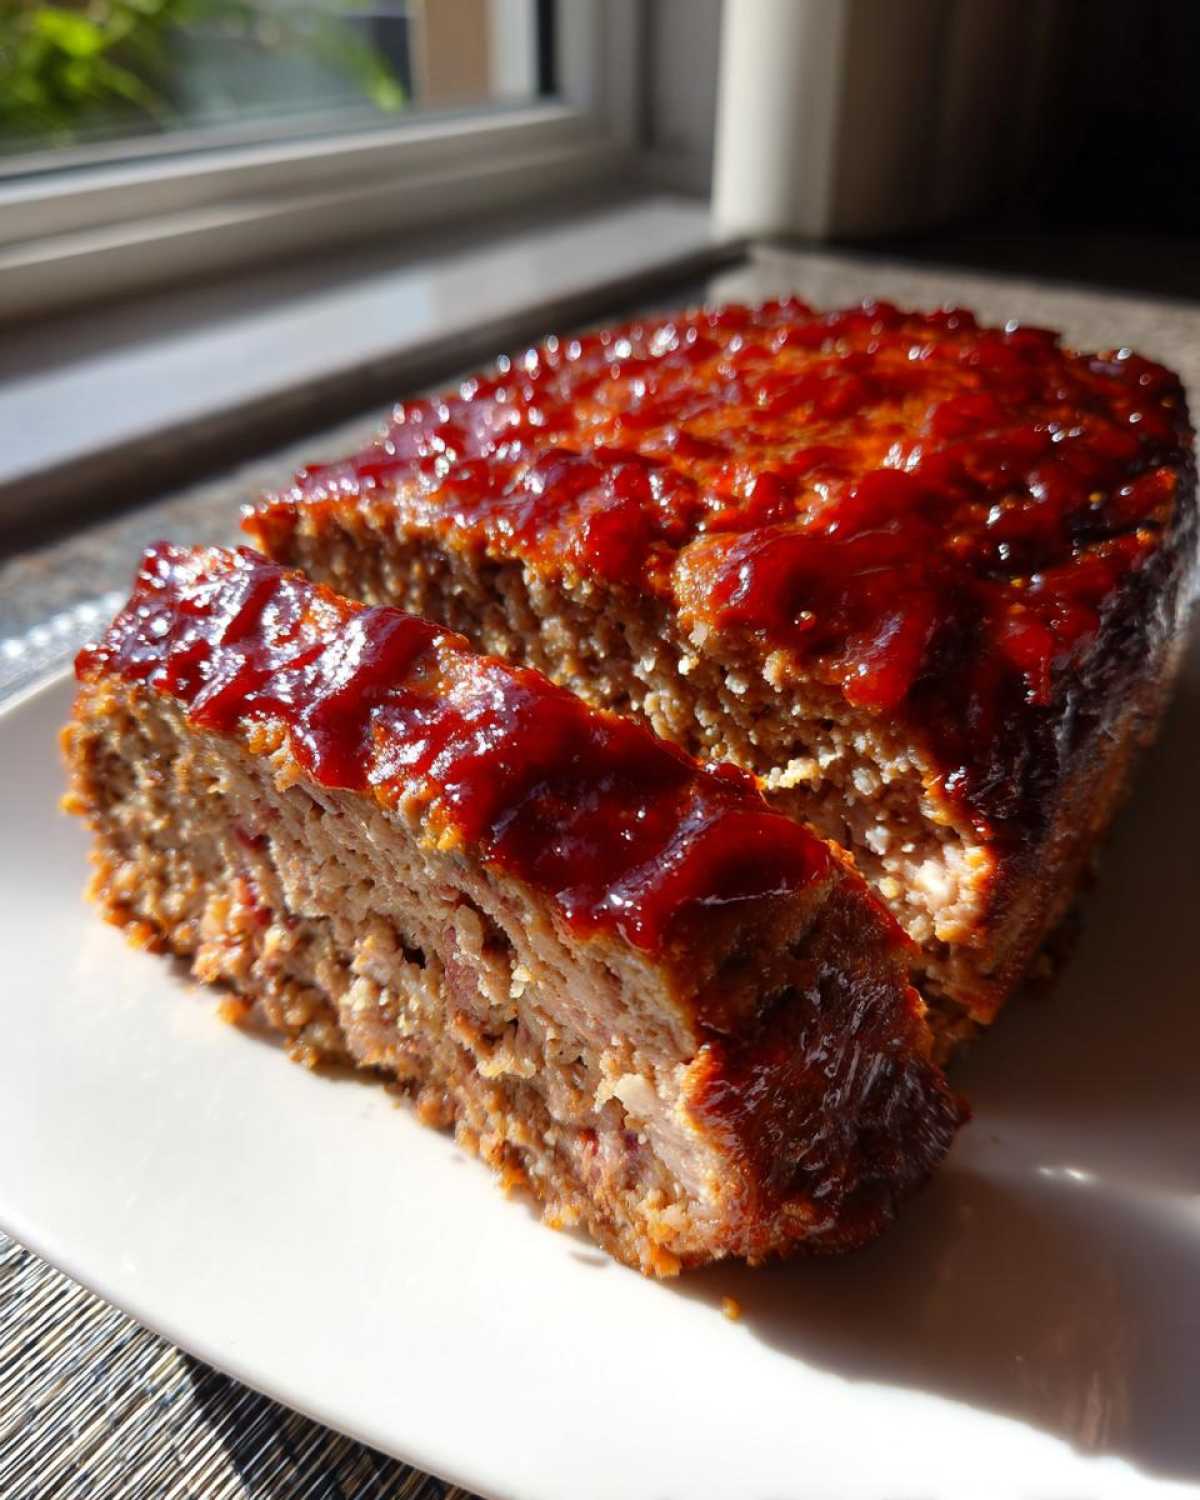
While the texture gets you halfway there, the glaze seals the deal. Honestly, this savory bake needs that shiny top layer. My glaze is super basic, but it’s perfect. It’s tangy from cider vinegar, a little sweet from brown sugar, and balanced by ketchup.
The best part? You probably have everything you need right now. No searching specialty stores! We use this easy topping strategy to bake on half the glaze first, then add the rest halfway through. This creates that wonderfully sticky, caramelized crust that you just can’t beat. It really elevates this simple $\text{meatloaf}$.
Essential Ingredients for the Best Ever Meatloaf
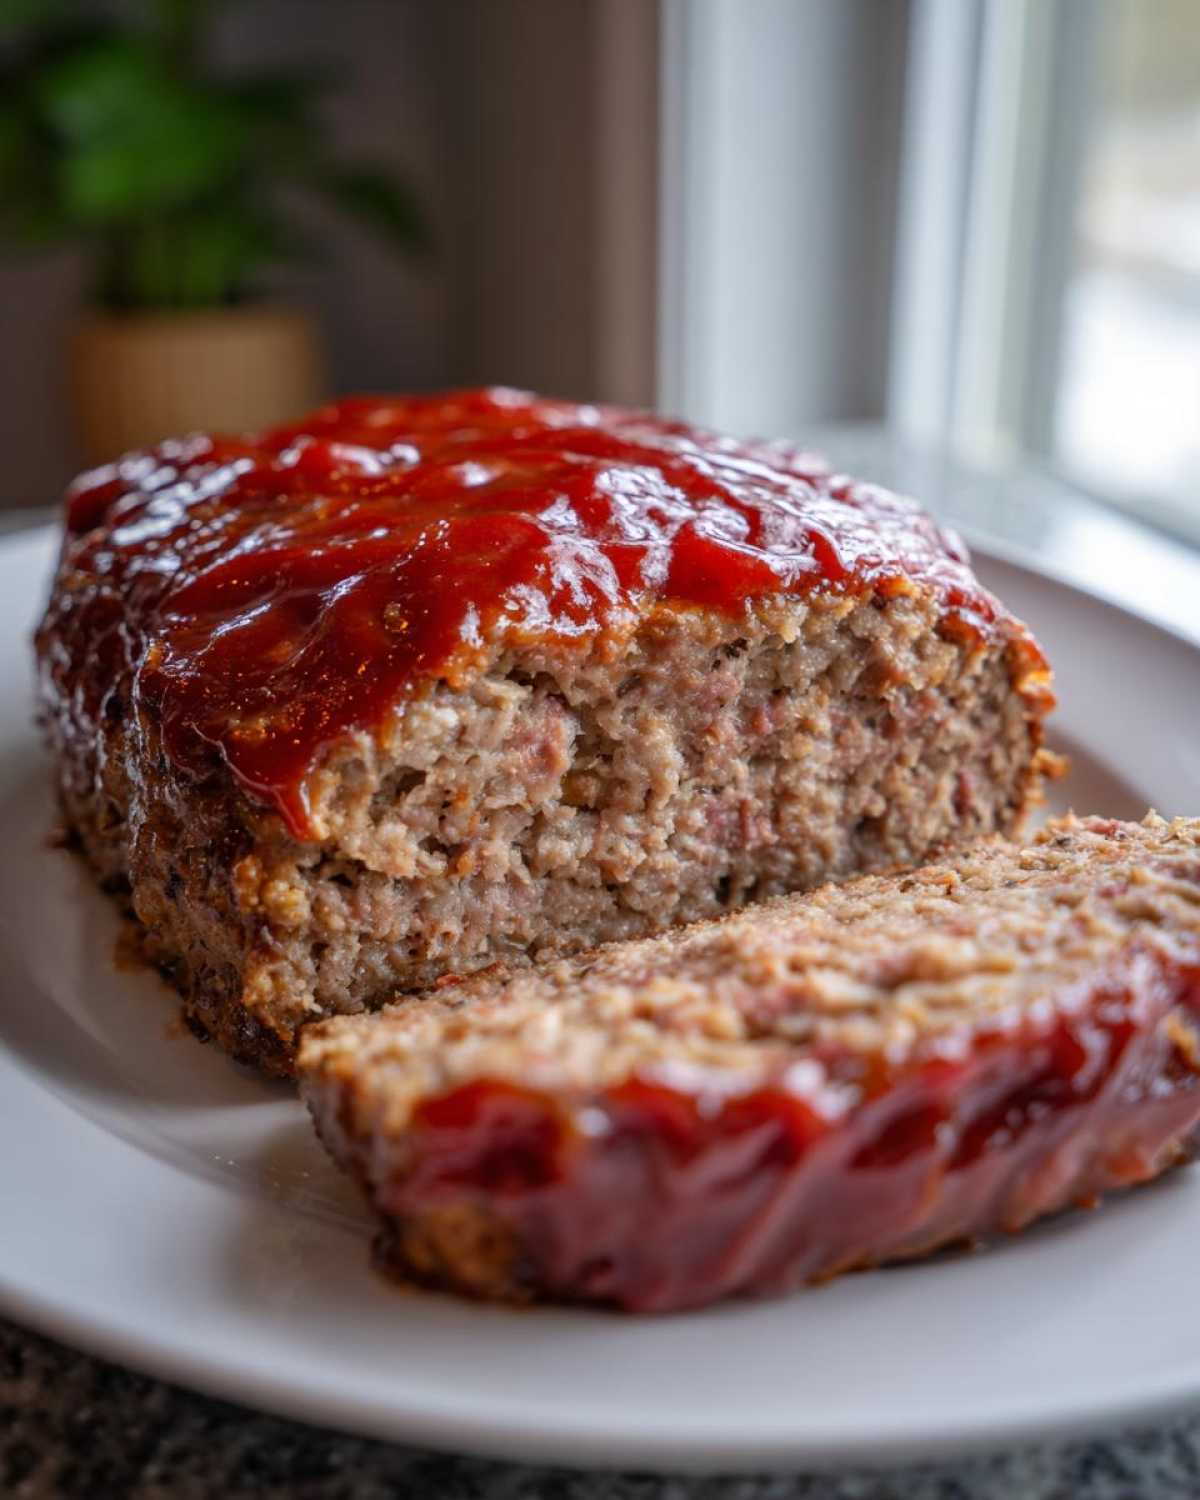
Getting the right building blocks is half the battle, right? You don’t need a pantry full of spices for this Classic Meatloaf Recipe; we rely on good quality basics. I always reach for 80/20 ground beef because that little bit of fat is your insurance policy against drying out. Seriously, don’t skimp on that fat ratio if you want a truly juicy result!
For the binders and moisture, we keep it simple: an egg, some milk (remember to soak those breadcrumbs in it!), finely chopped yellow onion, and fresh garlic. The little bit of ketchup mixed *into* the loaf itself adds necessary moisture and a subtle backbone flavor before the glaze even hits.
Then we have the glaze ingredients. It’s just three things: more ketchup, brown sugar for that deep molasses note, and a splash of apple cider vinegar for the essential tang. Simple, powerful pantry magic!
Step-by-Step Instructions for Juicy Meatloaf
Okay, now for the fun part—the actual assembly! Don’t stress about this; it’s quick, but remember what I told you about gentle handling. We’re aiming for tender here, not bouncy! First things first, make sure your oven is humming along nicely at 350 degrees Fahrenheit. I usually skip the loaf pan altogether; I find placing it right on a baking sheet lined with parchment gives it better air circulation and promotes an all-around crust, though a greased pan works too if that’s your preference.
Whisk up your wet ingredients—the milk, egg, salt, pepper, chopped onion, garlic, and that first measure of ketchup—in a big bowl. Once that’s combined, toss in your breadcrumbs (remember yours have soaked up that milk?) and the ground beef. Now, take a deep breath. Use your hands, but be gentle! Mix it until everything is *just* incorporated. If you mix until it looks perfectly uniform, you’ve already gone too far for a tender meatloaf!
Preparing the Meat Mixture and Shaping the Meatloaf
Seriously, this is where most people mess up their homemade meatloaf. After you’ve mixed, shape it gently into a loaf shape—like a fat cylinder if you’re using a baking sheet. You want it about 3 inches tall. Don’t squish it down hard; you’re just encouraging it to hold its shape, nothing more. If you’re worried about sticking, you can look up my favorite pan release trick, but honestly, parchment paper is your best friend here!
Glazing and Baking Your Classic Meatloaf Recipe
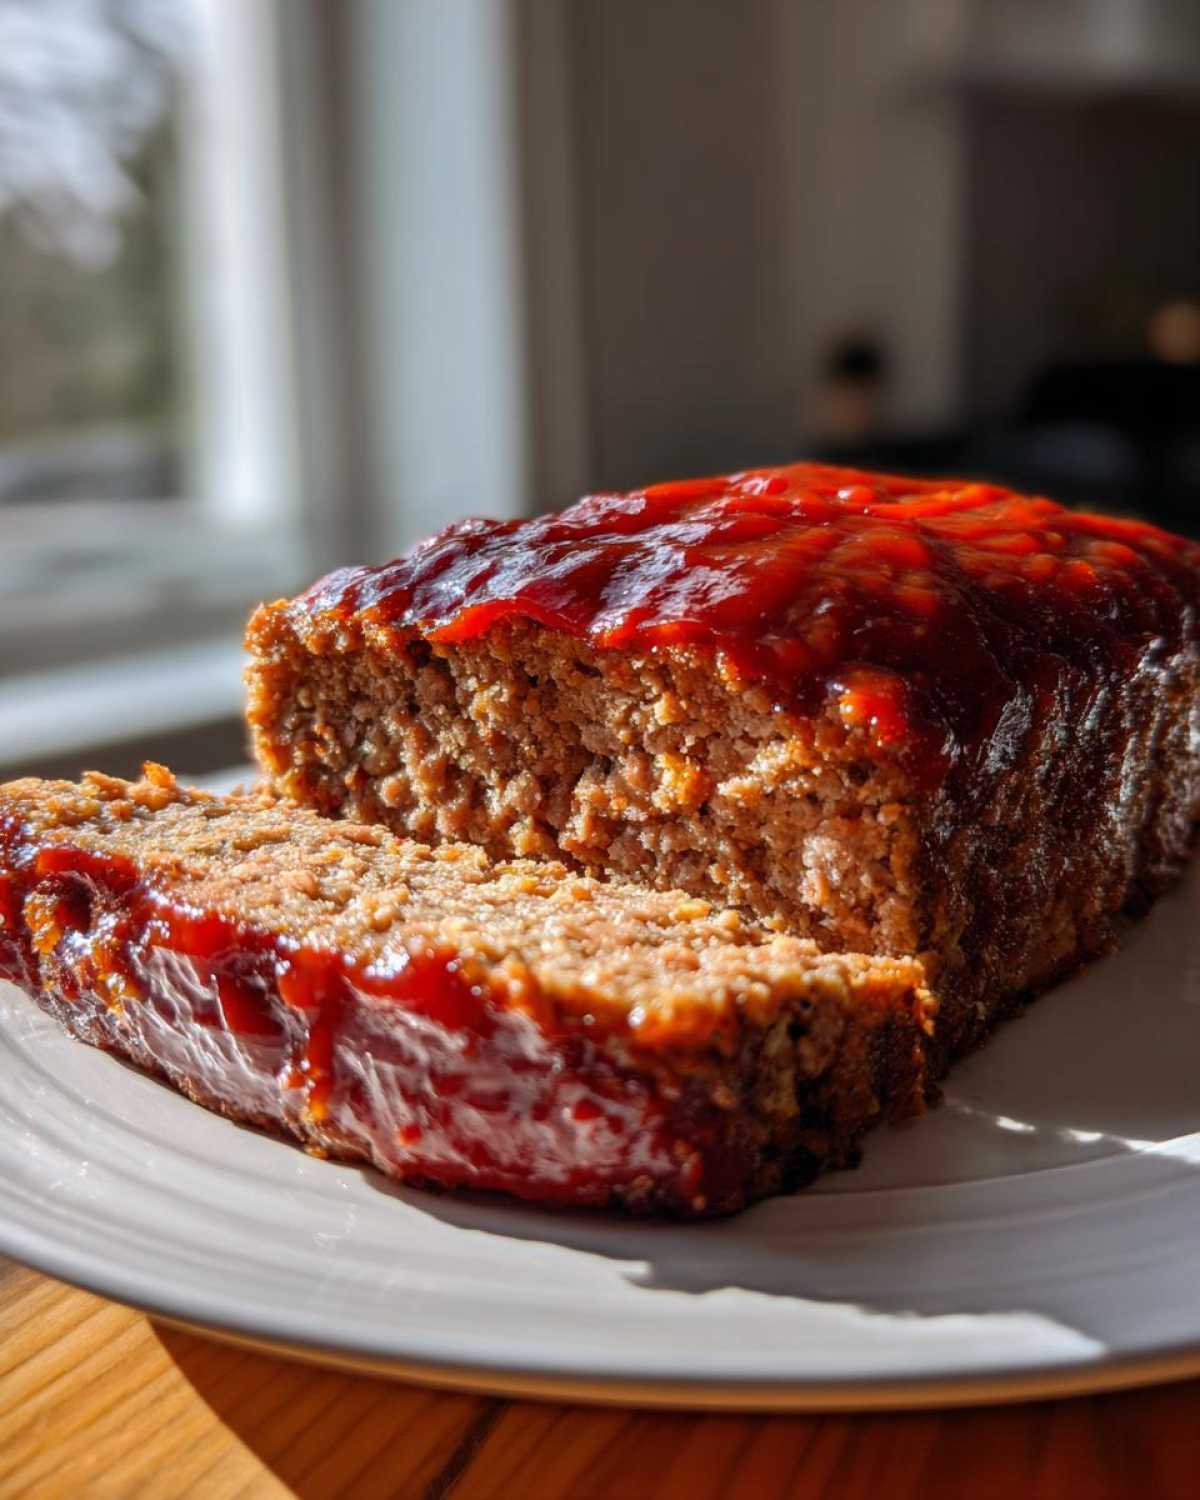
Time for that simple, amazing glaze! Whisk that remaining ketchup, brown sugar, and the apple cider vinegar together until the sugar dissolves a bit. Spread about half of that mixture right over the top of your shaped loaf. This first layer starts setting up that wonderful crust while the inside cooks.
Slide it into the preheated oven for 45 minutes. When that time is up, gently pull your meatloaf out. It will look like it’s cooked, but it needs that final push. Smear the rest of the glaze all over the top—this is the best part! Pop it back in for another 15 to 20 minutes until the temperature hits 160°F internally. Crucially, when it comes out, do not slice it immediately! Let that beautiful thing rest on a cutting board, tented loosely with foil, for a full 10 minutes. Resting keeps all those juices locked inside, making sure your Classic Meatloaf Recipe stays juicy!
Tips for Success When Making Homemade Meatloaf
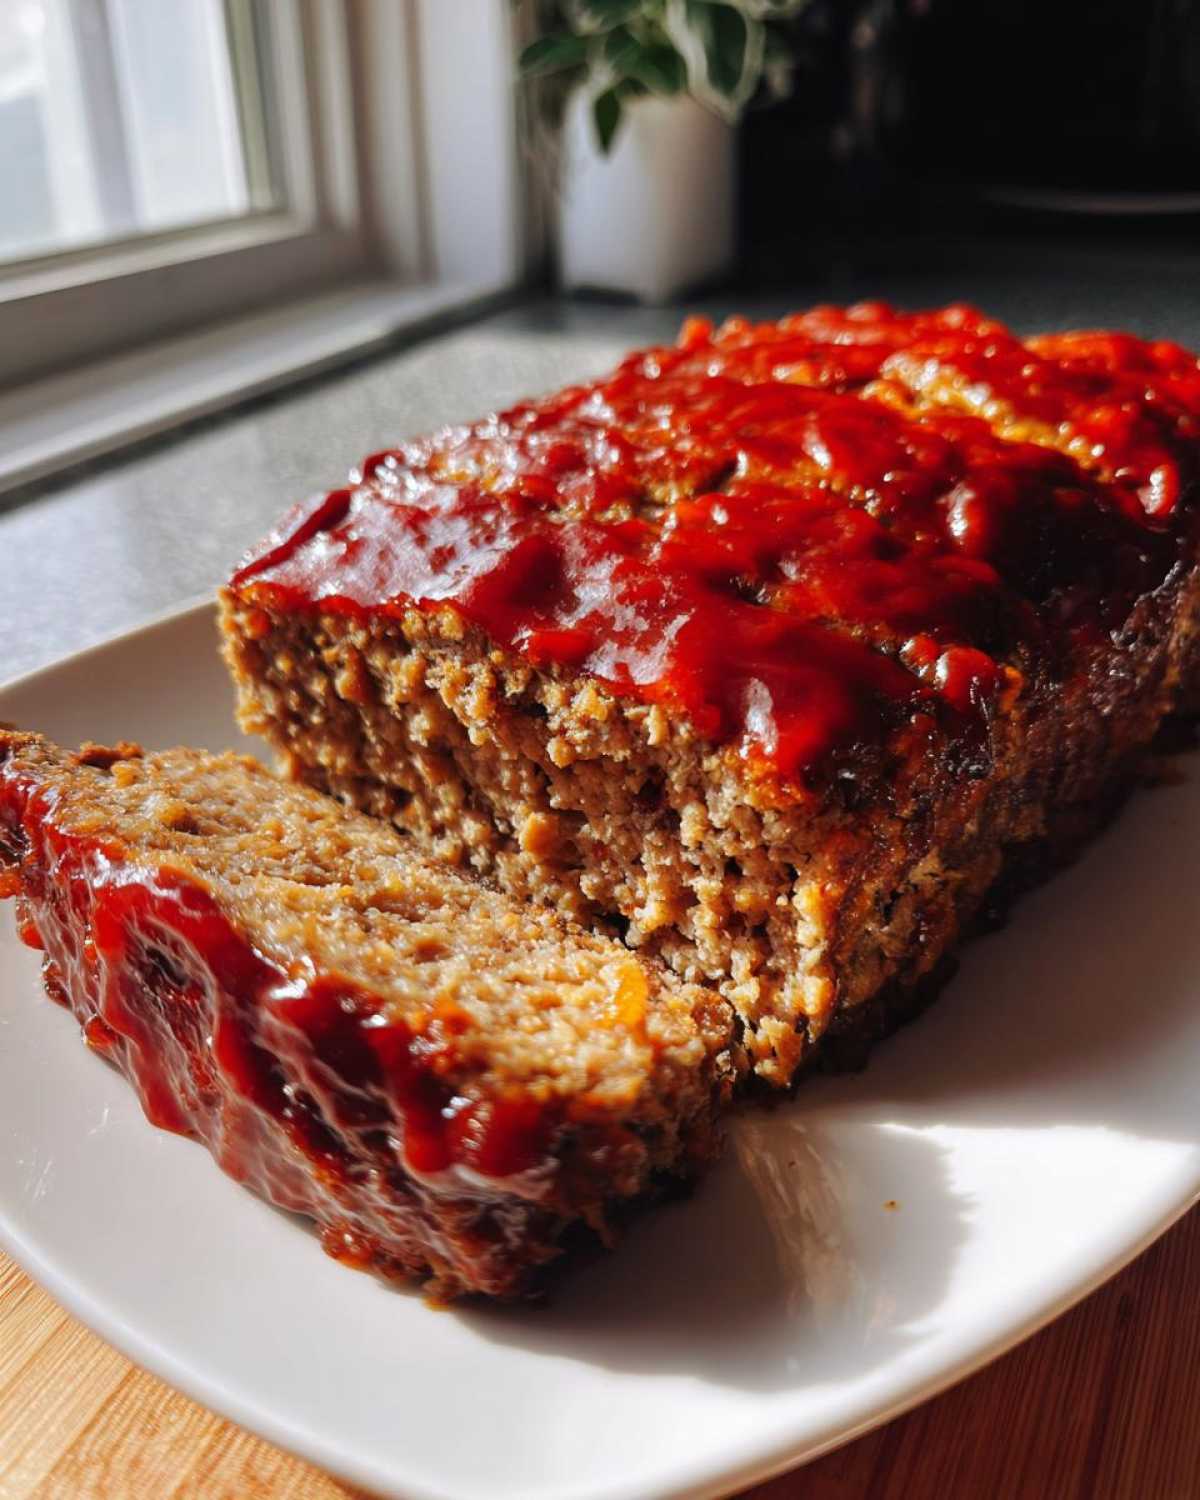
Making the best ever meatloaf really comes down to a couple of tiny details that make a gigantic difference. Seriously, following these tips takes the guesswork out of getting that perfect tender meatloaf result every time you bake one.
First off, let’s talk temperature. You absolutely must use an instant-read thermometer. Don’t just guess! Pull that homemade meatloaf when it hits 160 degrees Fahrenheit internally, not a degree hotter. Once you pull it out, that 10-minute rest I talked about before is non-negotiable. If you cut into it right away, all those lovely juices run right out onto your cutting board, not into the slice where you want them!
Also, consider using a mix of beef, pork, and maybe even some veal if you’re feeling fancy—that little bit of variety adds amazing depth of flavor. For an even cleaner finish, wrap your loaf in bacon before glazing! It’s extra work, but wow, is it worth it for special occasions.
If you are looking for other simple baking tricks, you might want to check out my recipe for those wonderfully moist bran muffins!
Simple Variations for Your Next Meatloaf Dinner
Part of the fun of a great classic recipe is knowing you can play with it once you’ve mastered the original foundation! Once you nail this base meatloaf that stays super juicy, you can start experimenting with different toppers and binders depending on what you have in the fridge or what kind of flavor mood you’re in.
Don’t feel stuck in a mold just because this is the “Classic” version. We can pivot easily toward spicy, smoky, or even a more herby flavor profile. These quick swaps mean you can serve meatloaf multiple weeks in a row without anyone getting bored!
Trying a BBQ Glazed Meatloaf
If you’re feeling like something smoky and a little more casual—maybe for a cookout feel—swap out that ketchup-based glaze entirely! The base of our glaze (the brown sugar and apple cider vinegar) is perfect for kicking off a BBQ flavor. You just need to combine those two elements with your favorite bottle of smoky BBQ sauce.
I love using a slightly spicier BBQ sauce here. Just use equal parts of your favorite BBQ sauce and the brown sugar/vinegar mix, and skip the original ketchup for the topping. You can even check out my recipe for BBQ glazed mini meatloaves if you want to make individual servings instead! They cook faster, which is great for small appetites.
Making a Stove Top Stuffing Meatloaf
This is a classic American shortcut, and I totally approve when I’m running short on time! If you want to skip the breadcrumbs entirely, you can—just replace the 1 cup of dried breadcrumbs in the main mix with 1 cup of prepared Stove Top Stuffing mix. That’s it!
The stuffing mix already has built-in herbs and seasoning, so it adds a fantastic layer of savory flavor without you having to chop extra celery or herbs. It keeps the texture wonderfully soft, too, because the stuffing holds onto moisture so well. It’s a fantastic way to streamline your meatloaf prep!
Serving Suggestions for Your Weeknight Meatloaf Idea
Now that you have the juiciest meatloaf known to humankind resting on the counter, you need the perfect supporting cast! A great Comfort Food Recipe demands equally comforting sides, but it shouldn’t require an hour of extra work, right? Since our glaze is rich and savory, I love balancing it with something bright or starchy that can soak up any extra glaze runoff.
Mashed potatoes are the absolute non-negotiable classic. You need that velvety smoothness to contrast the firm texture of the meatloaf. My kids insist on having gravy, but if you use that tangy glaze, you might not need a separate sauce!
For greens, a simple steamed green bean or maybe some slightly sweet glazed carrots work beautifully. If you’re looking for a heartier side that feeds a crowd, you absolutely have to try my recipe for Crispy Oven Roasted Potatoes; they’re great even when served alongside dinner instead of breakfast!
This whole setup just screams Family Favorite Dinner. It’s hearty, familiar, and incredibly satisfying!
Storage and Reheating Instructions for Leftover Meatloaf
Oh, the glorious leftover meatloaf! If you’re lucky enough to have any left after the first night, you’ll want to store it correctly so it stays delicious. Since we worked so hard to keep this baby tender, we don’t want to ruin it in storage!
Once the loaf has cooled down completely—don’t wrap it while it’s steaming hot, or you’ll encourage sogginess—wrap the slices tightly in plastic wrap first, then slide that package into a good airtight container. Stored this way in the fridge, your homemade meatloaf is usually good for a solid three to four days. Any longer than that, and I start getting nervous, so try to enjoy it within that window.
When it comes to reheating, you have two good options, depending on how much you want to bring back to life:
- For Slices: If you’re just reheating one or two pieces, the microwave is fastest, but be careful! Microwave on 50% power for short bursts (say, 45 seconds at a time) until hot all the way through. This keeps it from getting tough.
- For a Whole Loaf or Large Slice: If you want that fresh-baked quality back, the oven is your friend. Set your oven low, around 325 degrees Fahrenheit. Place your slices (maybe with a tiny splash of water or beef broth to reintroduce steam) in a baking dish, cover it loosely with foil, and heat for about 15 to 20 minutes until warmed through. This avoids drying out the edges!
If you prefer a shortcut for the reheating, check out how I sometimes adapt leftover beef for my lasagna recipe—sometimes leftover meatloaf crumbles work perfectly in other dishes!
Frequently Asked Questions About Making Meatloaf
I know when you look at a recipe, especially one claiming to be the absolute best, you’re going to have some questions sneak up on you! I get it; I’m the same way in the kitchen. We want to make sure this meatloaf turns out perfectly juicy, just like mine does. Here are a few things folks ask me all the time when they’re tackling this classic dish.
Can I use leaner ground beef for this meatloaf recipe?
Oh, this is the classic dilemma! Everyone wants that low-fat label, but I have to be straight with you: the fat is your friend when it comes to a tender meatloaf. If you use 93/7 lean ground beef, you risk ending up with something that’s a little dry, even with the milk and the breadcrumbs doing their best work. That 80/20 mix gives you the necessary internal fat content to keep things moist and delicious.
If you absolutely, positively must use lean beef, just add a little insurance policy! Try skipping the milk soak and instead, mix in about 2 tablespoons of sour cream or a tiny bit of melted butter directly into the meat mixture. It won’t be quite the same as the 80/20, but it helps fight that dryness! Don’t forget, even leftovers might need a splash of broth when reheating.
Should I bake my meatloaf in a loaf pan or on a sheet pan?
This choice totally impacts the final texture of your homemade meatloaf! I prefer the baking sheet every single time, but it depends on what you want:
- Loaf Pan: The loaf pan cradles the meat, ensuring it keeps a perfect oval shape. The downside? All those delicious juices and rendered fat pool right at the bottom of the pan underneath the loaf. This steams the bottom instead of developing a nice crust, and cleanup can be a bit sticky.
- Baking Sheet: When I place it on parchment paper on a baking sheet, the fat drains away, and the heat hits the entire surface evenly. This results in a beautifully rendered, slightly crusty exterior all around, which I think gives you the *best* overall texture for a juicy meatloaf. Plus, cleanup is a dream since I use that parchment paper!
So, if you want a defined shape and don’t mind a soft bottom, use the pan. If you want the best crust and easy cleanup, use the sheet pan!
If you’re looking for other ways to streamline dinner, you should definitely check out my instructions on using leftover meats in my cottage cheese lasagna recipe!
Nutritional Information for This Classic Meatloaf Recipe
Now, I know some of you are tracking macros or just curious about what exactly is in this hearty dish. Since we’re using 80/20 ground beef and a simple glaze, this Classic Meatloaf Recipe actually comes out pretty balanced for a comfort food! Remember, these numbers are estimates. If you swap out the beef for turkey, or use different breadcrumbs, things will change, so take this as a general guideline, not gospel!
When portioned into six satisfying slices, here’s what you’re looking at for a single serving:
- Calories: About 380
- Protein: A whopping 32 grams! Perfect for staying full.
- Fat: Right around 19 grams total.
- Carbohydrates: About 20 grams, mostly coming from the breadcrumbs and the sugar in the glaze.
It’s a surprisingly great option for a high-protein meal. We kept the cholesterol decent too, at about 105mg per slice. This recipe proves that a satisfying Family Favorite Dinner doesn’t have to involve endless counting. Just enjoy the flavor, and know you’re getting a solid meal on the table for your Weeknight Meatloaf Idea!
Print
The Best Classic Juicy Meatloaf with Easy Glaze
- Total Time: 80 min
- Yield: 6 servings
- Diet: Low Fat
Description
Make a tender, juicy classic meatloaf perfect for a satisfying weeknight family dinner using this simple recipe and tangy ketchup glaze.
Ingredients
- 2 lbs ground beef (80/20 recommended)
- 1 cup dried breadcrumbs (or crushed crackers)
- 1 small yellow onion, finely chopped
- 1/2 cup milk
- 1 large egg, lightly beaten
- 2 cloves garlic, minced
- 1 teaspoon salt
- 1/2 teaspoon black pepper
- 1/4 cup ketchup (for the mix)
- 1/2 cup ketchup (for the glaze)
- 2 tablespoons brown sugar (for the glaze)
- 1 tablespoon apple cider vinegar (for the glaze)
Instructions
- Preheat your oven to 350 degrees Fahrenheit. Lightly grease a loaf pan or line a baking sheet with parchment paper.
- In a large bowl, combine the chopped onion, minced garlic, egg, milk, salt, pepper, and 1/4 cup of ketchup. Mix well.
- Add the ground beef and breadcrumbs to the bowl. Gently mix all ingredients together using your hands until just combined. Do not overmix, as this can make the meatloaf tough.
- Shape the mixture into a loaf shape and place it on the prepared baking sheet or in the loaf pan.
- In a small bowl, whisk together the 1/2 cup ketchup, brown sugar, and apple cider vinegar to create the glaze.
- Spread half of the glaze evenly over the top of the meatloaf.
- Bake for 45 minutes. Remove the meatloaf from the oven, spread the remaining glaze over the top, and return it to the oven.
- Bake for another 15 to 20 minutes, or until the internal temperature reaches 160 degrees Fahrenheit.
- Let the meatloaf rest for 10 minutes before slicing and serving.
Notes
- For an extra juicy texture, substitute half the ground beef with ground pork or veal.
- If you prefer a stovetop stuffing meatloaf, replace the breadcrumbs with 1 cup of prepared Stove Top stuffing mix.
- To make this a sheet pan meal, surround the meatloaf with chopped potatoes and carrots before baking.
- Prep Time: 15 min
- Cook Time: 65 min
- Category: Dinner
- Method: Baking
- Cuisine: American
Nutrition
- Serving Size: 1 slice
- Calories: 380
- Sugar: 14
- Sodium: 550
- Fat: 19
- Saturated Fat: 7
- Unsaturated Fat: 12
- Trans Fat: 0.5
- Carbohydrates: 20
- Fiber: 1
- Protein: 32
- Cholesterol: 105



Comments are closed.