
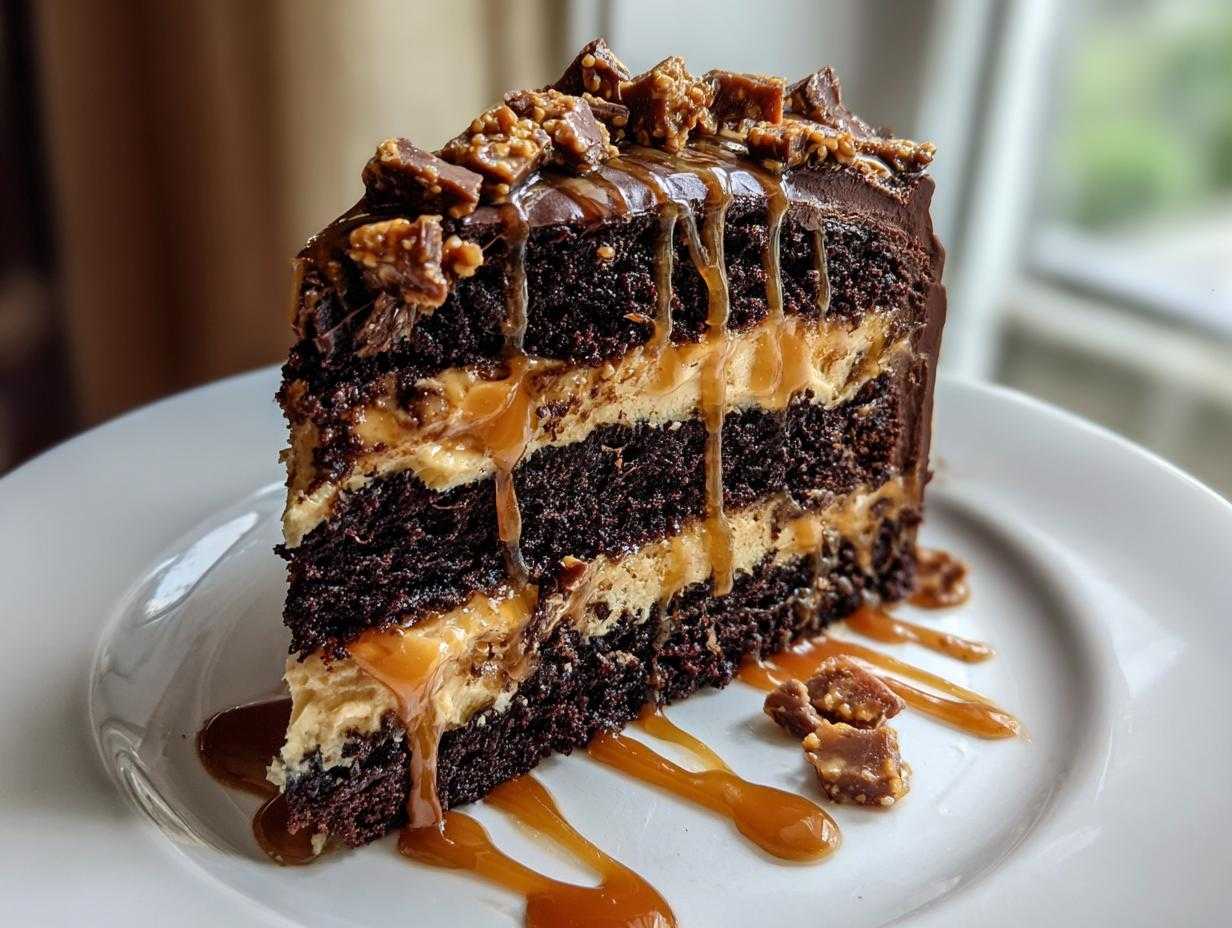
Oh, listen up, because I am about to share my absolute, over-the-top favorite dessert recipe: the chocolate caramel toffee crunch cake. This isn’t just any cake; this is the dessert you call when you need a serious moment of indulgence, or when you absolutely must impress everyone at the party. Forget those dry, sad chocolate cakes you’ve had! This recipe guarantees a showstopping, bakery-quality result right in your own kitchen.
What makes it magic? It’s the texture play, truly. You get this incredibly moist layers of dark chocolate cake, which just melts in your mouth, fighting for attention against thick, gooey salted caramel, and then—BAM!—you hit that satisfying, homemade toffee crunch. Honestly, this is the cake I make when I need serious indulgence. Trust me, once you try this combination, you’ll never look back.
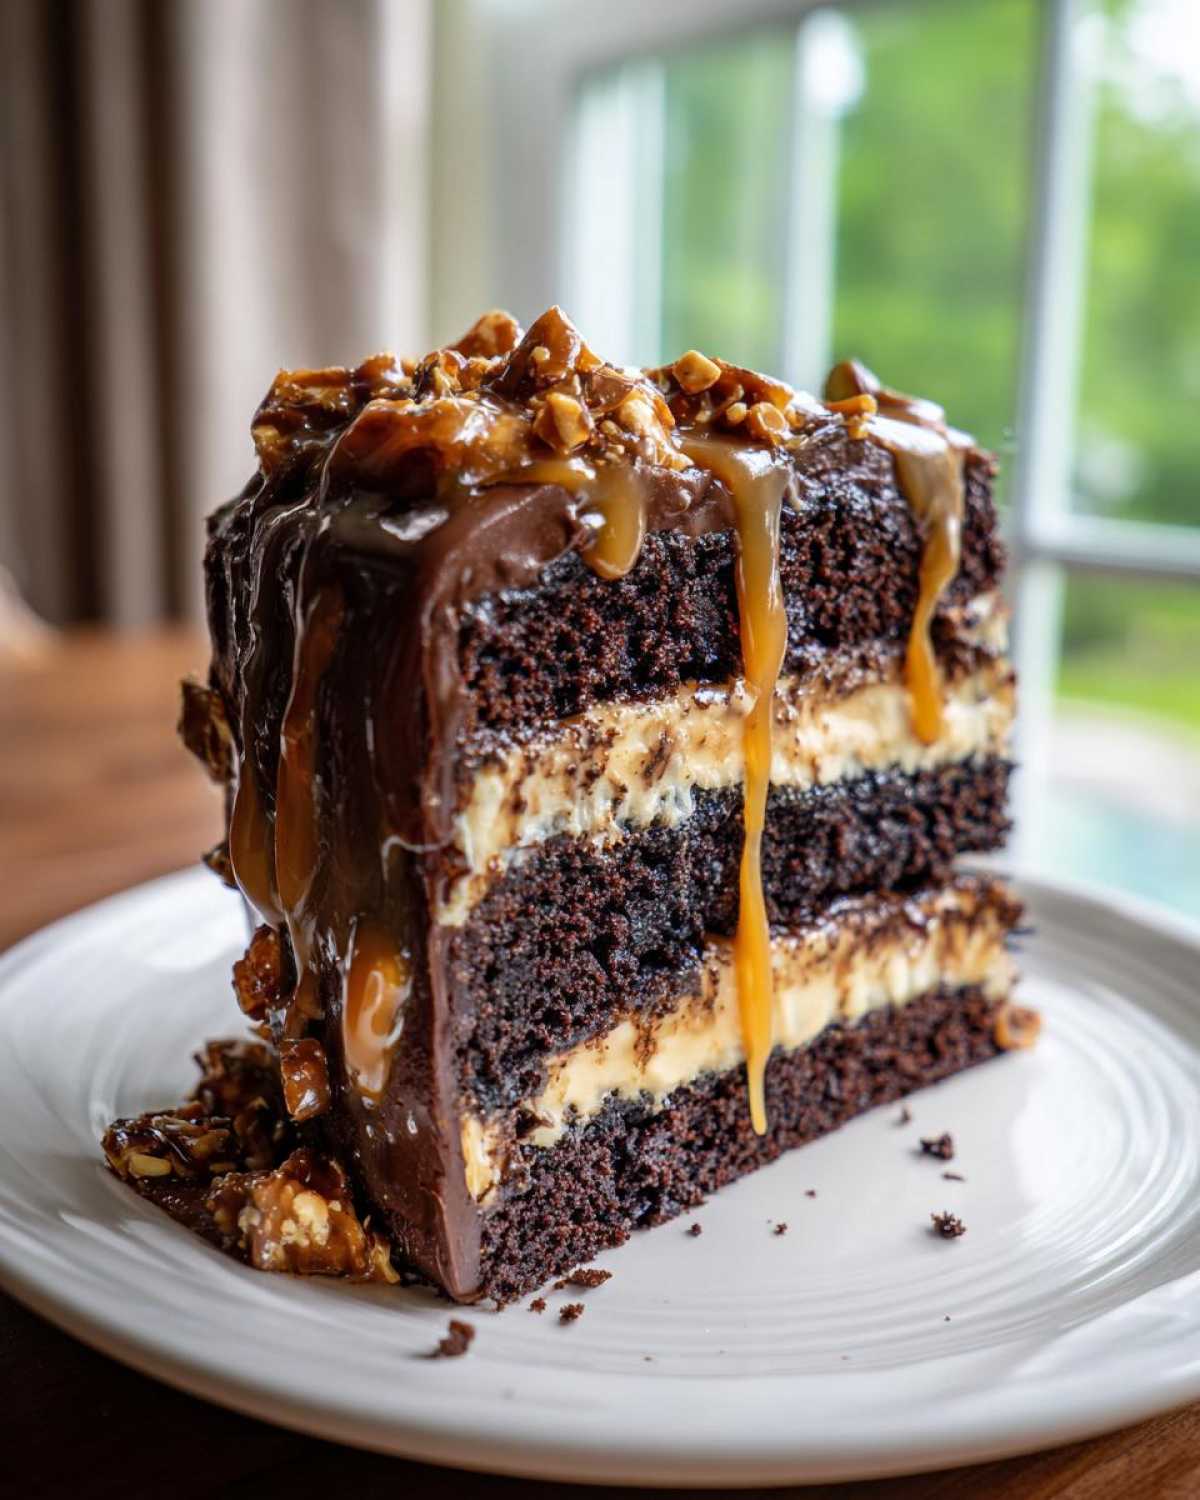
Why This Chocolate Caramel Toffee Crunch Cake Stands Out
If you’re looking for that ultimate dessert that screams celebration, stop scrolling. This is it! This cake isn’t trying to be humble—it’s rich, it’s layered, and frankly, it’s a masterpiece in texture contrast.
- It delivers that intense, bakery-style cake flavor without needing a commercial oven.
- The layering ensures every bite has moist chocolate, warm caramel, and a satisfying snap of toffee.
- We use hot coffee in the batter, which really deepens that decadent chocolate flavor—it’s my secret weapon for richness!
Essential Ingredients for Your Chocolate Caramel Toffee Crunch Cake
Gathering your supplies before you start baking is the first rule of an organized kitchen. For this showstopper, we have four main groups of ingredients, and trust me, don’t try to substitute the butter or the coffee in the cake—it’s worth tracking down the real deal!
If you’re looking for a great tutorial on mastering smooth frostings, you can check out my friend’s guide over at this link, but for this recipe, we stick strictly to caramel frosting!
For the Rich Chocolate Cake Layers
This is where the deep, dark chocolate flavor comes from. Notice the buttermilk and the hot coffee—they are essential for texture and flavor depth. Don’t worry; you won’t taste the coffee, it just wakes up the cocoa!
- 2 cups all-purpose flour
- 2 cups granulated sugar
- 3/4 cup unsweetened cocoa powder
- 2 teaspoons baking soda
- 1 teaspoon baking powder
- 1 teaspoon salt
- 1 cup buttermilk
- 1/2 cup vegetable oil
- 2 large eggs
- 1 teaspoon vanilla extract
- 1 cup hot brewed coffee
For the Homemade Toffee Crunch
This is the crunch that makes the chocolate caramel toffee crunch cake so irresistible. It’s simple candy making, and we’ll talk more about safety later!
- 1/2 cup unsalted butter
- 1 cup granulated sugar
- 1/2 cup chopped nuts (optional, but they add another layer of texture!)
For the Salted Caramel Frosting and Drizzle
We make a big batch of caramel, and we use most of it to flavor the frosting, saving the rest for that gorgeous, gooey drizzle on top. Make sure the caramel cools before mixing it into the butter!
- 1 cup (2 sticks) unsalted butter, softened
- 1 1/2 cups powdered sugar
- 1/2 cup heavy cream (for caramel)
- 1 cup granulated sugar (for caramel)
- 1/4 cup water (for caramel)
- 1/2 teaspoon salt (for caramel)
- 1/4 cup cooled caramel (to mix into the frosting)
Baking the Rich Chocolate Layer Cake
Okay, now we get to the good stuff—the actual cake! Don’t let the list of ingredients scare you; this cake comes together faster than you think, provided you follow the order. The goal here is deep chocolate flavor and a super tender crumb. We’re using some tricks that my best friend taught me when I was struggling with my earlier chocolate layer cake recipes.
The main thing to remember is that the final batter is going to look really thin once you add the coffee. I always panic a little, but trust me on this: thin batter yields the moistest cake when baked properly!
Mixing the Chocolate Caramel Toffee Crunch Cake Batter
First things first, make sure your oven is warming up to 350 degrees F (175 degrees C). Grab a big bowl and whisk together all your dry ingredients—the flour, sugar, cocoa, baking soda, powder, and salt. We want that cocoa powder totally broken up so we don’t get nasty little dry pockets later.
Next, dump in the buttermilk, oil, eggs, and vanilla. Turn your mixer on medium and go for a full two minutes until everything is just combined and looking smooth. Don’t overbeat here! The grand finale is pouring in that hot brewed coffee while mixing slowly. Just mix until it’s uniform. It will be watery, and that’s exactly what we want for this rich base.
Baking and Cooling for Perfect Layers
Grease up those two 9-inch cake pans—I like to use a little cake goop for insurance! Pour that thin batter right in, dividing it evenly between the two pans. Bake them at 350°F (175°C) for about 30 to 35 minutes. Seriously, watch them closely!
The moment a wooden pick comes out clean—pull them out immediately. Overbaking is the enemy of moisture! Let them sit in the pans for just 10 minutes to firm up slightly, and then flip them gently onto a wire rack to cool completely. If you cool them in the pan too long, they might stick, but if you rush them out, they often break! Ten minutes is the sweet spot.
Creating the Homemade Toffee Crunch and Gooey Caramel Drizzle
This is where we really earn the ‘crunch’ and ‘caramel’ in our chocolate caramel toffee crunch cake, folks! Getting these two components right is what takes the cake from ‘Really Good’ to ‘Did you buy this from a fancy bakery?’ Both parts involve cooking sugar, which can be a little intimidating, but I promise, if you’re careful and patient, you’ll nail it.
The key for both is resisting the urge to stir when the sugar is melting, and always having your other ingredients measured and ready to go—especially that heavy cream!
Making the Salted Caramel Drizzle
For the caramel, you need a heavy-bottomed saucepan. Combine the 1 cup of sugar, the water, the corn syrup, and the salt. Set it over medium heat. Give it a gentle stir just until that sugar dissolves completely. Once it starts bubbling actively, *stop stirring*! If you keep stirring, it can crystallize, and nobody wants sandy caramel.
Let it cook undisturbed until it hits a beautiful, deep amber color. It smells heavenly but watch it like a hawk near the end—it goes from perfect to burnt way too fast. Once you hit that color, pull it off the heat immediately. Now for the crucial safety step: carefully whisk in the heavy cream. I mean *carefully*! It will bubble up violently, spitting steam, so stand back and use a long whisk. Keep whisking until it’s smooth, and then set it aside to cool down. Don’t use it warm, or it’ll melt your frosting!
If you want more deep-dive tips on getting that perfect sauce, check out my guide on Gooey Caramel Drizzle.
Preparing the Crunchy Toffee Component
The toffee crunch is incredibly easy to make at home, and it tastes a million times better than anything store-bought. You’ll melt the remaining 1/2 cup of butter and one cup of sugar together in a clean saucepan over medium heat.
Again, you stir only until the sugar melts, and then you let it go until it hits that beautiful amber color again. Stir in those nuts, if you’re using them, right at the end for flavor distribution. Then, you have to work fast! Pour that hot liquid sugar mixture onto a baking sheet lined with parchment paper. Spread it out a little if you can. Let it cool completely—this might take an hour or so.
Once it’s totally hard, just grab a rolling pin or the back of a heavy spoon and smash it! You want small, irregular pieces for the best texture contrast against the moist cake. Store these crispy bits somewhere dry until assembly time. For more great tips on this component, see my deep dive on Homemade Toffee Crunch!
Whipping the Caramel Frosting for the Chocolate Caramel Toffee Crunch Cake
Okay, this frosting is what truly binds the entire chocolate caramel toffee crunch cake together. We aren’t doing a heavy cream frosting here; we are making something sturdy enough to hold up our layers but light enough that it doesn’t weigh down that delicate chocolate crumb. We’re using the classic American buttercream method, but giving it a huge flavor boost from our homemade salted caramel.
First things first: make sure that caramel sauce you made is completely cool. I mean room temperature—if it’s still warm, it will melt all your butter, and you’ll end up with sweet soup instead of frosting. If you need a refresher on getting super fluffy textures that don’t fall flat, I wrote a post about my secrets for fluffy baking that applies here too!
Start by creaming your 1 cup (2 sticks) of softened unsalted butter in your mixer bowl until it’s really creamy and pale—it should look almost whipped on its own. Gradually, and I mean *gradually* while the mixer is on low, start adding in that 1 1/2 cups of powdered sugar. You don’t want a sugar cloud explosion in your kitchen, so keep the speed low initially.
Once the sugar is incorporated and it looks thick, it’s time for the magic touch: the caramel! Add about 1/4 cup of your cooled salted caramel sauce. Now, turn that mixer up to medium-high. You need to beat this for several minutes. You’re looking for the frosting to transform. It should become noticeably lighter in color—almost beige—and significantly fluffier. That’s the air incorporating, making it light, rich, and perfectly spreadable!
If your frosting seems too stiff after adding the caramel, just add a tiny splash of milk or a pat more butter. If it’s too loose (which means your caramel wasn’t cool enough, oops!), add a tablespoon more powdered sugar just to stabilize it. We want a consistency that holds its shape but yields beautifully when you spread it on the cake layers.
Assembling Your Showstopping Birthday Cake
This is the moment everything comes together! We have perfectly moist cake, silky caramel frosting, gooey drizzle, and those addictively crunchy toffee pieces. If you’ve already made a quick pit stop to check out my guide on Showstopping Birthday Cake techniques, you’ll know the key here is building texture in thoughtful layers.
Make sure your cake layers are completely cool before you even think about frosting them. Warm cake equals melted, sliding frosting, and we absolutely cannot have that disaster on our hands when building this incredible chocolate caramel toffee crunch cake.
Start by placing your first cake layer—make sure it’s flat, maybe trim the dome off if you need to—onto your serving plate or cake stand. Now, take about one-third of your caramel frosting and spread it evenly over the top surface. You want a nice, generous layer here to act as the glue for the next component.
Next comes the caramel drizzle! Take about half of your *cooled* caramel sauce and drizzle it liberally over that layer of frosting. Don’t be shy! Then, grab a handful of those gorgeous, broken toffee crunch pieces and scatter them right over the caramel. This is where the texture really starts to build up!
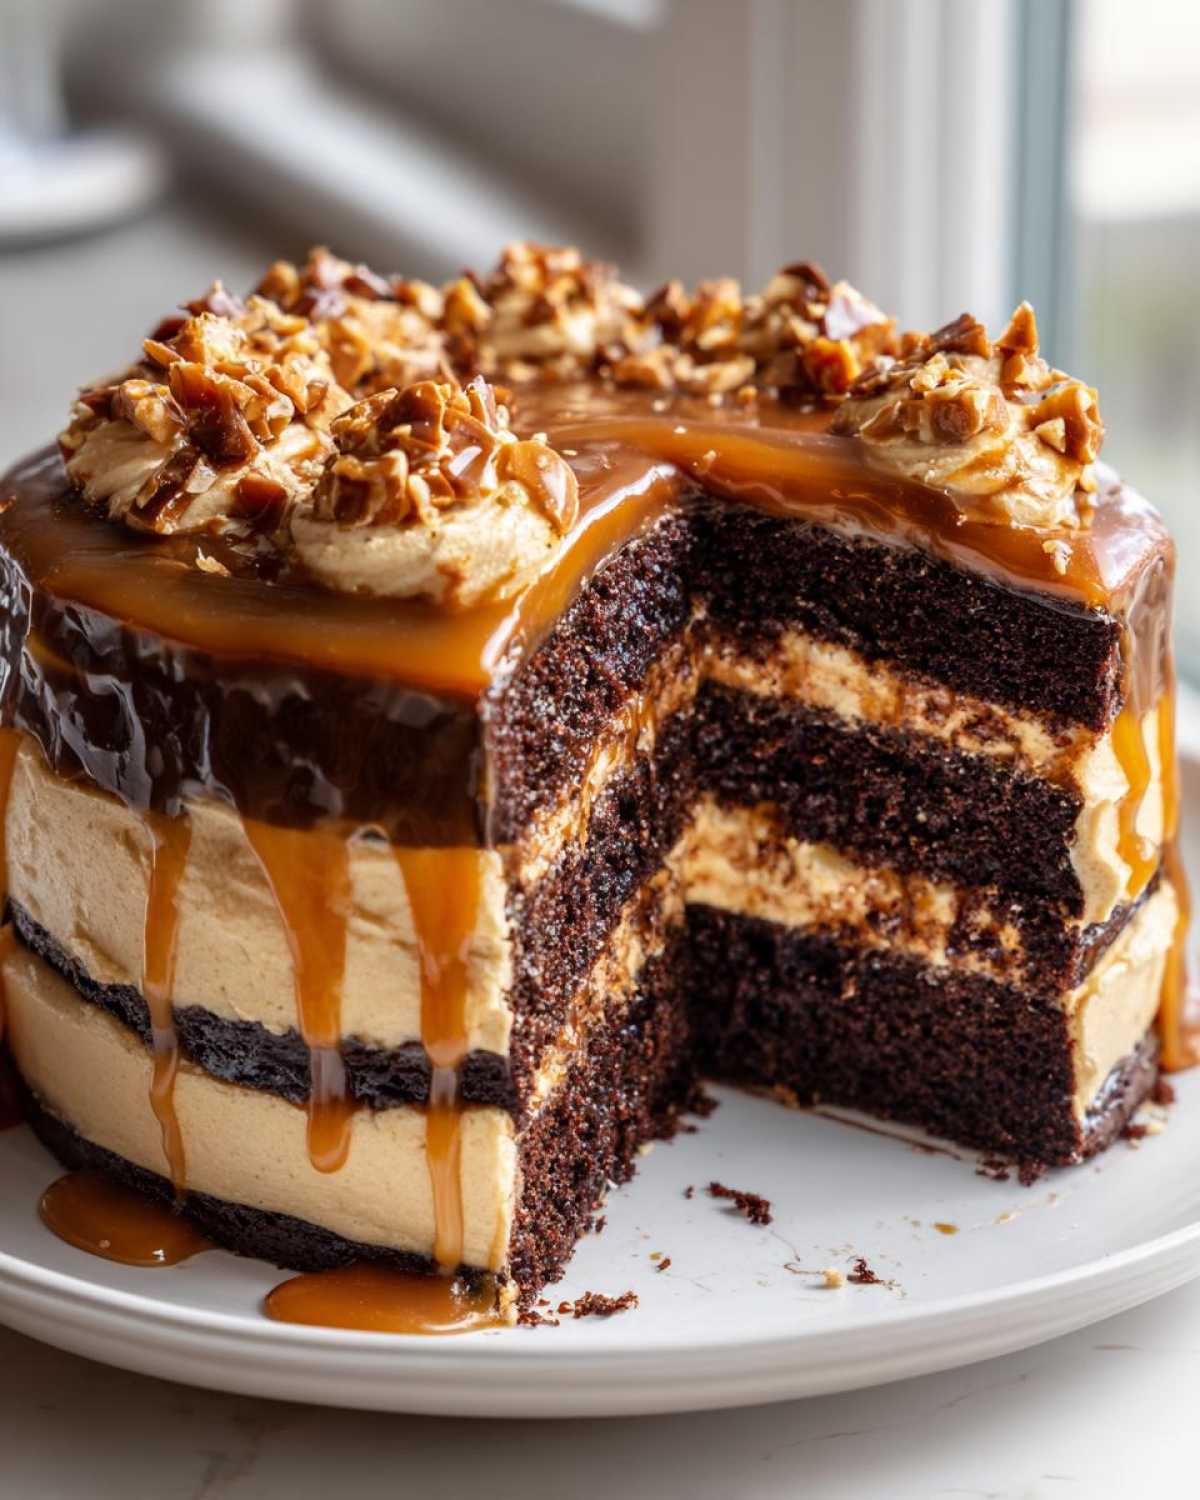
Gently place your second cake layer right on top. Now, take the rest of that buttery caramel frosting and cover the top and sides of the entire cake. I like to do a thin crumb coat first, chill it for about 15 minutes, and then add a final, thicker coat for a really professional look. Smooth it out with an offset spatula for that classic bakery finish.
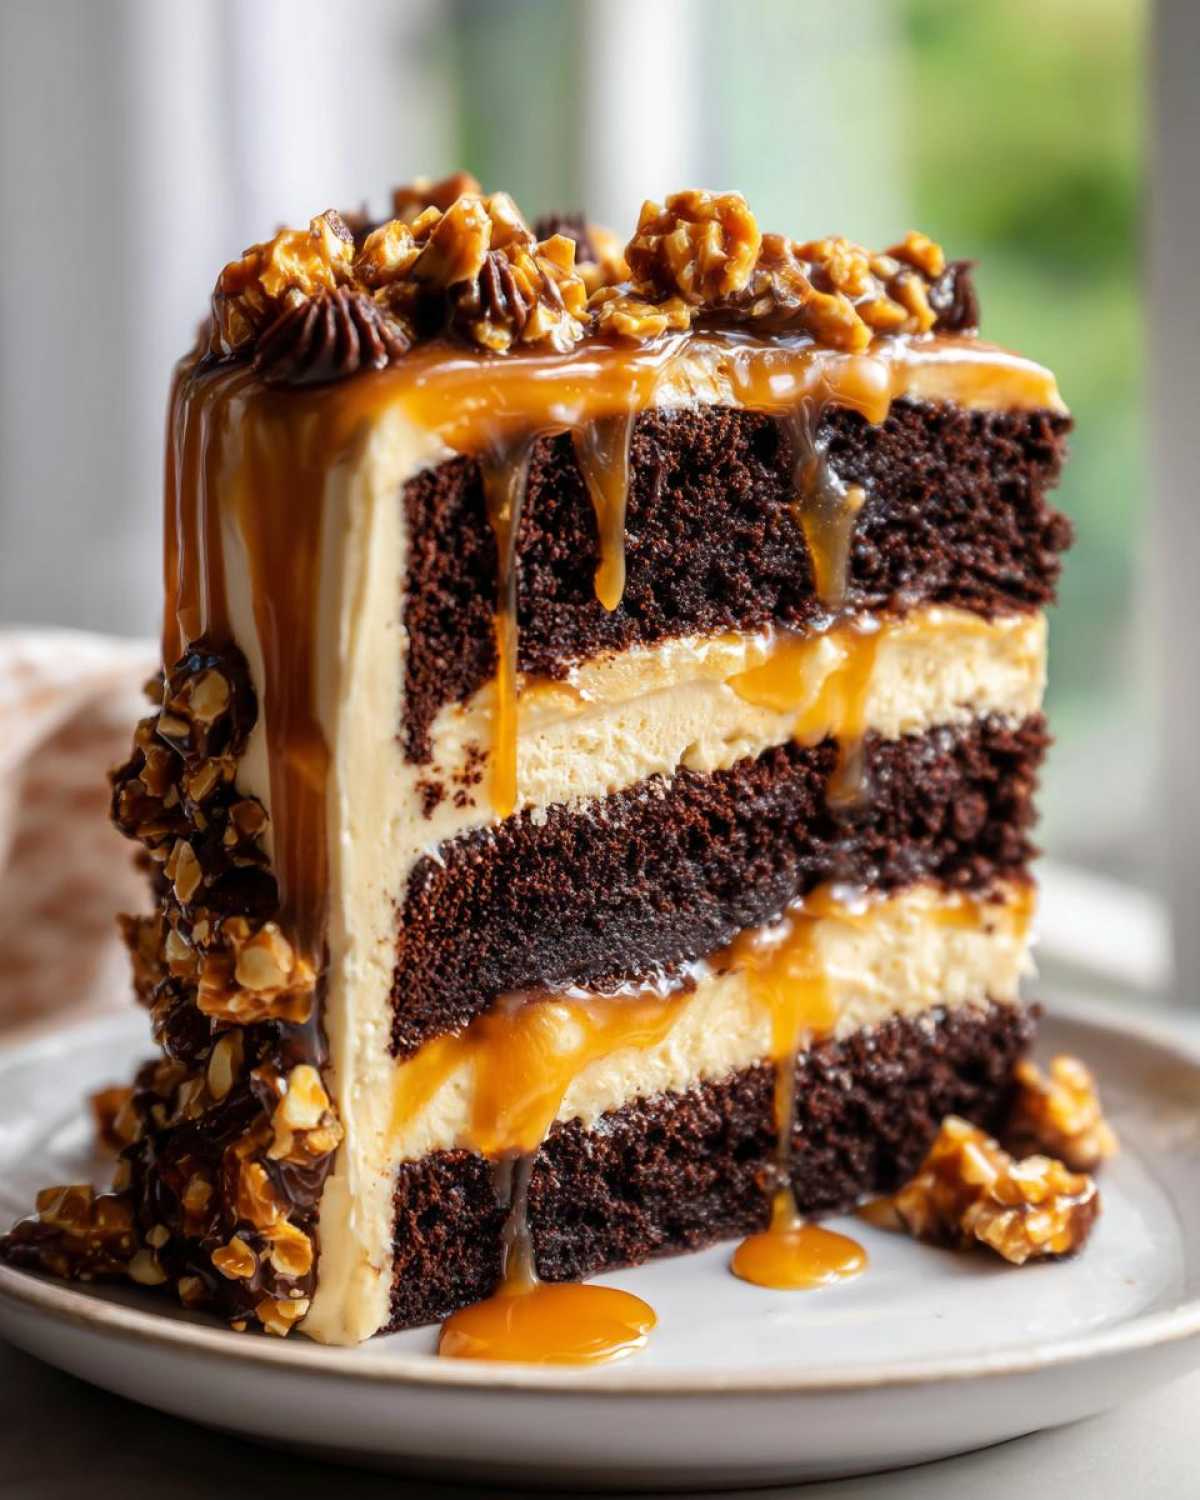
For the grand finale, right before serving—or maybe just before you chill it—drizzle the remaining glorious caramel right over the top edge so it drips down the sides artfully. Finish by sprinkling the rest of your hard-earned toffee crunch pieces right over the top center. It looks dramatic and tastes even better.
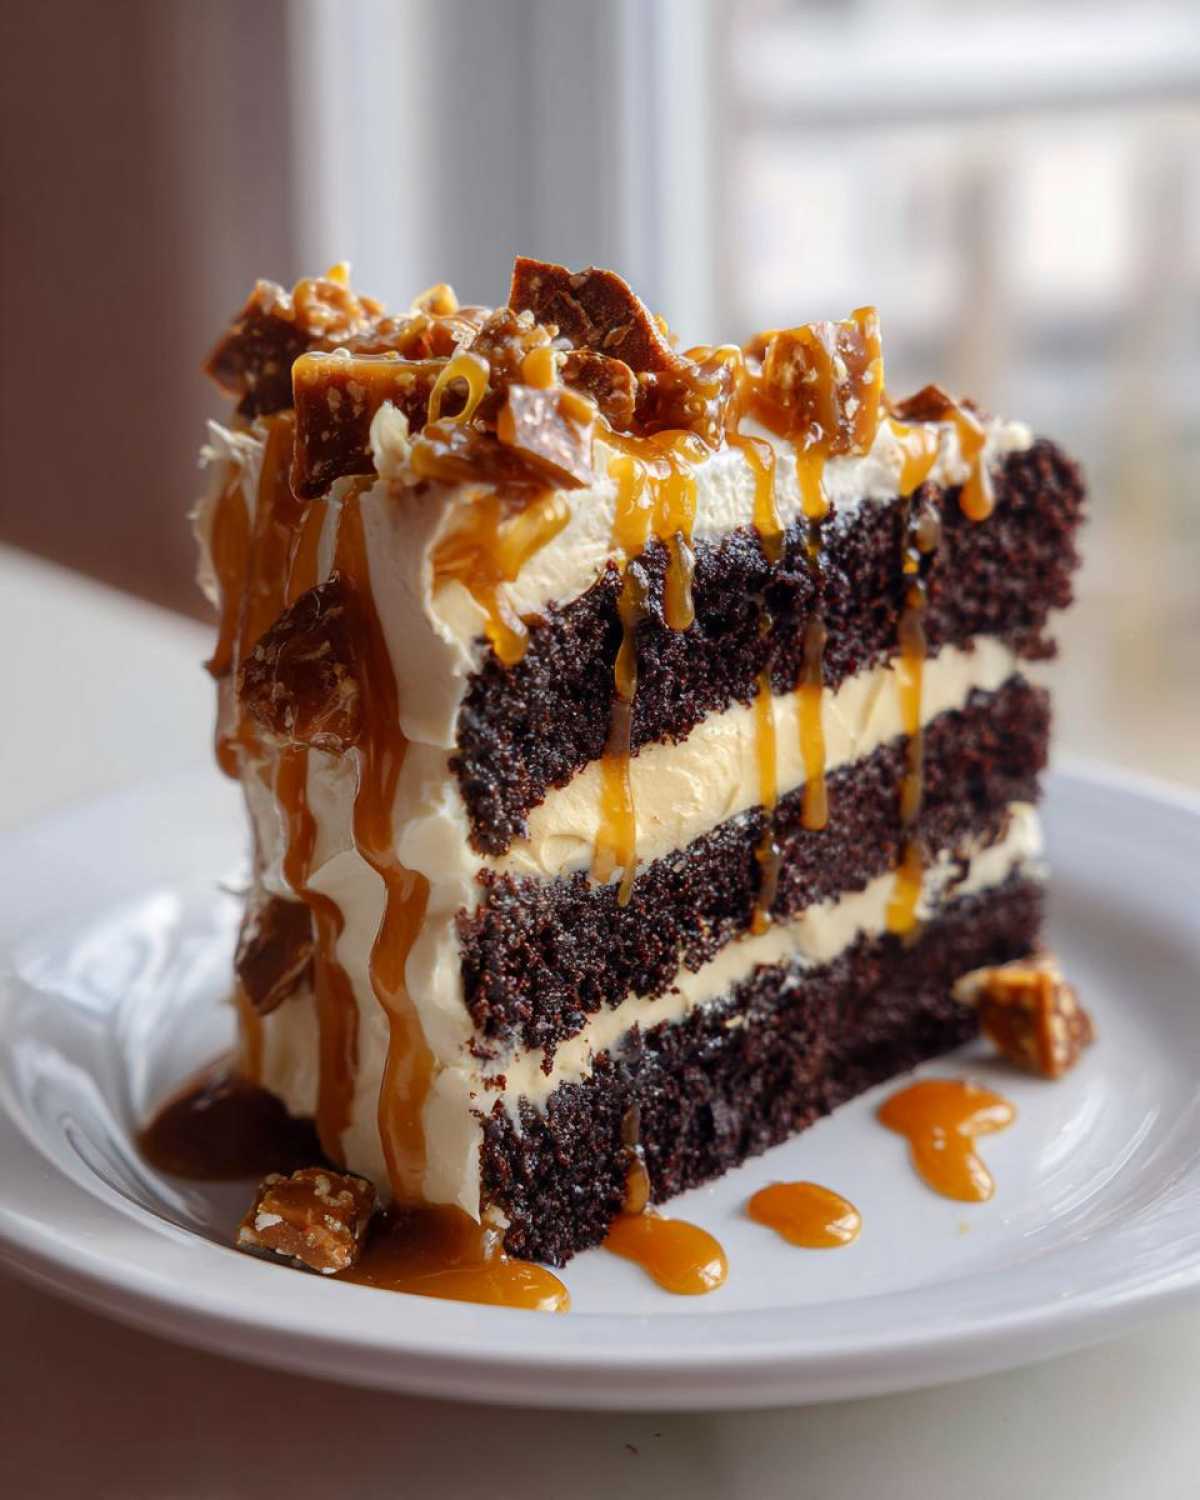
Remember that little tip in the notes? Pop this masterpiece into the fridge for about 30 minutes before slicing. It helps the frosting set up just enough so when you cut into those rich chocolate layers, everything stays perfectly stacked. Enjoy the applause; you earned it!
Tips for the Ultimate Chocolate Indulgence
Look, I know sometimes life gets hectic, and you need a shortcut. That’s totally fine! Making something this decadent should never feel like a punishment, even if you want that professional, bakery style cakes at home look. We’ve built this chocolate caramel toffee crunch cake up using scratch components, but there are a few easy swaps you can make without completely sacrificing the dream!
My biggest piece of advice when aiming for that high-end finish is to focus on presentation and temperature control. That’s what separates a homemade cake from something that looks like it came from a fancy pastry case!
Ingredient Swaps for the Chocolate Caramel Toffee Crunch Cake
If you look at the caramel instructions and feel your blood pressure rising, I get it! Cooking sugar to amber is stressful. My main suggestion for making this easier is to swap out the homemade salted caramel drizzle for a truly high-quality store-bought salted caramel sauce. You can find some amazing ones these days. Just make sure it’s thick enough that it doesn’t just run right off when you drizzle it.
If you use store-bought caramel for the drizzle, you can still use it to flavor the frosting, just make sure you have about 1/2 cup total. The homemade toffee crunch, however—please don’t skip that! It’s so quick, and the textural difference between homemade toffee and, say, crushed butterscotch chips is huge. That satisfying snap is what balances the richness of the chocolate and caramel.
Also, while I love using buttermilk, if you don’t have any on hand, you can make a quick substitute! Just measure out one cup of regular milk and stir in one tablespoon of white vinegar or lemon juice. Let it sit on the counter for five minutes until it curdles slightly. That acidic liquid works just as well for tenderizing the chocolate cake!
Tips for Perfect Slicing and Serving
This is the most important secret for presentation, especially when you have sticky, gooey elements like caramel mixed with crunchy elements like toffee. If you try to cut this cake straight out of the fridge, the buttercream will shatter, and the caramel will drag chunks of cake apart.
Conversely, if it’s too warm, everything oozes out onto the plate before your guests can even get their forks in. The solution is that final chill I mentioned earlier, but let’s elaborate! Once the cake is fully assembled, put it in the refrigerator for a solid 30 minutes. This lets the frosting firm up a bit and the internal caramel settle, especially in the toffee crunch layer.
When you are ready to serve, pull it out of the fridge, let it sit on the counter for maybe 15 minutes—just long enough so the frosting softens slightly—then take a long, sharp knife and clean the blade between every single slice using a **hot, damp cloth**. Wiping the knife ensures you get those beautiful, clean layers of the chocolate caramel toffee crunch cake every time. It makes such a difference!
Frequently Asked Questions About This Cake
I always get questions when I post pictures of this massive cake on social media, so I figured I’d answer the most common ones right here! It’s such an undeniably rich dessert, people often wonder about the logistics of pulling off a huge bake like this chocolate caramel toffee crunch cake.
Can I make the components of the chocolate caramel toffee crunch cake ahead of time?
Absolutely! This is my favorite strategy for keeping stress low before a big party. The cake layers freeze beautifully. Once they are completely cooled, wrap each layer tightly in plastic wrap, then foil. They’re good for up to two months, and you can frost them straight from the freezer—just let them sit on the counter for an hour first.
The homemade toffee crunch? That needs to be stored in an airtight container at room temperature. It’s basically hard candy, so humidity is the enemy! You can make that up to a week in advance. The caramel sauce also lasts forever, though you should use it within 10 days for the freshest flavor. The only thing you *must* do just before assembly is make that caramel frosting, since butter doesn’t love sitting around for days.
How should I store leftovers of this rich chocolate layer cake?
Storing this kind of cake is all about balancing the frosting versus the layers themselves. Because we have a buttercream frosting that uses actual butter, if your kitchen is very warm, you should probably cover the leftover slices and stick them in the fridge. Moisture is kept in well by that frosting, so it generally keeps well for about three days in the refrigerator.
If you are planning to store leftovers for more than 24 hours, I always recommend covering the whole cake loosely with plastic wrap once it’s chilled. This stops the cake layers from drying out in the fridge air, which we absolutely can’t have with such a lovely rich chocolate layer cake! When you want to eat a slice later, let it sit on the counter for 20 minutes before serving to let the frosting soften back up a bit.
Nutritional Estimates for Your Indulgent Dessert Ideas
Now, let’s talk numbers—though I always say you shouldn’t look at this part if you plan on eating the whole thing in one sitting! Any time you’re tackling an ultimate chocolate indulgence like this, you know it’s a treat, not an everyday snack. These estimates are based on dividing the entire recipe into 12 generous slices, just like the yield suggests.
These figures are estimates based on the ingredients listed above, and remember, baking is science, but eating is personal enjoyment! If you substitute light sour cream for buttermilk or use different sugar substitutes, the numbers will change, naturally. But for the straightforward, decadent version, here’s what you’re dealing with per slice:
- Serving Size: 1 slice
- Calories: Approximately 550
- Fat: Around 30g (That’s where the butter and oil do their work!)
- Carbohydrates: About 70g (Hello, sugar and flour!)
- Protein: Roughly 6g
- Sugar: About 75g (This is a very sweet cake, as expected!)
- Sodium: Near 350mg
It’s certainly a showstopper in flavor, and yes, it shows up in the estimates too! That’s why we save this marvelous chocolate caramel toffee crunch cake for parties and special occasions. It’s worth every single, glorious calorie when you take that first bite combining the moist chocolate, the salted caramel, and that fantastic crunch!
Print
Chocolate Caramel Toffee Crunch Cake
- Total Time: 90 min
- Yield: 12 servings
- Diet: Vegetarian
Description
A rich, moist chocolate layer cake filled and topped with homemade salted caramel and a crunchy toffee topping.
Ingredients
- 2 cups all-purpose flour
- 2 cups granulated sugar
- 3/4 cup unsweetened cocoa powder
- 2 teaspoons baking soda
- 1 teaspoon baking powder
- 1 teaspoon salt
- 1 cup buttermilk
- 1/2 cup vegetable oil
- 2 large eggs
- 1 teaspoon vanilla extract
- 1 cup hot brewed coffee
- 1 cup (2 sticks) unsalted butter, softened
- 1 1/2 cups powdered sugar
- 1/2 cup heavy cream (for caramel)
- 1 cup granulated sugar (for caramel)
- 1/2 cup light corn syrup (for caramel)
- 1/4 cup water (for caramel)
- 1/2 teaspoon salt (for caramel)
- 1/2 cup chopped nuts (optional, for crunch layer)
Instructions
- Preheat your oven to 350 degrees F (175 degrees C). Grease and flour two 9-inch round cake pans.
- In a large bowl, whisk together the flour, sugar, cocoa powder, baking soda, baking powder, and salt for the cake.
- Add the buttermilk, oil, eggs, and vanilla extract to the dry ingredients. Beat with an electric mixer on medium speed for two minutes.
- Carefully stir in the hot coffee until the batter is smooth. The batter will be thin.
- Pour the batter evenly into the prepared pans. Bake for 30 to 35 minutes, or until a wooden pick inserted into the center comes out clean. Let the cakes cool in the pans for 10 minutes before inverting them onto a wire rack to cool completely.
- Prepare the caramel: Combine the 1 cup sugar, corn syrup, water, and salt in a heavy saucepan over medium heat. Stir until the sugar dissolves. Stop stirring and cook until the mixture turns a deep amber color, about 8 to 10 minutes.
- Remove from heat and carefully whisk in the heavy cream (it will bubble vigorously). Stir until smooth. Let the caramel cool slightly.
- Prepare the toffee crunch: Melt 1/2 cup of the butter with 1 cup of sugar in a saucepan over medium heat. Stir until the sugar dissolves, then stop stirring. Cook until the mixture reaches a deep amber color. Stir in the chopped nuts, if using. Pour the mixture onto a parchment-lined baking sheet and let it cool completely until hard. Break the hardened candy into small, irregular pieces.
- Make the frosting: Beat the remaining 1/2 cup softened butter until creamy. Gradually add the powdered sugar, beating until smooth. Add 1/4 cup of the cooled caramel and beat until light and fluffy.
- Assemble the cake: Place one cooled cake layer on a serving plate. Spread a layer of caramel frosting over the top. Drizzle generously with more cooled caramel. Top with a layer of the broken toffee crunch pieces.
- Place the second cake layer on top. Frost the top and sides of the entire cake with the remaining caramel frosting. Drizzle the top with the remaining caramel and sprinkle with extra toffee crunch.
Notes
- For the moistest cake, do not overbake. Check for doneness early.
- You can substitute store-bought caramel sauce for the homemade version if you are short on time, but homemade tastes better.
- Chill the cake for 30 minutes before slicing to help the layers and toppings set.
- Prep Time: 45 min
- Cook Time: 45 min
- Category: Dessert
- Method: Baking
- Cuisine: American
Nutrition
- Serving Size: 1 slice
- Calories: 550
- Sugar: 75
- Sodium: 350
- Fat: 30
- Saturated Fat: 18
- Unsaturated Fat: 12
- Trans Fat: 0
- Carbohydrates: 70
- Fiber: 3
- Protein: 6
- Cholesterol: 95


Comments are closed.