

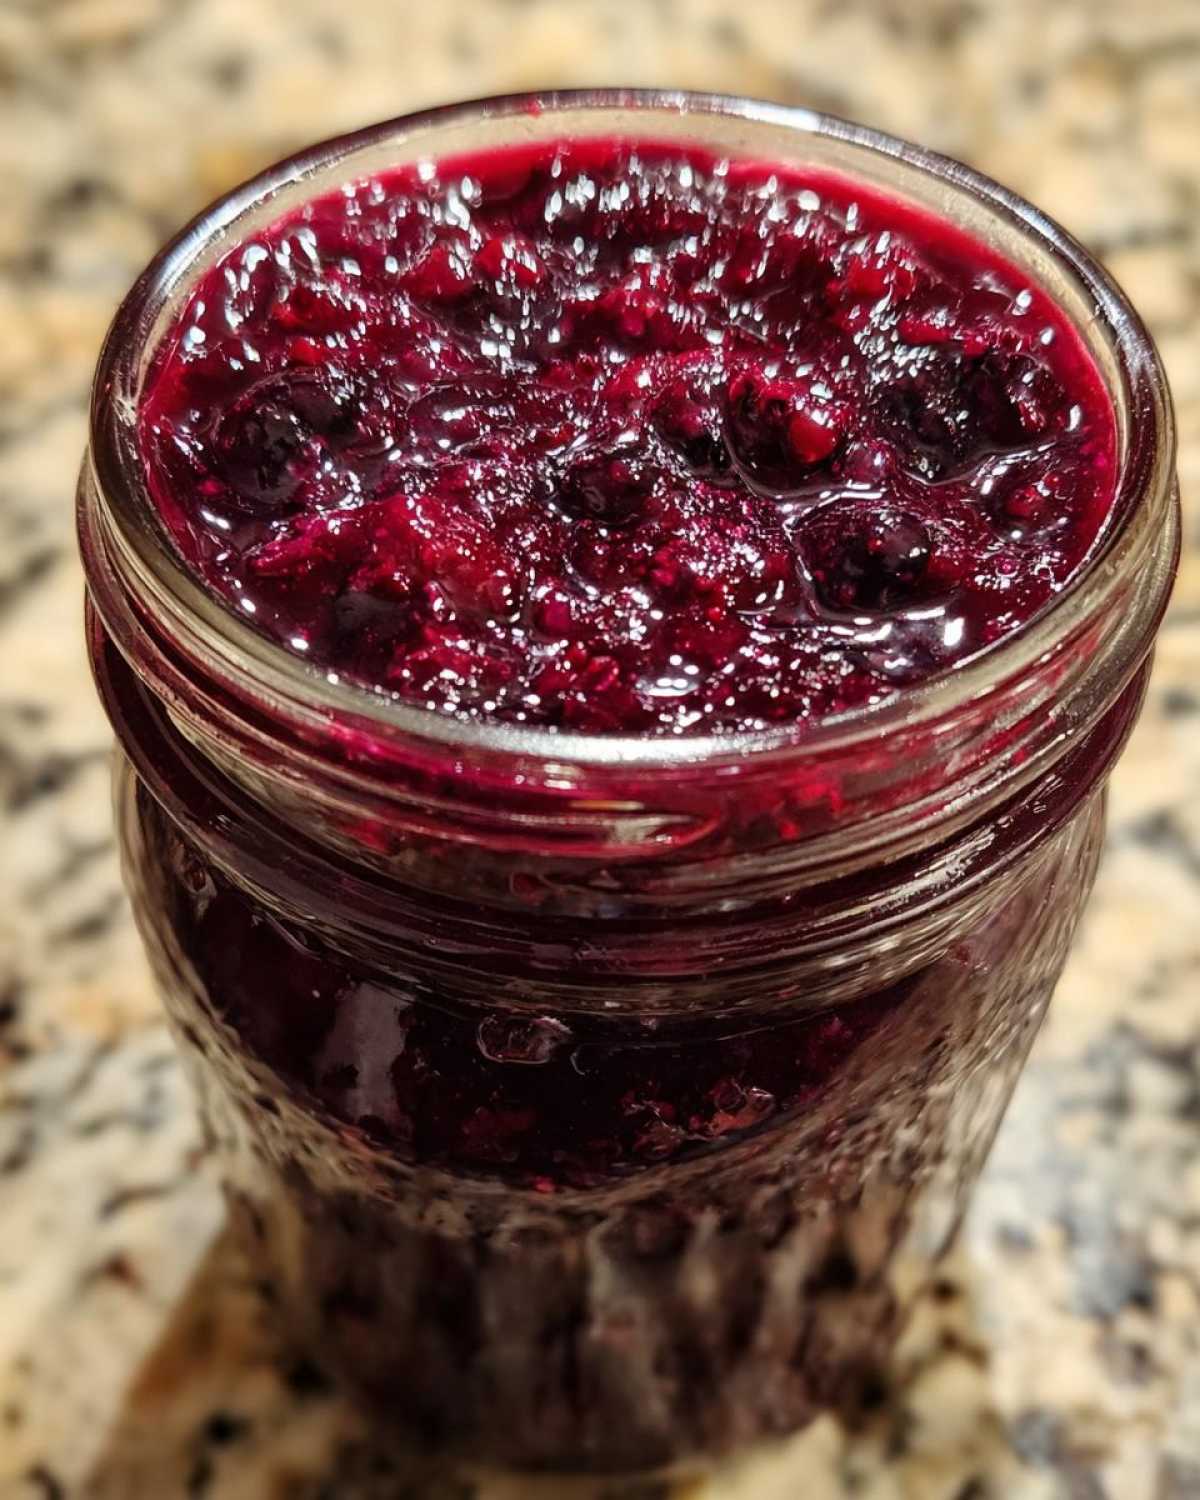
There’s just something truly special about a jar of homemade blueberry jam. It’s a little taste of summer sunshine, bottled up and ready to brighten any morning. For me, making jam at home is a lot like those early days watching my uncle in his Texas kitchen. It’s about taking simple ingredients and creating something truly wonderful, something that brings people together.
This recipe for homemade blueberry jam is one of my absolute favorites. It’s incredibly easy to make, even if you’ve never tried canning before. The satisfaction you get from stirring that bubbling pot and watching the berries transform is just amazing. And the smell? Oh, the smell is incredible!
Forget those store-bought versions with all the extra stuff you can’t pronounce. This simple homemade blueberry jam uses just three ingredients, letting the natural sweetness and flavor of the blueberries really shine through. It’s perfect on toast, stirred into yogurt, or even as a filling for pastries. It’s a little jar of happiness, ready for whatever you dream up.
Sharing delicious food is what Forkful Heaven is all about. This blueberry jam recipe is a perfect example of that. It’s a taste of my kitchen, shared with you, hoping it brings as much joy to your table as it does to mine.
Why You’ll Love This Homemade Blueberry Jam
So, why should you dive into making this blueberry jam? Well, let me tell you, there are so many reasons this recipe is a winner in my book.
- It uses just a few simple things you probably already have.
- The steps are really easy to follow, even for beginners.
- You get this beautiful, bright blueberry flavor that tastes like real fruit.
- You can put it on everything – toast, pancakes, ice cream, you name it!
- No weird additives or preservatives here, just pure goodness.
- And the smell while it’s cooking? Absolutely heavenly!
It’s a little bit of kitchen magic, I promise.
Essential Ingredients for Homemade Blueberry Jam
Alright, let’s talk about what you’ll need to make this lovely homemade blueberry jam. It’s a short and sweet list, just the way I like it!
- 4 cups fresh or frozen blueberries: These are the stars of the show! You can use either, which is great. Fresh berries give you that vibrant pop, but frozen ones work just as well and are often easier to find year-round. Just make sure they are washed if fresh.
- 2 cups granulated sugar: This isn’t just for sweetness; it helps the jam set and preserves it. Granulated sugar is my go-to for jam making.
- 2 tablespoons fresh or bottled lemon juice: Don’t skip the lemon juice! It adds a little brightness to the flavor and, more importantly, the acidity helps the jam thicken properly. Either fresh-squeezed or good quality bottled works fine.
See? Simple, right? With these three things, you’re well on your way to a batch of delicious homemade blueberry jam.
Equipment Needed for Your Homemade Blueberry Jam
Before you start cooking, let’s gather up the tools you’ll need. Having everything ready makes the process go so much smoother!
- A large pot or Dutch oven for cooking the jam.
- Measuring cups and spoons to get those ingredient amounts just right.
- A good stirring spoon, something sturdy.
- A ladle for scooping the hot jam into jars.
- Sterilized jars with lids and rings.
- A canning funnel (super helpful for filling jars neatly).
- A boiling water canner or a large pot with a rack that fits inside (if you plan to can your jam).
That’s it! Just the basics to get you started on your jam-making adventure.
Step-by-Step Guide: How to Make Homemade Blueberry Jam
Ready to turn those lovely berries into glorious homemade blueberry jam? Let’s get cooking! Follow these steps, and you’ll have jars of deliciousness in no time.
- Prepare Your Blueberries:
- Start by washing your fresh blueberries really well. Pick through them and pull off any little stems or bits that don’t belong. If you’re using frozen blueberries, you don’t need to thaw them first; they’ll be just fine going straight into the pot.
- Combine Ingredients:
- Grab your big pot or Dutch oven. Toss in the prepared blueberries, the granulated sugar, and the lemon juice.
- Start Cooking:
- Put the pot over medium heat. Stir everything together. Keep stirring gently until you see the sugar has completely dissolved into the berries and their juices.
- Bring to a Boil:
- Turn the heat up a bit and bring the mixture to a rolling boil. Make sure you watch it carefully so it doesn’t boil over!
- Simmer and Thicken:
- Once it’s boiling, reduce the heat to a gentle simmer. You’ll see little bubbles. Let it simmer, stirring every now and then, for about 20 to 30 minutes. This is where the magic happens and the jam starts to thicken.
- Test for Thickness:
- How do you know it’s ready? I like to use the cold plate test. Put a small plate in the freezer for a few minutes before you start cooking. When you think the jam is getting thick, spoon a tiny bit onto the cold plate. Let it sit for a minute. If it sets up and doesn’t run all over when you tilt the plate, it’s ready! If it’s still too runny, keep simmering and test again in a few minutes.
- Skim Off Foam:
- As the jam cooks, you might see some foam rise to the top. Just use a spoon to gently skim that off and discard it.
- Fill the Jars:
- Carefully ladle the hot jam into your sterilized jars. Use a canning funnel if you have one; it makes it much easier and less messy. Leave about a quarter inch of space at the top of each jar. This is called headspace, and it’s important for sealing.
- Wipe Rims and Seal:
- Wipe the rims of your jars clean with a damp cloth. Any jam on the rim can prevent a good seal. Place the lids on top and then screw on the rings just until they are fingertip tight.
- Process the Jars (for Shelf Stability):
- If you want your jam to be shelf-stable, you’ll need to process the jars. Place the filled jars in a boiling water canner or large pot with a rack. Make sure there’s enough hot water to cover the jars by at least an inch. Bring the water to a rolling boil and process the jars for 10 minutes. Adjust the time if you live at a higher altitude.
- Cool and Check Seals:
- Carefully take the jars out of the hot water bath and set them on a wire rack to cool completely. You’ll hear a “pop” sound as the lids seal. Once they are cool, check the seals by pressing down on the center of the lid. If it doesn’t flex or pop back up, it’s sealed!
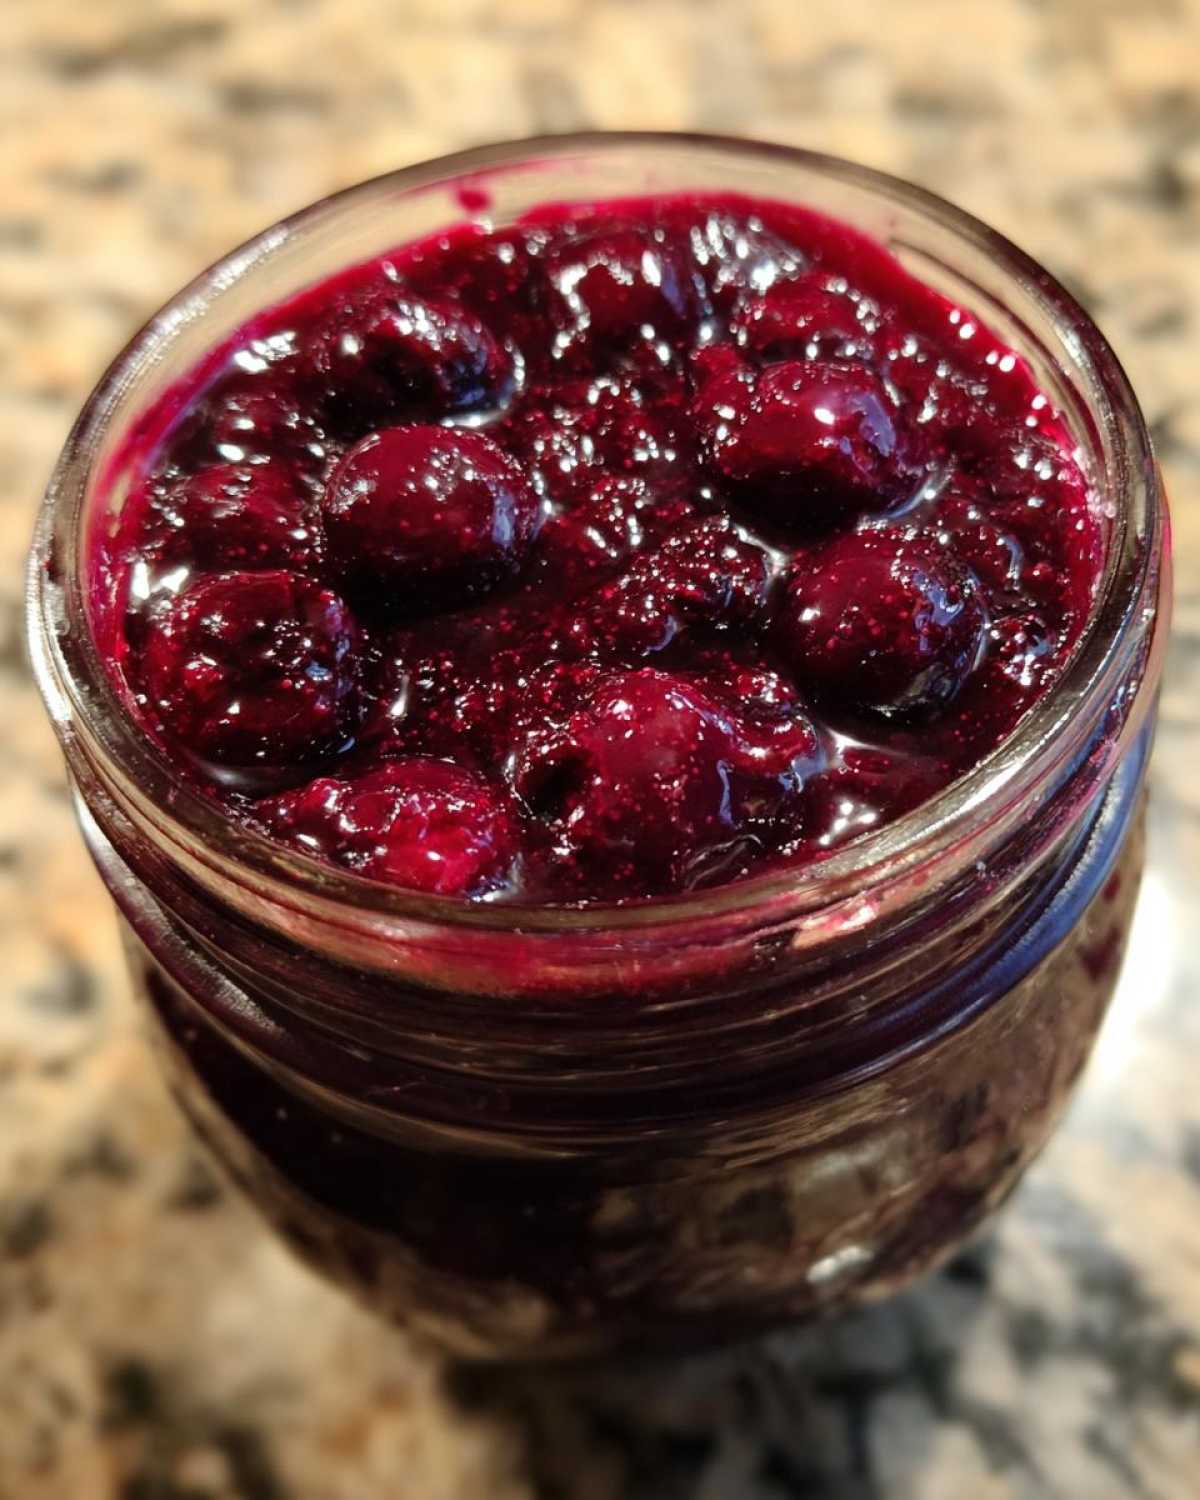
Preparing Your Blueberries for Homemade Blueberry Jam
Getting your berries ready is the very first step in making fantastic homemade blueberry jam. If you’re using fresh ones, give them a good rinse under cool water. Take a moment to look them over and pull off any little stems or leaves that are still attached. For frozen blueberries, there’s no need to wait for them to thaw; you can add them straight from the freezer into your pot. Easy peasy!
Cooking the Perfect Homemade Blueberry Jam Consistency
The simmering stage is key to getting that perfect texture for your homemade blueberry jam. Keep the heat gentle, just enough for a steady simmer. Stirring regularly is important to prevent sticking and burning, especially towards the end. Watch for the jam to visibly thicken and coat the back of your spoon. The cold plate test I mentioned earlier is your best friend here; it gives you a clear idea if it’s set enough. Patience really pays off during this part!
Canning and Sealing Your Homemade Blueberry Jam
Once your homemade blueberry jam is cooked, it’s time to get it into jars. Carefully filling the sterilized jars, leaving that little bit of headspace, is important. Make sure those jar rims are super clean before you put the lids on and screw the rings down snugly, but not too tight. The boiling water bath processing is what makes the jars seal properly, so follow the time for your altitude. Hearing those lids pop as they cool is so satisfying – it means you’ve got a good seal!

Tips for Success with Your Homemade Blueberry Jam
Making homemade blueberry jam is pretty straightforward, but a few little tips can make it even better. Don’t be afraid to play with the sugar amount a bit if you like your jam sweeter or less sweet. If you prefer a smoother jam without as many whole berries, you can mash some of them with a potato masher before you start cooking. For extra precision with the thickness, a candy thermometer can help; jam is usually ready around 220°F (104°C).
Always be careful when working with hot jam and jars! And when your jars are cooling, double-check that those lids have sealed properly; the center should be pulled down.
Variations for Your Homemade Blueberry Jam
One of the fun parts of making homemade blueberry jam is that you can totally make it your own! Want to mix things up? Try adding in some other berries, like a handful of raspberries or blackberries, for a delicious mixed berry jam. A pinch of warm spices like cinnamon or nutmeg can add a cozy twist. Or how about a splash of vanilla or almond extract right at the end of cooking? You could even experiment with different sweeteners like honey or maple syrup, just know the consistency might be a little different.
FAQs About Homemade Blueberry Jam
Got questions about making homemade blueberry jam? That’s totally normal! Here are some common ones I hear:
- Can I use frozen blueberries? Yes, absolutely! Frozen blueberries work just as well as fresh ones. You don’t even need to thaw them before adding them to the pot.
- How long does homemade blueberry jam last? If you process and seal your jars properly, unopened homemade blueberry jam can last for up to a year in a cool, dark place. Once you open a jar, keep it in the refrigerator, and it should be good for about 3 to 4 weeks.
- Why didn’t my jam set? There could be a few reasons. Make sure you used the right amount of sugar and lemon juice, as they help with setting. Also, make sure you simmered it long enough to reach the correct thickness. The cold plate test is really helpful for this!
- Do I have to can the jam? You don’t have to if you plan to use it right away or store it in the refrigerator. Canning in a boiling water bath is for making the jam shelf-stable so you can store it at room temperature for a long time. If you skip canning, just store the jam in clean jars in your fridge and use it within a few weeks.
Storing and Enjoying Your Homemade Blueberry Jam
Once your jars of homemade blueberry jam are cooled and sealed, you can store the unopened ones in a cool, dark spot like your pantry. They should stay good for up to a year! To check if a jar is sealed, the lid should be concave, curving slightly inwards, and it shouldn’t pop up when you press on it.
After you crack open a jar, be sure to keep it in the refrigerator. It will stay fresh and delicious in the fridge for about 3 to 4 weeks. Of course, you can enjoy this jam on your morning toast, but try it swirled into yogurt, spooned over pancakes or waffles, or even as a sweet filling for thumbprint cookies!
Estimated Nutritional Information
Just so you have an idea, here’s a peek at the estimated nutritional breakdown for this homemade blueberry jam, based on about a tablespoon serving:
- Calories: Around 50
- Sugar: About 12g
- Sodium: 0mg
- Fat: 0g
- Carbohydrates: Around 13g
- Fiber: About 1g
- Protein: 0g
Remember, these numbers are just estimates. They can change a bit depending on the exact ingredients you use and the brands you choose.
Share Your Homemade Blueberry Jam Creations
I would absolutely love to see how your homemade blueberry jam turns out! There’s nothing better than seeing what you create in your own kitchen. Please leave a comment below and tell me about your jam-making experience. Did you add any fun variations? Did you try it on something delicious?
If you snap a picture of your beautiful jars or a dish you made with your jam, please share it on social media! Tag me so I can see it. Happy cooking, and happy jamming!
Print
Shockingly Easy Homemade Blueberry Jam in 1 Pot
- Total Time: 40 minutes
- Yield: About 3-4 half-pint jars
Description
Learn how to make delicious homemade blueberry jam with this simple recipe. It’s perfect for spreading on toast, pastries, or adding to desserts.
Ingredients
- 4 cups fresh or frozen blueberries
- 2 cups granulated sugar
- 2 tablespoons lemon juice
Instructions
- Wash the blueberries and remove any stems.
- In a large pot or Dutch oven, combine the blueberries, sugar, and lemon juice.
- Stir the mixture over medium heat until the sugar dissolves.
- Bring the mixture to a boil, then reduce the heat and simmer, stirring occasionally, for 20-30 minutes, or until the jam thickens.
- To test for thickness, place a small dollop of jam on a cold plate. If it sets and doesn’t run, it is ready.
- Skim off any foam that rises to the surface.
- Carefully ladle the hot jam into sterilized jars, leaving about 1/4 inch of headspace.
- Wipe the rims of the jars clean and place lids and rings on tightly.
- Process the jars in a boiling water bath for 10 minutes (adjust time for altitude).
- Remove the jars from the water bath and let them cool completely on a wire rack. The lids should seal as they cool.
Notes
- You can adjust the amount of sugar to your preference.
- For a smoother jam, you can mash some of the blueberries before cooking.
- Store unopened jars of jam in a cool, dark place for up to a year.
- Once opened, store the jam in the refrigerator for up to 3-4 weeks.
- Prep Time: 10 minutes
- Cook Time: 30 minutes
- Category: Preserves
- Method: Boiling
- Cuisine: American
Nutrition
- Serving Size: 1 tablespoon
- Calories: 50
- Sugar: 12g
- Sodium: 0mg
- Fat: 0g
- Saturated Fat: 0g
- Unsaturated Fat: 0g
- Trans Fat: 0g
- Carbohydrates: 13g
- Fiber: 1g
- Protein: 0g
- Cholesterol: 0mg


Comments are closed.