
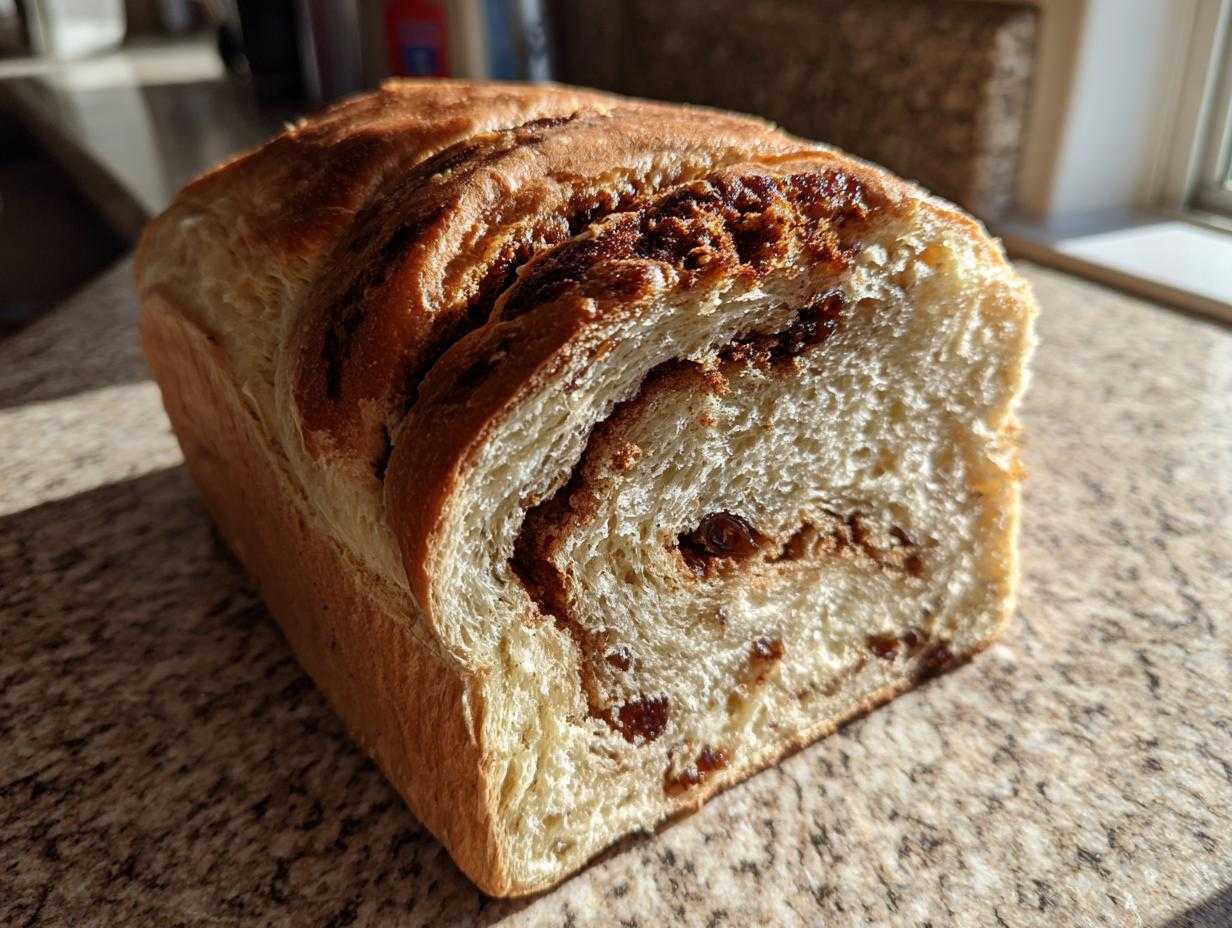
Oh my goodness, you have to listen to me! There is truly nothing—and I mean *nothing*—that beats that moment when you pull a loaf of warm cinnamon raisin bread out of the oven. That sweet, spicy aroma fills every single corner of the house, and suddenly, everything feels right in the world. Forget the stuff from the grocery store shelf; we’re making the ultimate, softest, fluffiest homemade raisin bread right here from scratch.
This particular recipe is the one that everyone asks for at every single gathering. Honestly, baking bread like this feels like cheating because the payoff—that glorious, thick cinnamon swirl—is so huge for the effort you put in. It’s the best sweet breakfast bread you’ll ever make, and trust me, once you get this technique down, you are going to feel like a true baking wizard!
Why This Homemade Raisin Bread Recipe Stands Out
When I talk about the best raisin bread, I’m talking about texture, first and foremost. This isn’t some dry, crumbly thing that needs gallons of butter just to be palatable. No way! This recipe guarantees a soft and fluffy raisin bread texture that melts in your mouth. It’s the kind of thing that makes you want to curl up with a cup of coffee—seriously cozy baking recipes at their finest! Check out my roundup of cozy baking recipes for more inspiration.
But the real star? That deeply flavorful, warm cinnamon swirl bread center. We make sure that cinnamon-sugar-raisin mixture is layered perfectly edge-to-edge. Once you taste this, you’ll never go back to the store-bought stuff, I promise you that. It’s worth the time!
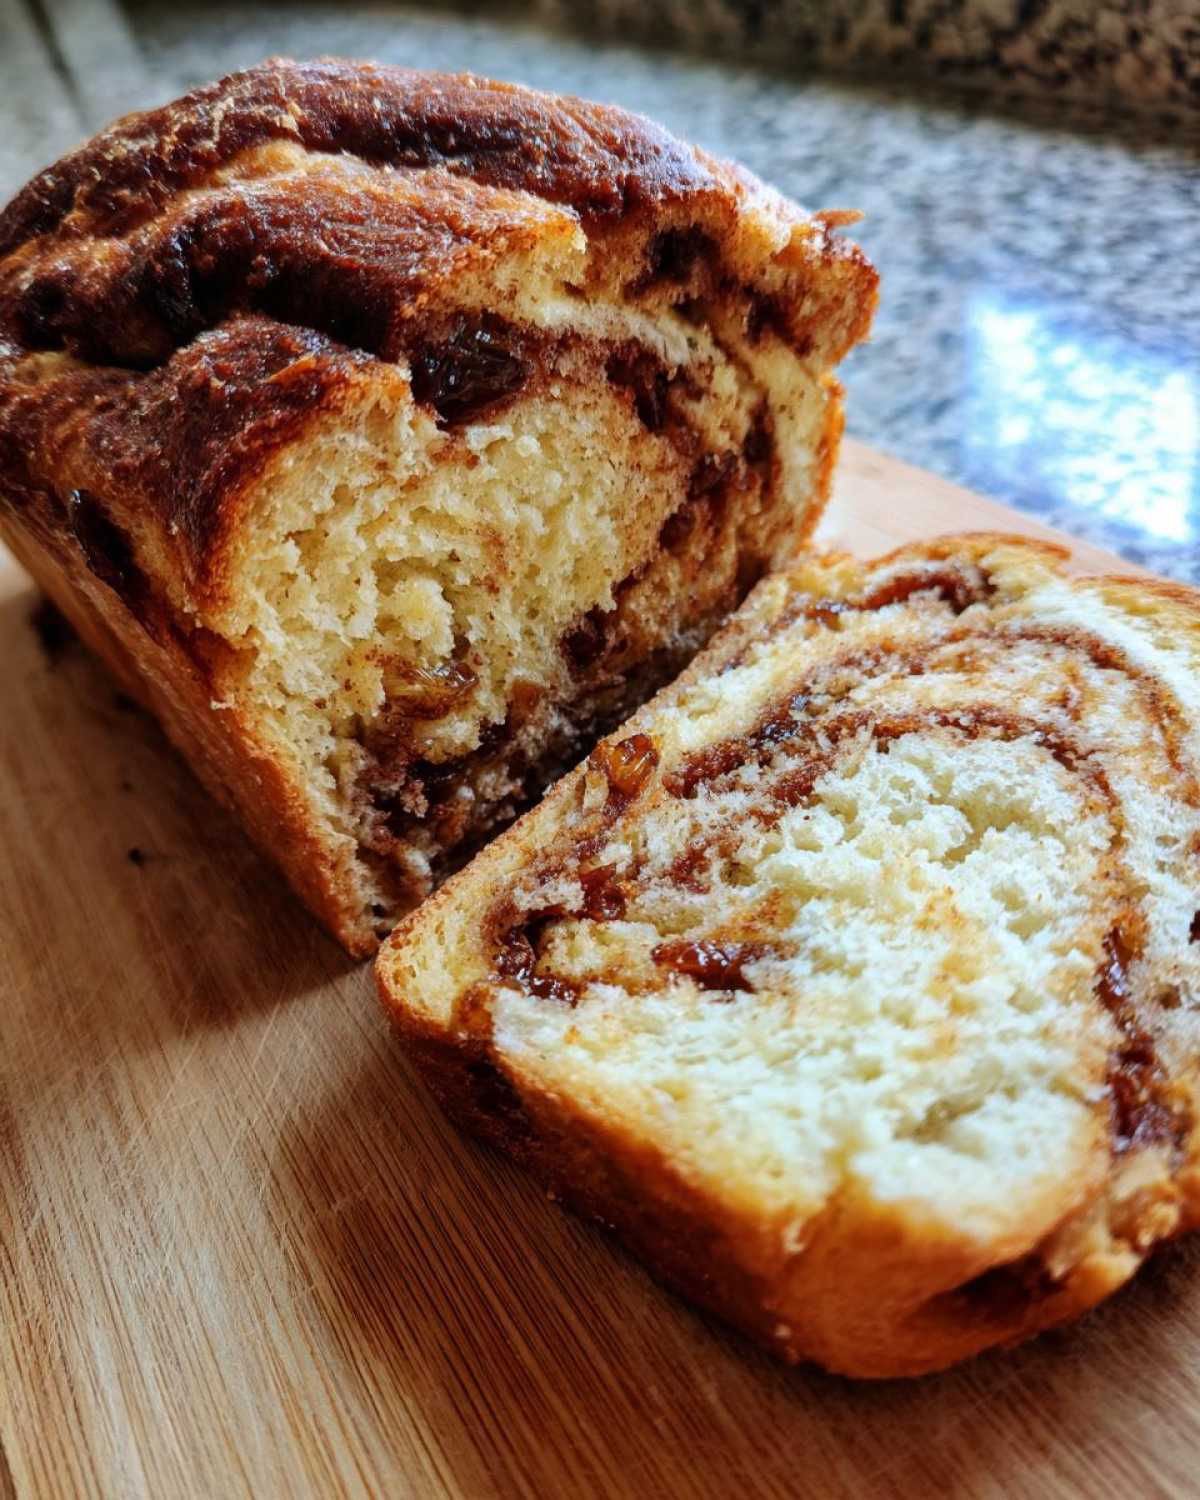
Achieving the Perfect Soft and Fluffy Raisin Bread Texture
It all comes down to gentle handling after the first rise. We knead just long enough to build structure, but we don’t push it! Over-kneading or over-baking is the enemy here. The warm milk helps wake up the yeast perfectly, giving us that necessary lift. Keep an eye on the oven; as soon as that top is golden brown and the internal heat clicks to 200 degrees, pull it out immediately!
Gathering Ingredients for Your Best Raisin Bread Yet
Alright, let’s talk supplies for this amazing raisin bread adventure! Using good ingredients really makes the difference between a basic loaf and something you’d pay top dollar for at a bakery. When you bake this loaf from scratch, you control the quality, and that makes the final product taste so much richer. You can find my full list of ingredients in the recipe card, but know that these staples create magic. For great baking inspiration, check out how I approach other from scratch bread recipes!
Ingredient Notes and Substitutions for Raisin Bread
A couple of small things that make a huge impact here. First, the milk! It needs to be warm, around 110°F—just slightly warmer than bathwater. If it’s too hot, you’ll kill your yeast, and that’s a sad day for everyone. You can use the one cup of raisins straight from the box, but honestly, I recommend giving them a quick soak in hot water for ten minutes first. They plump up beautifully! If you don’t have raisins, dried cranberries work wonderfully instead—they add a nice little tart pop to the sweetness.
Step-by-Step Instructions for Classic Raisin Bread Baking
Okay, here’s where the fun really starts! We’re taking these simple ingredients and turning them into a beautiful, swirled loaf. I always like to get my dough mixed while the milk is warming up—multitasking is key in the kitchen! Just follow these steps closely, and you won’t end up with any baking disasters, I promise. Keep an eye on those rising times; they aren’t suggestions, they are your roadmap to the fluffiest loaf possible!
Preparing the Dough and First Rise for Fluffy Raisin Bread
First things first, get that yeast blooming in your warm milk for about five minutes until it looks nice and foamy—that’s how you know it’s alive and ready to party! Mix in your wet elements, and then slowly bring in the flour. Once you have a shaggy mess, turn it out onto a lightly floured counter. You need to knead this dough by hand for a solid 8 to 10 minutes. It should feel smooth and springy when you’re done. Pop it into an oiled bowl, cover it up, and let it chill out in a warm spot for an hour to an hour and a half until it has doubled its size. If you’re looking for softer treats while you wait, I made these neat no-bake cookie bars that are perfect for snacking!
Creating the Cinnamon Swirl Filling and Shaping the Raisin Bread Loaf
While that dough is puffing up, whisk together your brown sugar, cinnamon, and raisins—that’s the glorious filling! When the dough is ready, gently punch it down and roll it out into a big rectangle, roughly 12 by 18 inches. Sprinkle that entire cinnamon-raisin mix evenly across the surface right to the edges. Now, here’s the secret to the excellent swirl: roll it up as tightly as you can along the long side. Make it a snug caterpillar! Pinch that seam together really well, and lay your log seam-side down into your greased 9×5 loaf pan.
The Final Proof and Baking Your Perfect Raisin Bread
Cover that pan loosely and let the dough have one more relaxing nap for about 30 to 45 minutes. We are looking for it to generously crown about an inch over the top of the pan—that means it’s got a great final rise. While it’s resting, make sure your oven is preheated to 375°F (190°C). Brush the top lightly with water or milk and dust with that last bit of sugar for a nice sparkly crust. Bake it for about 30 to 35 minutes. You know it’s done when the top is golden brown, but always double-check—you need that internal temperature to hit 200°F (93°C) to ensure it’s cooked through without drying out!
Tips for Success: Mastering Your Raisin Bread Technique
Baking this **raisin bread** is fun, but knowing a few insider tricks really separates the good loaves from the *great* loaves. Like I mentioned before, if you can, always plump those raisins! Soaking them for ten minutes in hot water before you mix them transforms them from chewy little nuggets into plump, juicy bites of sunshine in your bread. It stops them from stealing moisture from the dough while it bakes.
Also, don’t stress if you’re not feeling the whole kneading thing. If you want a super easy, almost hands-off method, this recipe is happy to go *no-knead*! You just mix everything until it’s just combined, then cover it, and let that first rise go longer—maybe two and a half or three hours. It takes longer, but the yeast still does all the hard work for you. For more brilliant baking secrets, you have to check out my tips for my secret ingredient chocolate chip cookies; the mindset is kind of similar!
Storage and Reheating Instructions for Leftover Raisin Bread
I know, I know, there might not be much leftover! But when you do manage to save some of this wonderful raisin bread, you have to store it right to keep that softness locked in. Once the loaf is completely cool—and I mean *completely* cool—wrap it up tightly in plastic wrap, and it will easily last on your counter for three or four days.
If you want it to last longer, slicing it first and freezing those individual slices is fantastic. Then, next time the craving hits, you just pull one out! It’s perfect for making the perfect toast bread. A quick pop in the toaster, and that cinnamon swirl comes right back to life!
Serving Suggestions for Sweet Breakfast Bread
The best part of baking this sweet breakfast bread is deciding how to eat it first! Frankly, a thick slice still warm from the cooling rack is perfect with just a smear of quality softened butter—you don’t even need anything else. But if you’re feeling fancy, a light layer of homemade cream cheese frosting (or even just plain cream cheese!) is heavenly against that tangy cinnamon filling.
When I make a full loaf, I always end up turning the leftovers into the most amazing French toast the next morning. You absolutely have to try it; I’ve got my favorite method mapped out in my classic French toast recipe. That soaked raisin bread browns up so beautifully!
Frequently Asked Questions About Making Raisin Bread
I always get so many questions when people try this recipe for the first time, which tells me you guys really care about getting it perfect! And you should! Baking the best cinnamon raisin bread at home takes just a little bit of know-how. It’s all about answering those little snags before they become big problems, so let’s dive into what everyone asks me most about these sweet loaves.
Can I use a Bread Machine for this Raisin Bread Loaf?
Oh yes, you absolutely can save your arms some work! This dough is sturdy enough for the machine, but you need to be careful with the add-ins. I usually prep the dough on the machine’s basic cycle up to the kneading stage. Then, I pull it out, roll it with the filling, shape the loaf, and let it do the second rise on the counter before baking it in a regular oven. Baking it inside the machine can sometimes make the swirl look a bit messy. You can check out my dedicated post on how to manage a bread machine raisin loaf for specific timing adjustments!
What is the best way to get a thick Cinnamon Sugar Raisin Filling?
This is crucial for that bakery-style experience! The key is balance, but you need to be generous. Make sure you spread that filling mixture completely edge-to-edge across the rolled-out dough rectangle. If you leave a half-inch border bare, guess what happens when you roll it? You get a plain 1/2-inch strip of bread at the end! So, really pile it on there before you tighten that roll. That rich filling is what makes this loaf so wonderful for toasting.
How can I make this an Artisan Raisin Bread style?
If you want that craggy, complex crust that makes artisan raisin bread so gorgeous, you need steam! The easiest way for me is to preheat a Dutch oven inside the oven. Once it’s piping hot, gently drop your shaped loaf (seam down!) onto the parchment paper inside the hot pot, quickly cover it, and bake. The trapped steam keeps the crust soft initially, allowing the bread to expand fully. Reduce the heat after 20 minutes, take the lid off, and let that crust brown up perfectly. Talk about comfort food bread!
Nutritional Estimates for This Raisin Bread
Now, I know looking at labels isn’t always the fun part of baking, but since we made this amazing raisin bread completely from scratch, you have total control! Please remember these numbers are just estimates based on my specific ingredients, so yours might vary a tiny bit based on how much butter you use or the exact brand of flour. These figures are calculated per slice, which is a generous serving size, if you ask me!
- Calories: Around 210
- Total Fat: About 4 grams
- Protein: Roughly 5 grams
- Carbohydrates: We’re looking at around 40 grams total
- Sugar Content: Approximately 12 grams
It’s a substantial slice of heaven, packed with energy for the morning!
Share Your Homemade Raisin Bread Creations
I put my heart into sharing this raisin bread recipe, and now I need to hear from you! Did you try the tight roll technique? Did you use plumped raisins? Please head down to the comments section and leave a rating—I truly want to know what you think. And if you snapped a great photo of your beautiful, swirled loaf ready for my inbox or social media, tag me! There is nothing better than seeing your success in the kitchen.
Print
Classic Homemade Cinnamon Raisin Bread
- Total Time: 1 hour 45 min
- Yield: 1 loaf
- Diet: Vegetarian
Description
Make a soft, fluffy loaf of cinnamon raisin bread from scratch, featuring a rich cinnamon swirl perfect for breakfast or toasting.
Ingredients
- 3 cups all-purpose flour
- 1 cup warm milk (about 110°F)
- 1/4 cup granulated sugar
- 2 1/4 teaspoons active dry yeast
- 1 teaspoon salt
- 1 large egg, lightly beaten
- 1/4 cup unsalted butter, melted
- 1 cup raisins
- 1/2 cup packed light brown sugar (for filling)
- 2 tablespoons ground cinnamon (for filling)
- 1 tablespoon granulated sugar (for topping)
Instructions
- In a large bowl, dissolve the yeast in the warm milk. Let it stand for 5 minutes until foamy.
- Add the 1/4 cup granulated sugar, salt, egg, and melted butter to the yeast mixture. Mix well.
- Gradually add the flour, mixing until a shaggy dough forms.
- Turn the dough out onto a lightly floured surface and knead for 8 to 10 minutes until smooth and elastic.
- Place the dough in a lightly oiled bowl, turning to coat. Cover the bowl and let the dough rise in a warm place for 1 to 1.5 hours, or until doubled in size.
- While the dough rises, mix the brown sugar, cinnamon, and raisins together in a small bowl.
- Punch down the risen dough. Roll the dough out into a large rectangle, about 12 by 18 inches.
- Sprinkle the cinnamon-raisin mixture evenly over the surface of the dough. Roll the dough tightly along the long edge to form a log. Pinch the seam closed.
- Place the log seam-side down into a greased 9×5 inch loaf pan. Cover loosely and let it rise again for 30 to 45 minutes, or until the dough has crowned about 1 inch over the rim of the pan.
- Preheat your oven to 375°F (190°C) during the second rise.
- Brush the top of the loaf lightly with water or milk and sprinkle with the remaining 1 tablespoon of granulated sugar.
- Bake for 30 to 35 minutes, or until the top is golden brown and the internal temperature reaches 200°F (93°C).
- Remove the bread from the pan immediately and cool completely on a wire rack before slicing.
Notes
- For a softer crust, lightly brush the top of the loaf with melted butter immediately after removing it from the oven.
- If you prefer a no-knead method, mix the dough until just combined, allow a longer first rise (2-3 hours), and proceed with the filling steps.
- Soak the raisins in hot water for 10 minutes before mixing them into the filling to keep them plump during baking.
- Prep Time: 25 min
- Cook Time: 35 min
- Category: Breakfast
- Method: Baking
- Cuisine: American
Nutrition
- Serving Size: 1 slice
- Calories: 210
- Sugar: 12
- Sodium: 250
- Fat: 4
- Saturated Fat: 2
- Unsaturated Fat: 2
- Trans Fat: 0
- Carbohydrates: 40
- Fiber: 2
- Protein: 5
- Cholesterol: 25


Comments are closed.