
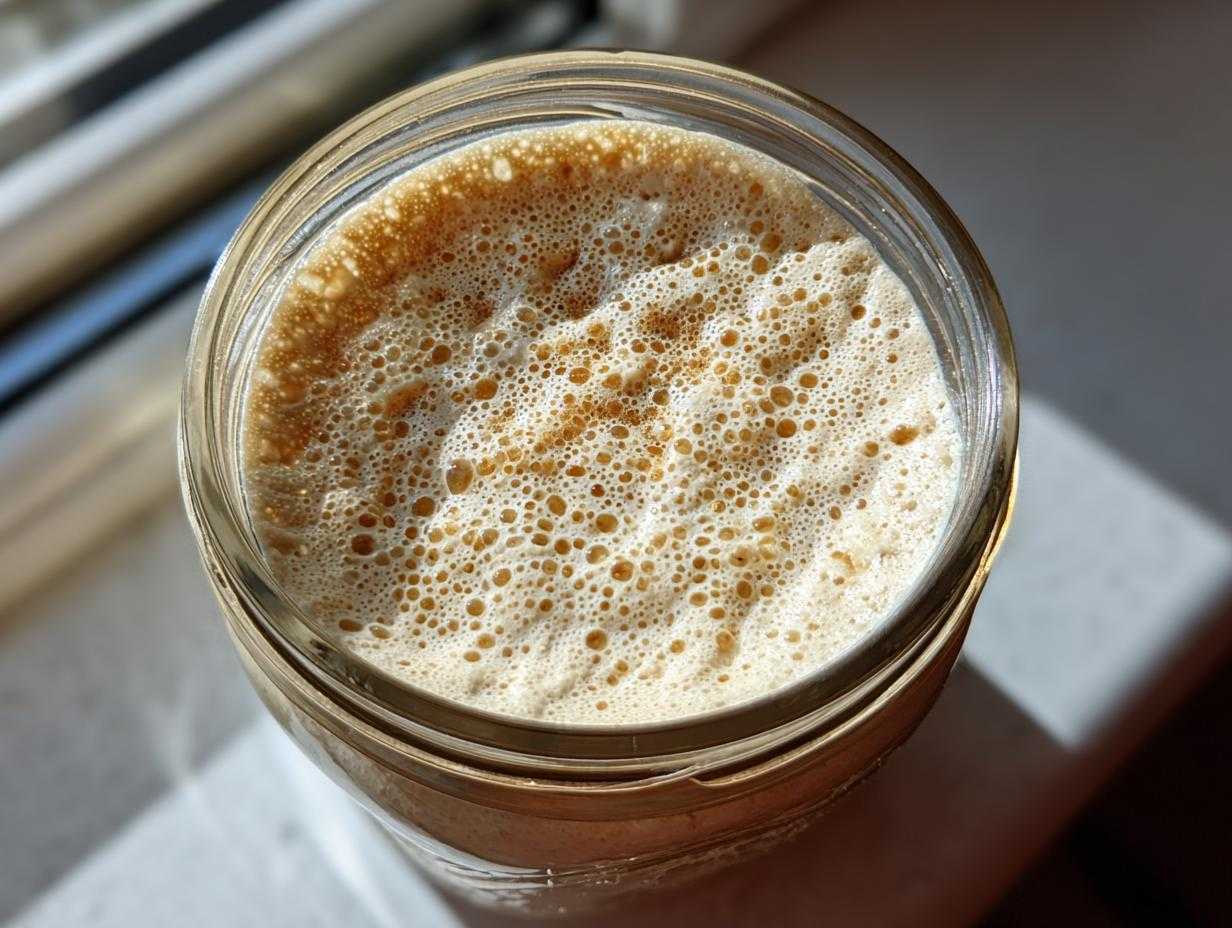
There is this absolute magic that happens when you realize you can create bread that rises purely from flour, water, and the invisible yeasts floating right around us. Forget those packets of instant yeast; we’re getting back to the real, ancient way of baking! I remember the first time I managed to keep a wild yeast culture alive—I nearly cried watching it bubble. It felt like I had a tiny, living pet in a jar, and that pet was going to make the best bread I’d ever tasted.
If you’ve been nervous about starting, toss that worry right out the window. This isn’t some fussy, complicated process reserved for professional bakers. I’m going to show you the absolute simplest, most reliable method to create your very own thriving sourdough starter from scratch. Seriously, if you can mix flour and water, you can do this. It’s definitely the most important step in sourdough baking foundation, and I’ve distilled the whole 7-day process down into steps that even a total beginner can follow. Let’s get this little culture going!
Why You Need a Homemade Sourdough Starter for Baking Foundation
Why bother with this 7-day process instead of just grabbing yeast at the store? Oh, honey, the payoff is huge! Once you have your own sourdough starter bubbling away, you unlock a whole new world of bread. We’re talking about incredible depth of flavor—that signature tang that you just can’t rush.
But it’s not just about taste, although that’s a big part of it. There are real health benefits, too, especially when it comes to digestion. The fermentation process starts breaking down complex starches before you even bake the bread, which is fantastic. If you want to see what you can do once you’ve mastered this foundational step, check out what I make with the discard—we turn it into amazing pizza dough at this link!
- It gives you superior flavor—that complex, wonderful sourness!
- It aids in digestibility compared to commercial yeast breads.
- You have total control over the ingredients (no weird additives here!).
This entire journey is really about mastering the sourdough baking foundation. You’ll feel unstoppable once you see it thrive!
What Makes This Sourdough Starter Recipe Beginner-Friendly
I know watching videos might make it look overly complicated, but trust me, this starter recipe is designed to be simple. You don’t need any fancy gadgets or esoteric ingredients to get started. Seriously, we are just using flour and water!
That’s it! This keeps things light because troubleshooting is much easier when you only have two variables. We focus on making this an easy sourdough starter to begin with, so you can build your confidence right away before diving into complex bread formulas.
Gathering Supplies for Your Sourdough Starter
Okay, before we start stirring anything, we need to make sure our little jar is ready for action. Think of this as setting the stage! Getting your supplies together now saves you from running around later when you’re trying to keep a schedule. It’s all about preparation when you’re cultivating wild yeast.
We keep the ingredient list super short, which is part of why this process is so forgiving for newcomers. Don’t let anyone tell you this needs exotic grains or special conditioners; we are starting with the basics!
Essential Ingredients for Your Flour and Water Starter
For the initial mix on Day 1, you absolutely need some whole grain feed. I highly recommend using a nice hearty whole grain flour, like rye or whole wheat, to get things going. The bran in those kernels wakes up the wild yeast buddies living there!
After that initial boost, we switch over to standard Unbleached All-Purpose Flour for our regular feedings. You’ll need 100g of each flour type total, and the water needs to be room temperature and unchlorinated. If your tap water smells like a swimming pool, switch to bottled or filtered water; the chlorine can really stunt yeast growth, and we don’t want that!
Equipment Needed to Create Sourdough Starter
Your toolkit doesn’t need to be complicated. You’ll need a clean glass jar—I prefer glass because you need to see what’s happening! Are there bubbles? Is it growing? You need to watch it work. I stress clean because we want happy yeast, not competing mold or bacteria.
Then you just need a small rubber spatula or spoon for mixing everything up smoothly. If you have a kitchen scale, please use it! Measuring by weight is much more accurate than volume, even for this beginner process. If you don’t have one, standard measuring cups will work, but weigh everything if you can!
How to Create Sourdough Starter From Scratch: Day-by-Day Guide
Alright, this is the exciting part—we are officially creating life in a jar! Remember, patience is key here. You might think things aren’t working on Day 2, but trust me on the schedule. We are working hard over the next week to cultivate a super healthy, robust sourdough starter that will power all your future artisan bread dreams.
The basic drill once we get rolling is: discard half, feed what’s left, and wait 24 hours. We start strong with whole grain flour to attract those wild yeasts, and then we transition to the milder all-purpose flour for maintenance. I always love checking my Day 1 jar; it usually just looks like thick paste, but that’s where the magic begins!
Days 1-3: Initial Mixing and First Signs of Activity in Your Sourdough Starter
For Day 1, just mix 50g of your whole grain flour with 50g of room-temp water in your jar. Stir it until it’s totally smooth—no dry pockets allowed! Cover it loosely and let it just hang out at room temperature. Day 2 is the first feed: discard half the starter, then add 50g of all-purpose flour and 50g of water. Mix it up and cover loosely.
On Day 3, you might see a few sad-looking bubbles, or maybe nothing at all—that’s totally normal! My first starter looked absolutely dead by Day 2, and I almost threw it out. Don’t panic; sometimes you get a burst of bacterial activity that dies down before the real yeast takes over. Just keep up the routine: discard half, feed 50g flour and 50g water, and wait another 24 hours. You’re doing great!
Days 4-7: Developing an Active Sourdough Starter
Now we are getting serious! From Day 4 onward, we need to see energy. Keep discarding half and feeding every 24 hours with 50g of all-purpose flour and 50g of water. By the time you hit Day 7, your little sourdough starter should be reliably doubling in size between feedings—usually in about 4 to 8 hours. That consistent doubling is your signal that you have an active sourdough starter ready for baking!
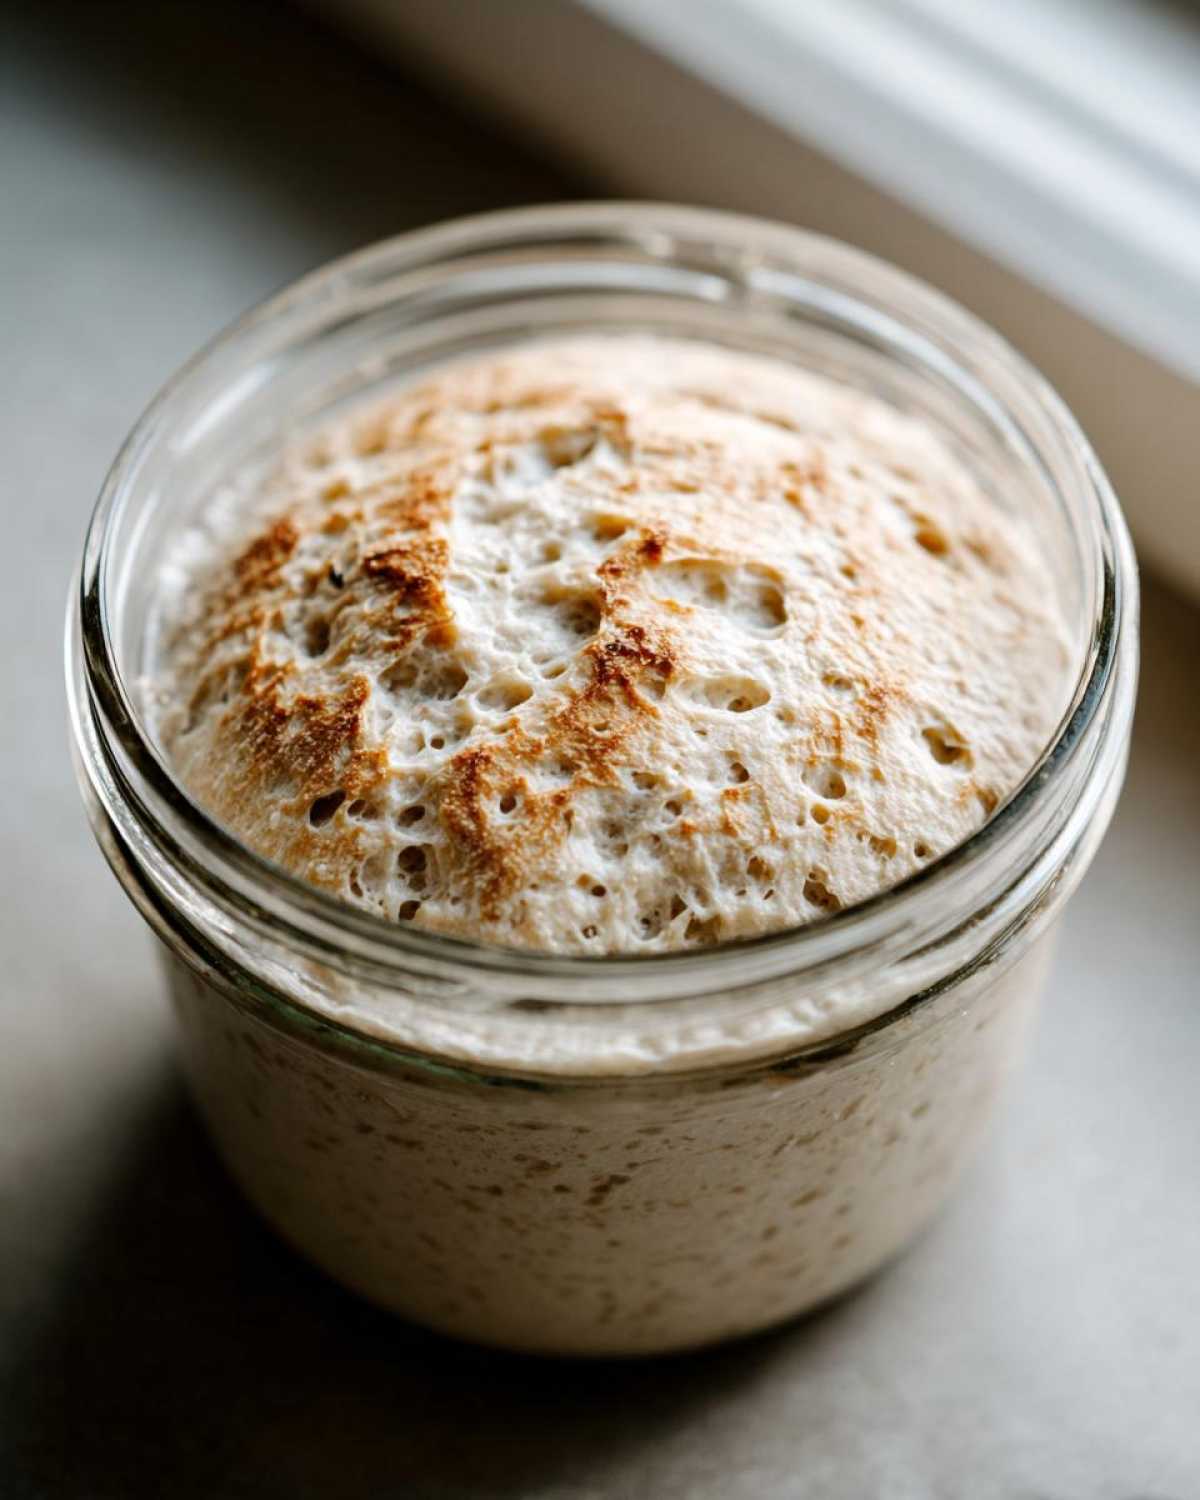
If you’re still having trouble getting that rise, keep going with the feedings. Sometimes it just takes a little longer for the local yeast to behave. Mastering how to make sourdough starter means sticking with it until you see that consistent performance. If you’re looking for a great baking idea once you hit that milestone, you have to try my honey bran muffins using the discard!
Feeding Sourdough Starter Guide: Maintaining Your Culture
Congratulations! You’ve got an active, bubbly powerhouse of a sourdough starter. Now we switch gears from creation mode to maintenance mode, and honestly, it’s much easier than the first week. The key here is consistency, especially with the ratio.
Once your starter is reliably doubling, you should adopt the 1:1:1 feeding ratio by weight. This is crucial for a healthy, happy culture. It simply means that for every one part of existing starter you keep, you feed it one part fresh flour and one part fresh water. So if you decide to keep 50 grams of your starter, you feed it 50 grams of flour and 50 grams of water. Simple math, huge results!
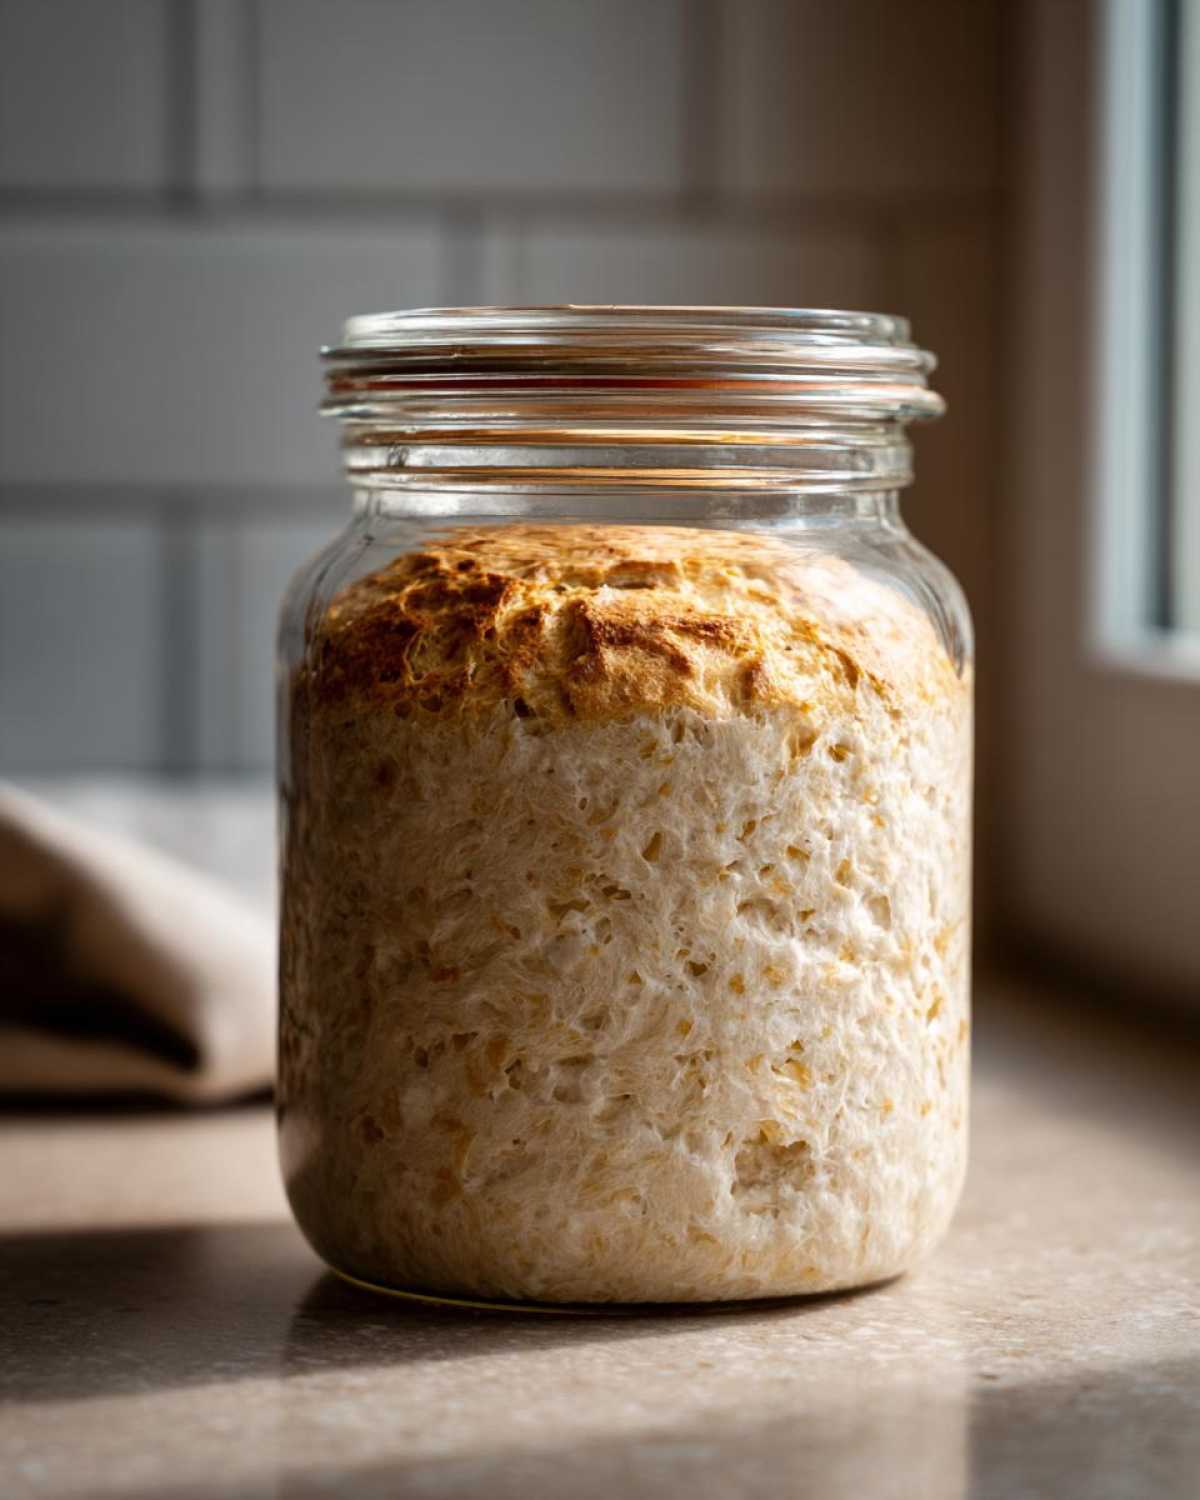
Once you nail that ratio, you get amazing, predictable activity. If you’re baking every day, you can keep it on the counter. If you’re only baking on weekends, we’ll need to put it to sleep in the fridge! If you want to see a fantastic first recipe to try out that newly fed starter, my sourdough pancakes recipe is an absolute winner.
Counter vs. Refrigerator Sourdough Culture Maintenance
Where you keep your starter really dictates how often you need to feed it. If your kitchen is warm and you plan to bake daily or every other day, keep it right on the counter. When it’s at room temperature, it’s active and ready to go! You’ll need to follow that 1:1:1 feeding routine about every 12 hours just to keep it happy and prevent it from getting too hungry.
Now, if you’re busy, don’t stress! Storing your sourdough starter in the refrigerator is the best way to slow down fermentation. When chilled, it only needs a proper feeding once a week, maybe even every 10 days if you’re pushing it. Just remember to take it out a day or two before you bake, give it two or three room-temperature feedings to wake it up and get it active again before using it in your dough!
Tips for Success When Creating Your Sourdough Starter
Even though we’re keeping this sourdough starter recipe super simple, there are a few little tricks I learned the hard way that can save you a lot of frustration during that first week. Think of these as non-negotiable steps from my years of nurturing wild yeast—little pieces of wisdom that ensure you get a truly thriving culture right off the bat.
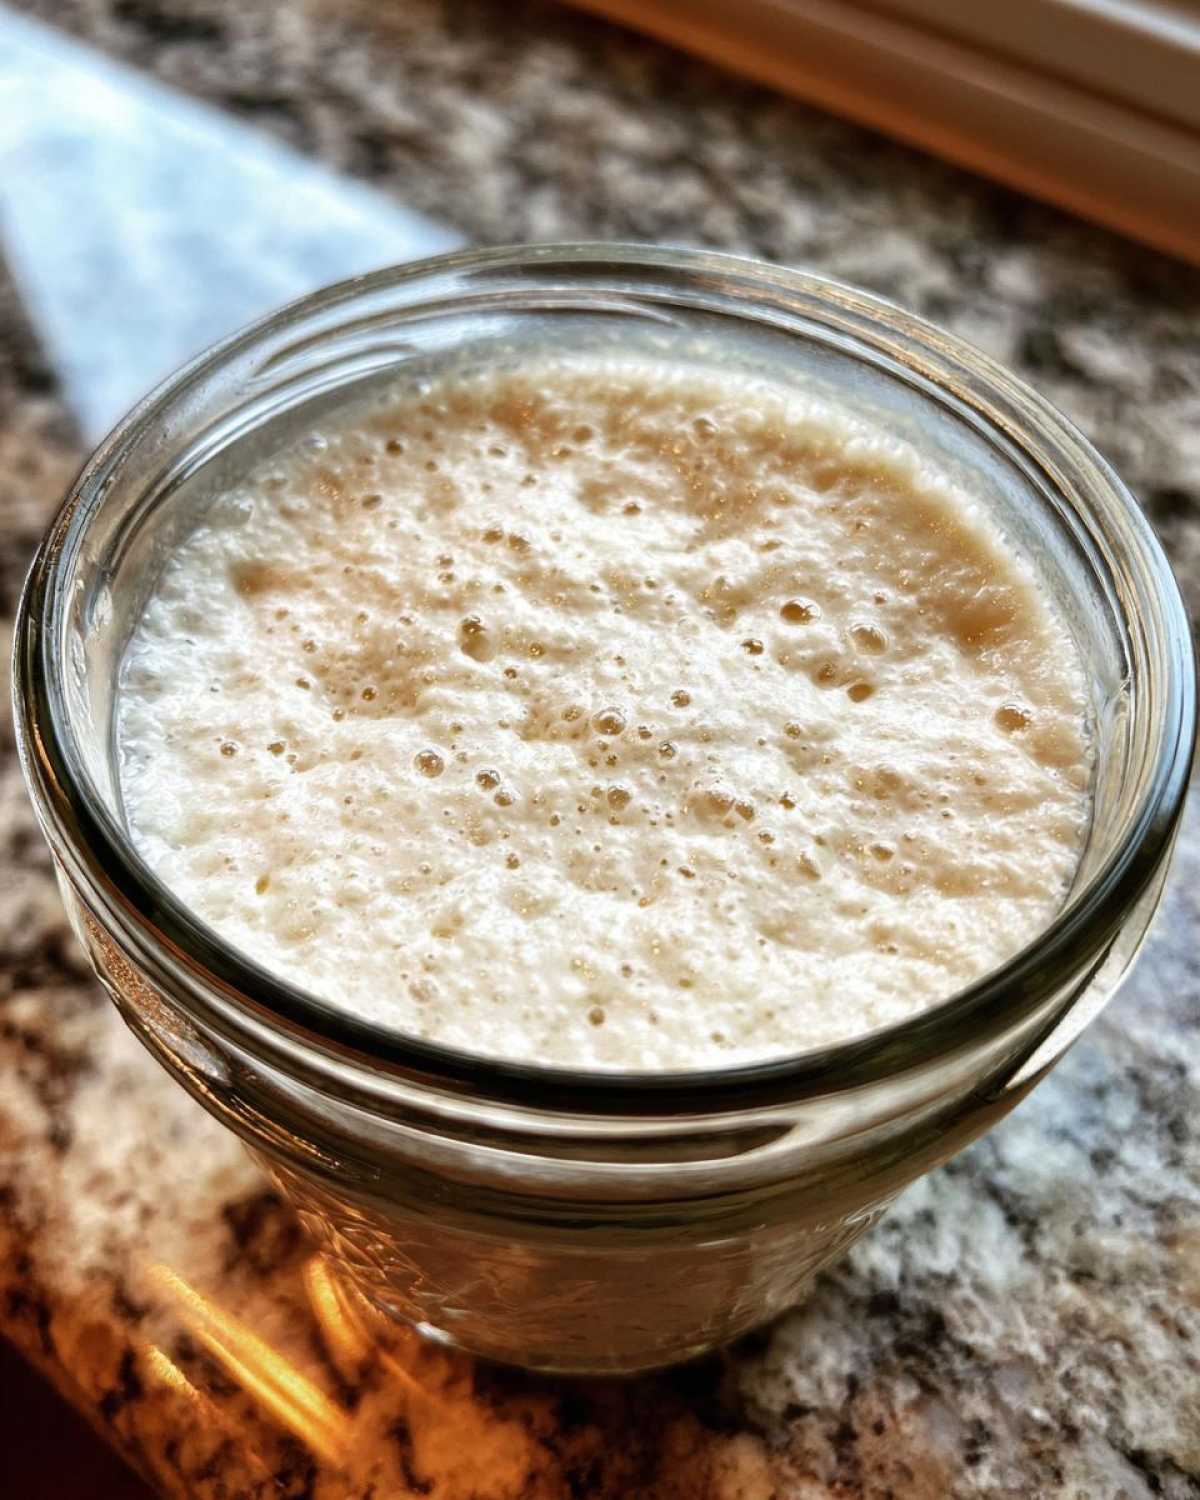
It’s amazing how much difference tiny details make when you’re relying on wild ingredients. Don’t worry if you mess up one day; just jump back on the feeding schedule the next time. These tips will help you avoid the most common beginner pitfalls.
Water Quality and Jar Covering Best Practices
Let’s talk water first, because this trips up more people than you’d think! Yeast are living things, right? And like any living thing, they don’t like harsh chemicals. If your tap water is heavily chlorinated—you know, that strong chemical smell—it can actually kill off the wild yeast you’re trying to capture. So, if your water smells like a public pool, grab the filtered pitcher or just buy a gallon of spring water for the first few days. It’s worth the peace of mind.
Next up: covering the jar. You absolutely need to keep dust and stray things out, so don’t leave it wide open! However, your starter needs to breathe air to work its magic. If you seal it tight—like with a canning lid screwed down—you can actually build up dangerous pressure! No thank you. I just lay the lid loosely on top, or use a coffee filter secured with a rubber band. It lets the gas escape but keeps the dust out.
Understanding Hooch and Smell Cues
Oh, the dreaded ‘hooch.’ If you ever lift the lid and see a layer of dark, greyish liquid sitting on top of your starter, don’t panic! That’s hooch—it’s an alcohol that the yeast produces when it gets really hungry and runs out of food. It’s not mold; it’s a sign your starter is starving.
What to do? You can either gently pour the hooch off, or if it’s just a little bit, stir it right back in for an extra kick of sourness! Either way, after the hooch situation, you need to feed it immediately. Also, learn to trust your nose! A healthy, happy culture should smell pleasantly sour—think yogurt, or maybe a little like clean vinegar. If it starts smelling overwhelmingly like acetone or nail polish remover, that’s a sign of stress, and it definitely needs a good feeding session right away to stabilize the environment.
Troubleshooting Sourdough Starter Issues for Beginners
Even if you follow every step perfectly, sometimes your beginner sourdough guide journey hits a little bump in the road. Don’t even sweat it! Every baker—and I mean *every* baker—deals with starter hiccups. The key to successful troubleshooting sourdough starter is knowing what those hiccups mean so you can fix them fast and get back to baking.
The most common problem? Lack of activity. If you’re not seeing doubling by Day 5, it usually comes down to temperature or water quality. Remember, those wild yeasts are picky! If your kitchen is chilly, the yeast go dormant. Try moving your jar near the oven after the oven has been off for a bit, or tape a small heating pad set on low near the back of the jar to give them a cozy 75°F cuddle session.
Another frequent issue is strange smells. We talked about the nail polish remover smell—that means eat more! We just need to increase the frequency of feeding until that acetone funk disappears and you get that lovely, mild sour note back.
Using Your New Sourdough Starter in Baking
Okay, deep breath, because this is the reward! You have nurtured, fed, and coddled this little jar of flour and water, and now it’s ready to work for you. When your starter is reliably doubling and it smells fantastic, you have achieved the true sourdough baking foundation. You are officially ready to move onto actual bread recipes!
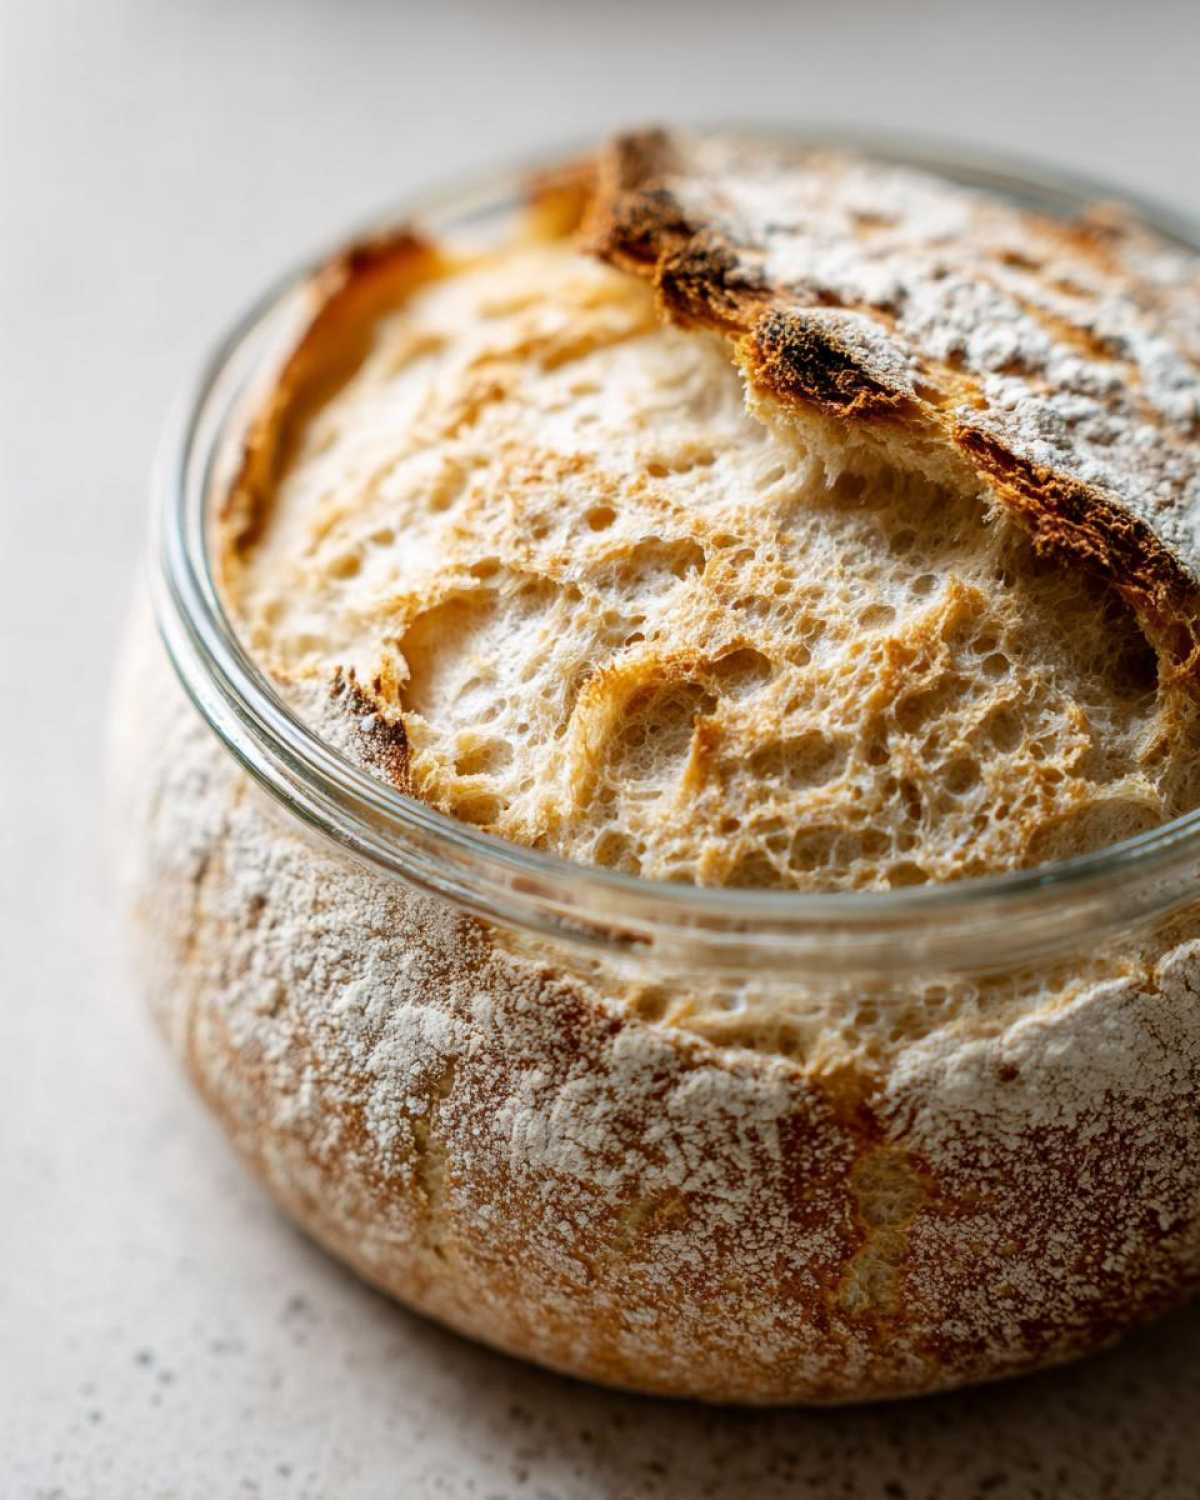
It feels overwhelming looking at artisan recipes that call for 24-hour ferments, but don’t let it scare you. Remember, everything relies on that strong, happy starter you just created. We feed it, we wait for the peak rise, and then we use it. That’s the secret sauce for everything from tangy loaves to fluffy pancakes!
If you want to tackle your very first real loaf now that your starter is strong enough, I highly recommend checking out my favorite recipe for rustic artisan bread. It has become my absolute go-to recipe for showing off my new culture! You can find that recipe right here: Easy Crusty Italian Bread Recipe. Get ready for amazing oven spring!
Frequently Asked Questions About Your Sourdough Starter
I get so many questions about keeping these little guys happy! It’s totally normal, especially when you’re first getting familiar with cultivating your own sourdough starter. These are just the things I wished someone had told me right away. Don’t worry about getting it perfect the first time; it’s all learning!
How long does it take to create an active sourdough starter?
It takes about seven full days—one week—to get what I call a consistently active sourdough starter ready for baking. Day 1 starts the initial mix, and by Day 7, you should be seeing it reliably double in size within a few hours after a feeding. Some starters are faster, some are slower, but a week is a really solid estimate!
Can I use any type of flour when making my sourdough starter?
Not quite, especially at the very start! For the initial mix on Day 1, you really want that whole grain flour, like rye or whole wheat, because the bran helps attract the wild yeasts we are trying to capture. After that initial wake-up call, you can switch entirely over to unbleached all-purpose flour for all your regular feedings. That keeps things simple for you!
What temperature is ideal for my new sourdough starter?
Yeast are heat lovers! They really thrive when things are warm, but not hot. The sweet spot where you want to keep your jar during those first seven days is right between 68 and 75 degrees Fahrenheit (that’s 20 to 24 Celsius). If your kitchen is cooler than that, you might need to find a warmer spot for the jar, like inside a microwave with the light left on—just don’t turn the microwave on!
Once you get that rhythm down, you can start baking amazing things, like my easy whole wheat starter bread. Happy bubbling!
Nutritional Estimate for Flour and Water Starter
Now, I know some of you are serious about tracking everything, and that’s cool! But when it comes to the nutritional breakdown of your actual sourdough starter, things get a little hazy, and I want to be upfront with you about that.
Because my goal here is to teach you how to make sourdough starter using just flour and water, the final nutritional content is constantly changing as the culture grows and matures. It’s a living thing, remember? So, while I’ve provided the nutritional info for a batch of my final baked goods, the starter itself—the fluffy, bubbly culture you feed daily—doesn’t have a fixed profile.
Basically, it’s made of flour and water, and the proportions are always shifting depending on when you last fed it! Don’t stress about logging the calories for the starter in your tracker. For all specific food claims and health disclaimers regarding my recipes, you can always check out the information over at this link. Let’s focus on getting that beautiful rise instead!
Share Your Sourdough Culture Journey
Well, that’s it! You’ve officially graduated from just buying bread to *making* your own yeast source. Isn’t that wild? I am so proud of you for taking the plunge and learning how to make sourdough starter.
Now, I desperately want to hear how it went! Did you see bubbles on Day 3? Did you name your starter? (I named mine Bartholomew, by the way.) Drop a note in the comments below and tell me about your experience creating your very first sourdough starter. Be sure to let me know if this guide helped you solidify your beginner sourdough guide steps!
If you found this detailed dive into creating a wild yeast culture helpful, please give the article a rating—it really helps other nervous beginners find this simple method. Happy baking, and enjoy the amazing world of naturally leavened bread!
Print
How to Create and Maintain a Thriving Sourdough Starter From Scratch
- Total Time: 7 days (initial creation)
- Yield: Approximately 100g active starter
- Diet: Vegan
Description
Follow these simple steps to create your own active sourdough starter using only flour and water. This guide covers daily feeding and maintenance for beginners.
Ingredients
- 100g Whole Grain Flour (Rye or Whole Wheat recommended for initial mix)
- 100g Unbleached All-Purpose Flour
- 100g Unchlorinated Water (room temperature)
Instructions
- Day 1: Mix 50g of whole grain flour and 50g of water in a clean glass jar. Stir until no dry spots remain. Cover loosely and let it sit at room temperature (68-75°F or 20-24°C) for 24 hours.
- Day 2: Discard half of the mixture. Add 50g of all-purpose flour and 50g of water to the remaining starter. Mix well, cover loosely, and let sit for 24 hours.
- Day 3: You may see some bubbles. Discard half. Feed with 50g all-purpose flour and 50g water. Mix and let sit for 24 hours.
- Day 4 to Day 7 (or until active): Repeat the discard and feed process every 24 hours using only all-purpose flour. You should see consistent doubling in size within 4-8 hours after feeding by Day 7.
- Maintenance (Once Active): Once the starter reliably doubles after feeding, switch to feeding once every 12 hours if keeping it on the counter, or once a week if storing it in the refrigerator.
- Feeding Ratio: For maintenance, use a 1:1:1 ratio by weight (e.g., 50g starter, 50g flour, 50g water).
Notes
- Use filtered or bottled water if your tap water is heavily chlorinated, as chlorine can inhibit yeast growth.
- Keep the jar loosely covered; the starter needs air but protection from dust.
- If you see dark liquid (hooch) on top, stir it in or pour it off before feeding. This means your starter is hungry.
- A healthy starter should smell pleasantly sour, like yogurt or mild vinegar, not like acetone or strong nail polish remover.
- Prep Time: 5 min
- Cook Time: 0 min
- Category: Baking Foundation
- Method: Fermentation
- Cuisine: General
Nutrition
- Serving Size: 100g
- Calories: 180
- Sugar: 0.5
- Sodium: 2
- Fat: 0.5
- Saturated Fat: 0.1
- Unsaturated Fat: 0.4
- Trans Fat: 0
- Carbohydrates: 38
- Fiber: 2
- Protein: 5
- Cholesterol: 0



Comments are closed.