

Oh my goodness, if you haven’t made a Basque Burnt Cheesecake yet, you are seriously missing out on the easiest, most impressive gourmet dessert imaginable! Forget fiddly crusts and fussy water baths; this Spanish cheesecake beauty is designed to look perfectly rustic right out of the oven. Truly, this recipe for the basque burnt cheesecake is my go-to when I need something that looks like it came from a fancy bakery but only took 15 minutes to mix. Over many attempts testing everything from the sugar ratios to the exact oven temperature, I finally nailed the balance—that deep, almost blackened, caramelized top that gives way to the most impossibly smooth, velvety interior. Trust me, once you master this simple technique, it’ll become your favorite party trick, too.
Why This is the Best Easy Basque Burnt Cheesecake Recipe
I truly believe this version is the winner because it nails exactly what everyone wants from this dessert. Honestly, it’s shocking how little effort goes into something that tastes this decadent. Don’t even stress about making things perfect—that’s the charm!
- The Texture: It produces the creamiest, almost mousse-like filling, which is what you want in a velvety cheesecake filling.
- The Simplicity: We skip the water bath completely, which is a huge time saver. Learning how to manage that high heat is key here.
- The Look: You get that gorgeous, deeply caramelized top—the signature char—without worrying about cracks or perfect edges. It’s foolproof!
- Zero Crust! This is technically a no crust cheesecake recipe, meaning less fuss and more of that rich, creamy goodness.
If you’re looking for more straightforward desserts, you might want to check out my tips on simple cheesecake baking, but this Basque style is my absolute favorite for impressing people.
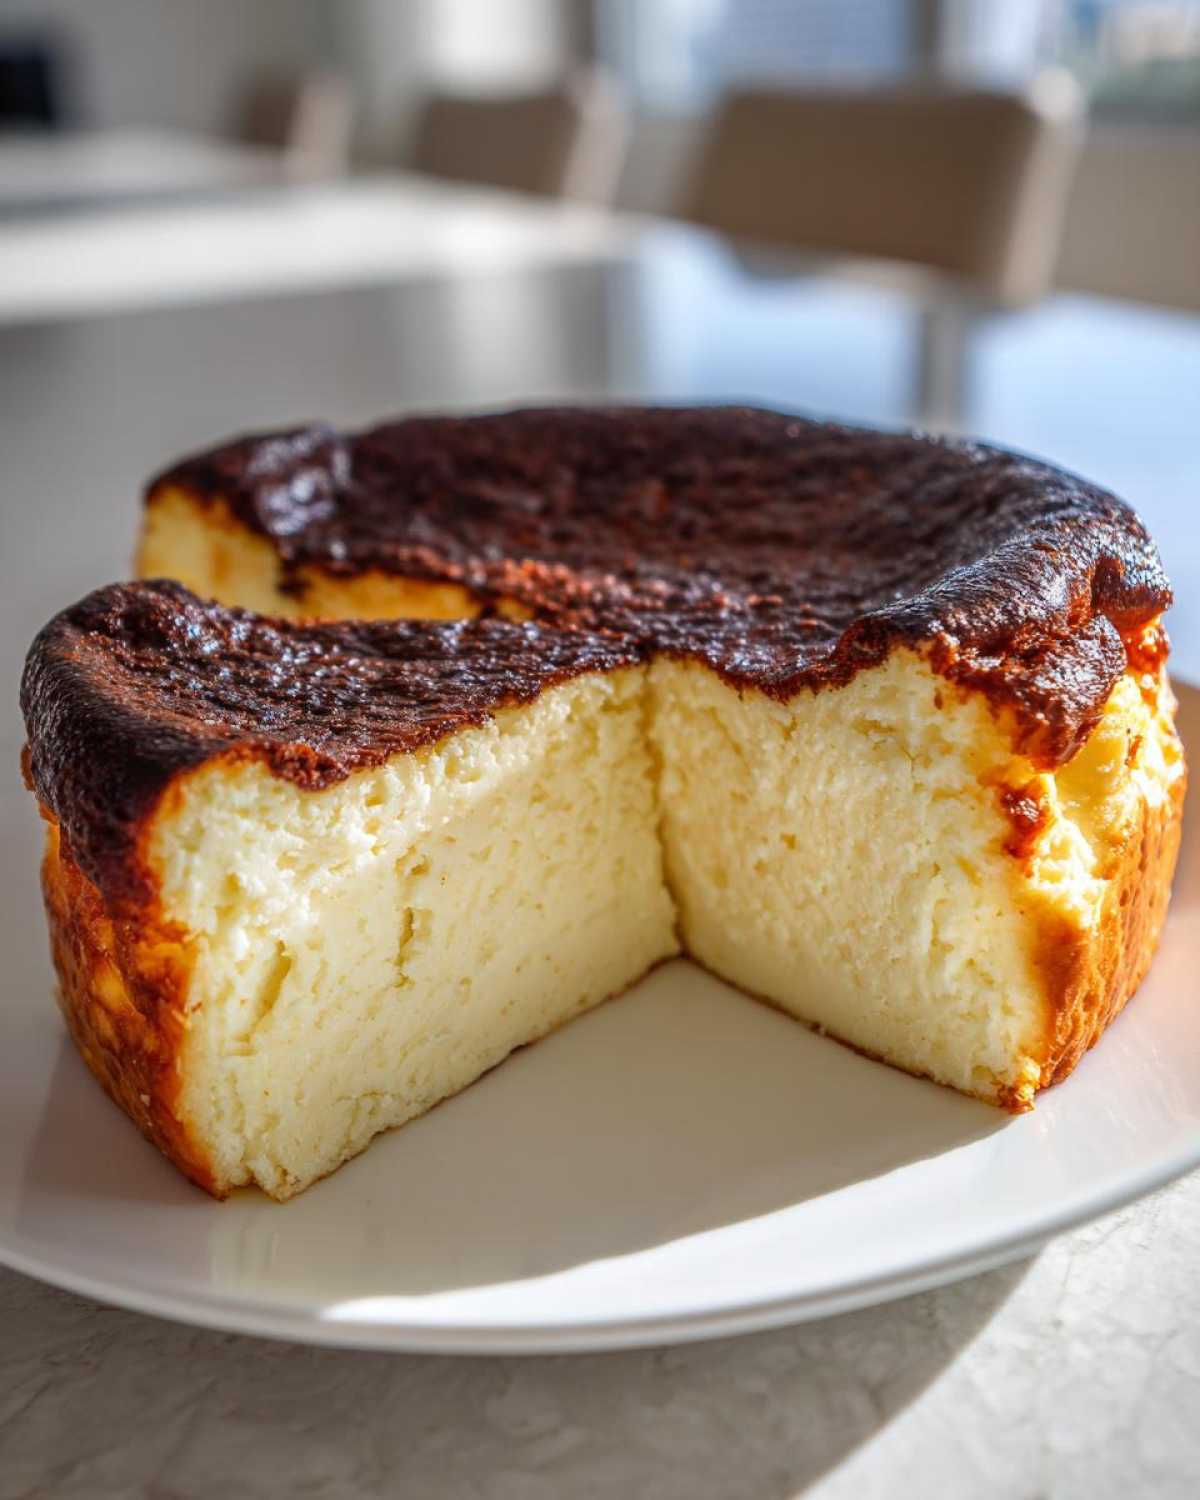
Best Basque Cheesecake Ingredients for a Velvety Filling
Okay, let’s talk ingredients because this is where the magic—and the creaminess—starts! The great thing about the basque burnt cheesecake is that it uses ingredients you probably already have lurking in your fridge. But listen closely: temperature is everything here. If your cream cheese and eggs are cold, you’re going to end up with lumps, and we absolutely cannot have lumps in our pursuit of that perfect, creamy burnt cheesecake texture!
For the best result, make sure everything sits out on the counter for at least an hour or two before you even think about turning on the mixer. I’m serious about this—it’s my biggest guiding principle for any great cheesecake!
Here is exactly what you’ll need for this crustless masterpiece:
- 900 g cream cheese, softened to room temperature (Use full-fat, please! Don’t skimp here; that fat equals that luxurious texture we crave.)
- 250 g granulated sugar
- 6 large eggs, room temperature (Yes, six! This provides structure without being dense.)
- 480 ml heavy cream (35% fat)
- 1 teaspoon vanilla extract
- 1/4 teaspoon salt
- 30 g all-purpose flour (This tiny bit builds structure but keeps it mostly custard-like.)
Ingredient Notes and Substitutions for Basque Burnt Cheesecake
Since this is a no crust cheesecake recipe, every ingredient is working overtime to create structure and flavor, so quality really counts. When it comes to the cream, it has to be that heavy whipping cream, don’t substitute it with milk or half-and-half.
The high fat content in the heavy cream is what helps give that beautiful, decadent wave throughout the filling as it bakes. I always use a standard 9-inch springform pan for this volume of batter. If you think about changing the pan size, remember we are aiming for depth! If you use a wider, shallower pan, your cheesecake will bake faster, and you won’t get that signature jiggly middle that characterizes true San Sebastian cheesecake guide perfection.
How to Make Basque Burnt Cheesecake: Step-by-Step Instructions
Okay, now that everything is properly room temperature, the actual mixing is almost ridiculously simple. This is where you see why this is the easy basque cheesecake everyone talks about! You really only need one large bowl and a hand mixer, or even a whisk if you’re feeling brave and want to give your arm a good workout. We are aiming for smooth, but not whipped. Air is the enemy of the super-creamy center!
Preparing the Pan for Your Basque Burnt Cheesecake
Before anything else, you need the oven blazing hot—preheat it to 200 degrees Celsius (400 Fahrenheit). Next up is the pan prep, and please don’t try to be neat here, okay? Take two large sheets of parchment paper and just shove them crisscross into your 9-inch springform pan. You want big, floppy overhangs sticking up over the sides everywhere. Seriously, don’t trim anything! Those crinkled, high sides are what protect the edges and give your finished basque burnt cheesecake that stunningly rustic look. It’s supposed to look a little dramatic!
Mixing the Creamy Burnt Cheesecake Filling
First, take that softened cream cheese and beat it until it is genuinely silky smooth—absolutely no lumps allowed. Scrape down the sides of the bowl because dry cream cheese hiding at the bottom is a textural nightmare later on. Once that’s perfect, add your sugar and mix just until it disappears. Then, those room-temperature eggs go in one at a time. Mix low and slow after each egg just to combine them! Please, resist the urge to whip it up high. Too much air equals bubbles and cracked tops later!
Finally, pour in the heavy cream, vanilla, and salt. Mix gently until everything looks like one uniform, slightly thin liquid. Sift that small amount of flour over the top and mix for just five seconds—we only want to ensure there are no white streaks left. That batter will be thin; that is correct for a true velvety cheesecake filling.
Baking for the Perfect Caramelized Cheesecake Top
Pour that thin batter right into your prepared, crinkled pan. Now it’s time for the high heat gamble to achieve that incredible caramelized cheesecake top. Bake this beauty for about 50 to 60 minutes. You are going to watch the edges turn dark brown, maybe even black in spots, and that’s the goal! When you gently shake the pan, the outside edges should look set, but the very center? It needs to look almost liquid and jiggle like Jell-O.
If you wait until the center is firm, you’ll end up with a regular baked cheesecake, not the amazing one we are making! When the outside looks beautifully burnt and the inside is still wavy, pull it out immediately. We use this high-heat method precisely because it lets us skip the messy no water bath cheesecake process entirely.
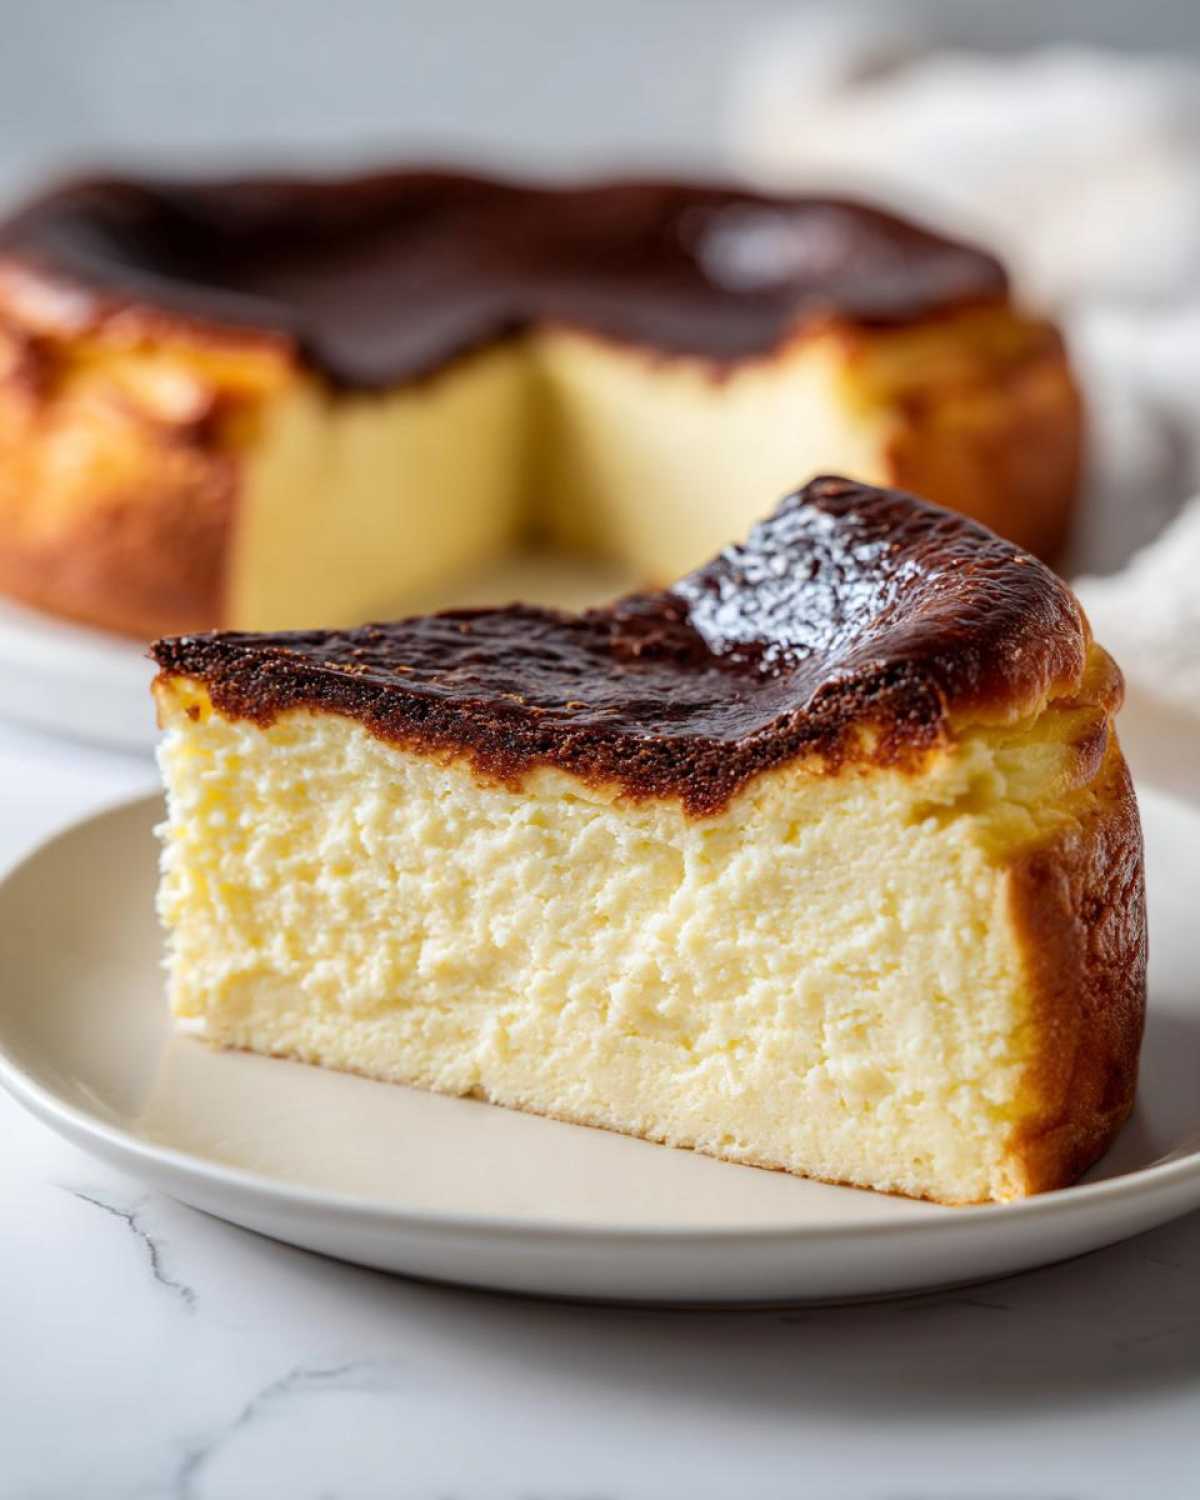
Cooling and Chilling Your Basque Burnt Cheesecake
Okay, this next part requires the most patience, which is funny because the actual baking was so fast! Once you pull that gorgeous, dark cheesecake out of the oven, you must resist cutting into it immediately, I know, I know, it smells heavenly! But you have to trust the process here for that velvety cheesecake filling to set properly.
First, let it cool down right on the counter at room temperature for a good three hours. It’s totally normal to watch it deflate dramatically as it cools—it sinks right down in the middle, making those crispy edges stand up even higher! That’s exactly what you want in this rustic cheesecake dessert; it tells you the inside is still soft and custardy.
After it’s cooled fully on the counter, it then needs chilling time. We’re talking a minimum of six hours in the fridge, but honestly, overnight is always the sweet spot. When you slice it the next day, that center will have firmed up into that decadent, creamy layer we worked so hard for. Don’t rush this chilling part, or you’ll end up with a soupy mess!
Troubleshooting Common Basque Burnt Cheesecake Issues
Even though this is the easiest cheesecake on the planet, baking is still baking, and sometimes things don’t look exactly like the pictures! I’ve definitely had a few wobbly moments with my early attempts at the basque burnt cheesecake, so don’t worry if yours doesn’t look flawless right when it comes out of the oven.
Why isn’t my top burnt enough?
This is a common one, especially if you’re used to delicate, pale cheesecakes! If you pull your cake out and the top is just golden brown instead of dark brown or ‘burnt,’ you probably didn’t let it get hot enough or didn’t leave it in long enough.
My secret weapon here is the high heat—we need that 200°C (400°F) to really caramelize the sugar fast. If your oven runs cool, you might need to bump it up to 210°C, or simply give it an extra 5 to 10 minutes toward the end. Just watch for that dramatic jiggle in the center; that’s your cue!
Help! My center is too liquidy!
If you slice into your cake after chilling and the middle is still totally soupy, not just creamy, two things are the likely culprits. First, and I can’t stress this enough for achieving that creamy burnt cheesecake, your ingredients were too cold when you started mixing. Cold cream cheese doesn’t blend properly with the sugar, and that uneven base leads to a loose final texture.
Second, you didn’t bake it long enough! Remember, we are looking for that massive jiggle right when you take it out. If you pull it when it looks even slightly set in the middle, it will be firm and maybe even dry after chilling. Don’t be shy; let it bake until it looks dangerously underdone in the very center.
Did I mess up if there are tiny cracks?
Unlike traditional New York style cheesecakes where cracks send us running for the sour cream topping, cracks on a basque burnt cheesecake? Honestly, I barely notice them! Because we don’t use a water bath and we let it cool slowly on the counter, it should deflate gently and smoothly. But if you see a tiny crack or two near the very edge? Don’t sweat it! That just adds to the beautifully rustic cheesecake dessert charm. Just cover it with parchment paper and let it chill, nobody will ever notice once it’s sliced.
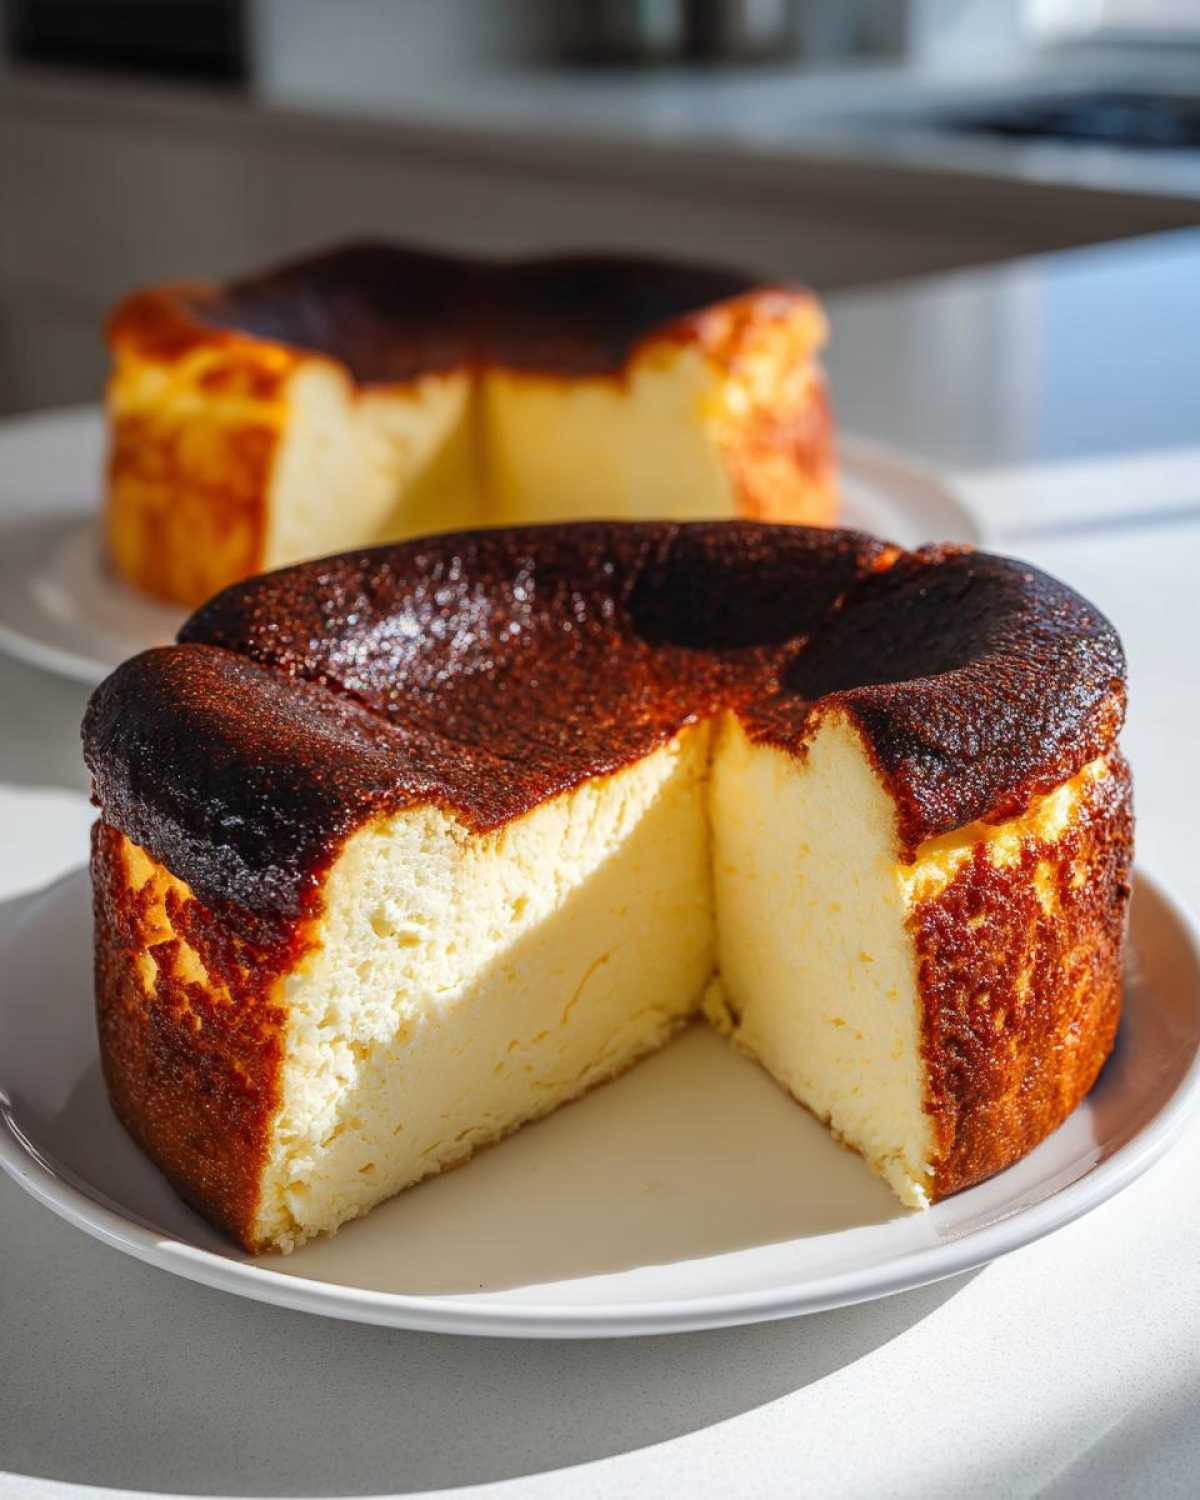
Variations: Making Basque Cheesecake Loaf Pan Style
Now, I know not everyone has a 9-inch springform pan lying around, or maybe you’re just baking for two and don’t want a giant cheesecake that lasts a week! So, yes, you absolutely can adapt this recipe for a smaller format, and making a basque cheesecake loaf pan version is such a smart way to go.
The key to success when switching pan styles isn’t really about the ingredients—they stay the same—it’s all about managing the heat transfer. A loaf pan is deeper and narrower than a springform, which means the middle takes longer to cook through while the outside risks burning too fast if we aren’t careful.
You’ll want to use a standard 8×4 inch loaf pan for this. Just like the springform, you need to line it generously with parchment paper. When you do this, make sure you cut the paper into a long strip that lines the long sides, and then cut two smaller squares to basically create a little ‘+’ shape right in the bottom. You want a ton of overhang, maybe 2 inches sticking straight up on the ends!
When baking, keep your temperature at the required 200°C (400°F) for the first 45 minutes. Because the batter is deeper in the loaf pan, it needs that initial blast of dry heat to set the crust you desire for the caramelized cheesecake top. However, because you are dealing with a deeper layer, you must start checking it sooner than the full 60 minutes.
Around 45 minutes, give that pan a gentle shake. If it still looks very wobbly but the edges are darkening nicely, you’re good! It might take up to 15 minutes longer than the round version, so start checking every five minutes after minute 45. You are looking for the same result: edges set, center wildly jiggly. If you bake it until the center is firm in the loaf pan, you’ll lose that amazing decedent creamy dessert texture we love about the proper basque burnt cheesecake recipe. It’s a balancing act, but totally worth the slight adjustment!
Serving Suggestions for This Impressive Party Dessert
This home-made cheesecake recipe is already such a showstopper with that dark, dramatic top, it barely needs any help to be the star of any gathering. That’s what I love about it—it’s a true gourmet simple dessert that does all the heavy lifting presentation-wise for you.
Once it’s fully chilled, you can carefully lift it out of the springform pan using those crinkly parchment paper handles we insisted on earlier. Place it right onto a pretty serving platter. You don’t need frostings or piped decorations, but if you want to add just a little something extra, I have a few favorite tricks.
The Simplest Finishing Touches
My absolute favorite way to serve the basque burnt cheesecake is just as it is, maybe with a light, almost ethereal dusting of powdered sugar right over the top. You can use a fine-mesh sieve for this. It provides a beautiful, soft white contrast against that dark, almost black crust, and it doesn’t interfere with the flavor at all.
For a slightly brighter finish, try adding some acidity to cut through the richness. Since this cheesecake is so dense and rich, you need something light on the side. I usually aim for fresh fruit—raspberries or sliced strawberries work miracles! If you happen to have my recipe for bakery-style blueberry scones, you know how much I adore fresh berry flavors!
Another easy idea is a light drizzle of high-quality salted caramel sauce, but use it sparingly! Just a few artful lines across the slice once everything is plated. This really enhances the caramelized notes already present in the crust.
Tips for Perfect Party Slices
Since the texture is so creamy, you absolutely must use a very sharp knife when cutting slices for your guests. What I do is warm my knife under hot water for about 30 seconds, wipe it completely dry, and then slice. Wipe the knife clean between every single cut.
This technique ensures you get clean, gorgeous slices that show off that amazing interior contrast. If you try to cut it with a dull or cold knife, you’ll just end up dragging that beautiful velvet filling, and you’ll lose the clean look of this impressive party dessert.
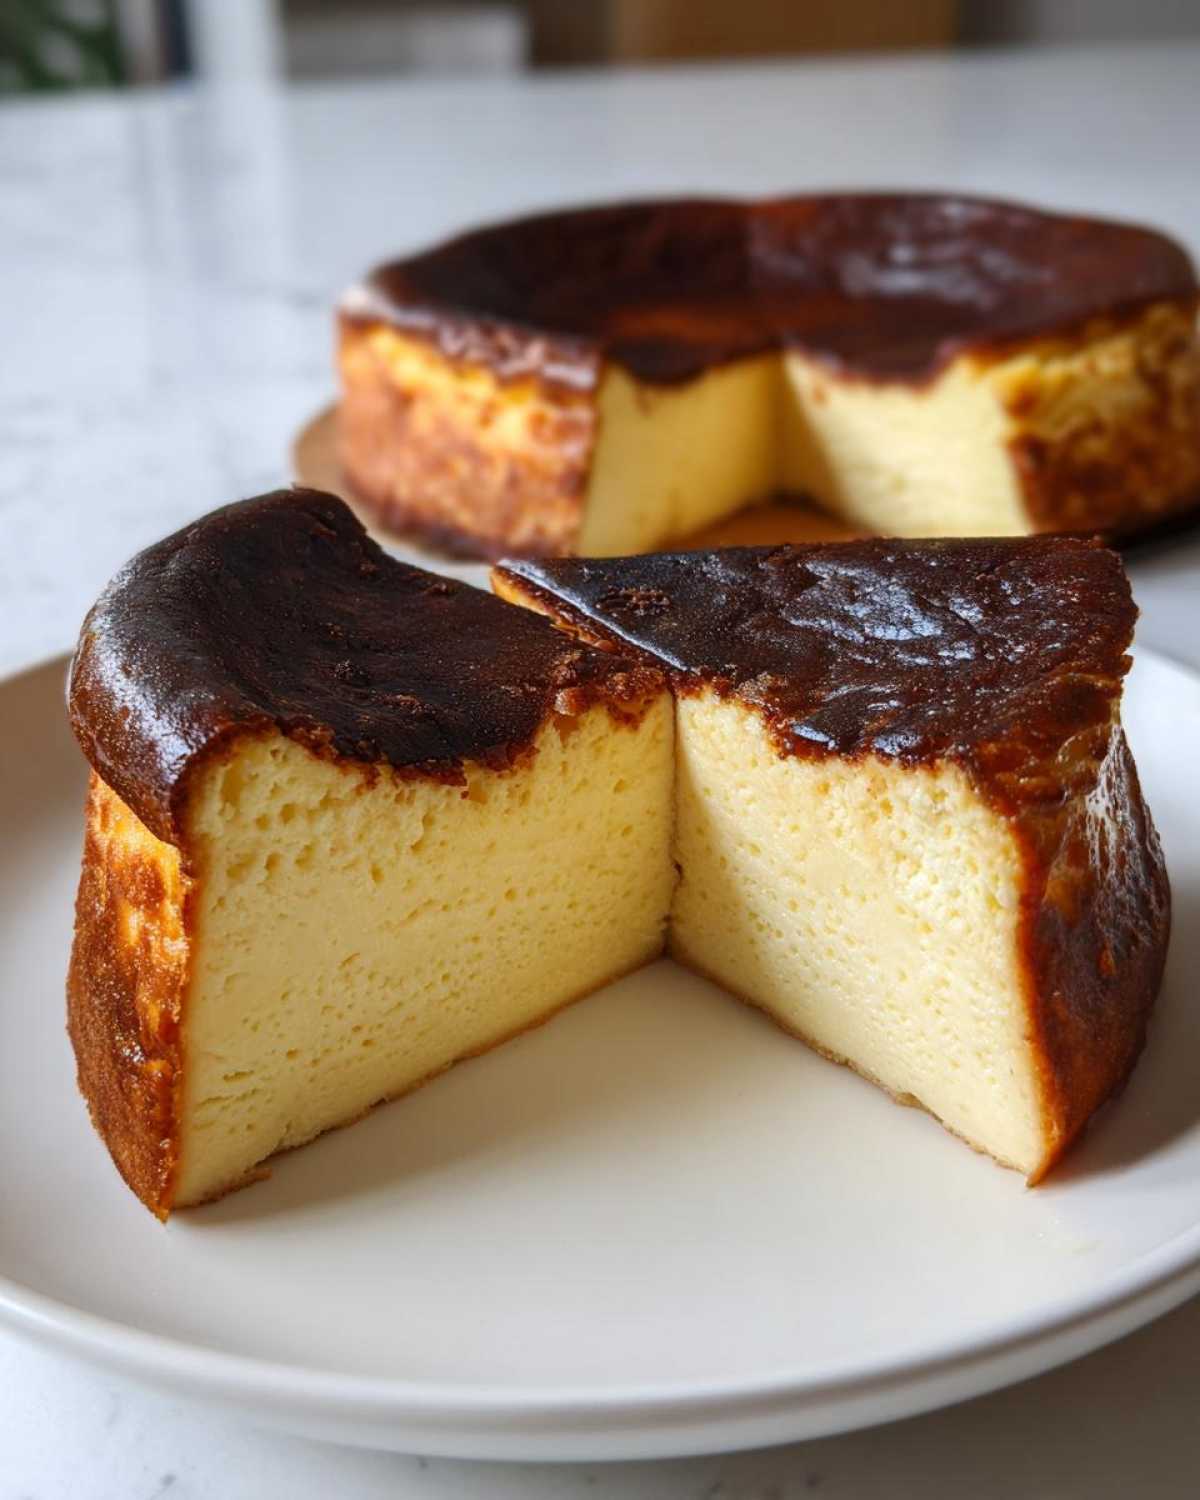
Serve it slightly cool, straight from the fridge, or let it sit out for about 15 minutes before everyone digs in. That little bit of warming lets the texture soften just perfectly.
Storage and Reheating Instructions for Basque Burnt Cheesecake
Alright, this is the part people always ask me about after they’ve devoured the first slice! Because this basque burnt cheesecake is so rich and creamy, it actually keeps remarkably well, which makes it the perfect make-ahead dessert for parties. Store it properly, and you can enjoy those creamy layers for days.
First things first: always cover it up! Once you’re done slicing and have that first round out of the way, wrap the remainder of the cheesecake tightly in plastic wrap. I usually do one layer of cling film, and then I tent some aluminum foil over that, just to be extra cautious about any fridge smells sneaking in.
How Long Does This Cheesecake Last in the Fridge?
When kept tightly covered in the refrigerator, this cheesecake holds up wonderfully for about four to five days. Honestly, I think it tastes even better on day two because the flavors have had time to really settle and meld together. It firms up just a touch more than it does overnight, but it stays incredibly velvety. Don’t forget, this is a no water bath cheesecake, so as long as it’s covered, it handles the cold much better than its watery cousins.
Can You Actually Freeze Basque Burnt Cheesecake?
Yes, you absolutely can freeze it! If you made one using the basque cheesecake loaf pan method or a full round, and you know you can’t possibly eat it all, wrapping it well saves the day. Cut the cheesecake into individual slices first—this is so much easier than trying to slice a rock-hard frozen block later on. Wrap each slice individually in a layer of plastic wrap, then slide those wrapped slices into a heavy-duty freezer bag. You want to squeeze out as much air as possible before sealing it up tight.
When frozen properly, it lasts great for up to two months. I’ve kept mine longer, but honestly, they never last that long in my house!
The Reheating Question (Spoiler: Don’t Reheat It!)
If you’ve taken your creamy burnt cheesecake out of the fridge or freezer, you’re not going to want to reheat it. This Spanish cheesecake is designed to be served cool or perhaps just slightly cooler than room temperature. High heat will absolutely ruin that gorgeous, dense, yet yielding center.
If you froze it, just transfer the wrapped slices to the refrigerator and let them thaw slowly overnight. In the morning, let it sit on the counter for about 20 minutes before serving. You want that slight softening to bring back the luscious texture, but you never want it warm. The slight chill is part of what keeps this dessert feeling so unbelievably light and refreshing!
Estimated Nutritional Data for Basque Burnt Cheesecake
Alright, let’s be real here—this basque burnt cheesecake is pure indulgence, and we aren’t going to pretend it’s health food! This recipe uses a lot of full-fat dairy because that’s what creates that signature creamy magic we love, so the numbers definitely reflect that richness. But hey, you only live once, right?
I put together the nutritional breakdown based on the hefty ingredient list, but take this with a grain of salt! Depending on the brand of cream cheese you use or exactly how much sugar clings to the sides of the bowl after you clean it out, these numbers are always going to shift slightly. This is the best estimate I could come up with for a single slice, assuming you get 10 servings out of the whole thing.
Quick Look at the Numbers Per Slice
It’s definitely on the heavier side calorically, which is why just one slice of this decedent creamy dessert is usually more than enough!
- Serving Size: 1 slice
- Calories: 450
- Carbohydrates: 30 g
- Sugar: 35 g (Yes, it’s sweet, but that’s what makes it so good!)
- Fat: 35 g
- Protein: 9 g
Breaking Down the Fat Content
You can see that the fat takes up a large chunk of the calories, and that’s expected given the 900g of cream cheese and 480ml of heavy cream. But remember, fat is flavor, and in a crustless cheesecake recipe like this, it’s structural integrity too!
- Saturated Fat: 22 g
- Unsaturated Fat: 13 g
- Trans Fat: 0.5 g
We try to keep that trans fat low, but zero is tough when you are working with dairy products. Mostly, just enjoy knowing you are eating something truly special!
A Note on Sodium and Fiber
The sodium content is pretty standard for a baked, sweetened item, mostly coming from the salt you add, so that’s fine. The fiber is almost non-existent since this is a no crust cheesecake recipe, so don’t look here for your daily greens!
- Sodium: 250 mg
- Fiber: 0.5 g
- Cholesterol: 220 mg
Seriously, treat yourself when you make this basque burnt cheesecake. It’s a celebration dessert, and knowing the numbers just helps you appreciate the indulgence factor!
Print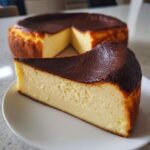
Easy Basque Burnt Cheesecake
- Total Time: 75 min
- Yield: 10 servings
- Diet: Vegetarian
Description
A straightforward recipe for a crustless Basque Burnt Cheesecake, focusing on achieving a deeply caramelized top and a creamy, velvety interior without using a water bath.
Ingredients
- 900 g cream cheese, softened to room temperature
- 250 g granulated sugar
- 6 large eggs, room temperature
- 480 ml heavy cream (35% fat)
- 1 teaspoon vanilla extract
- 1/4 teaspoon salt
- 30 g all-purpose flour
Instructions
- Preheat your oven to 200 degrees Celsius (400 degrees Fahrenheit).
- Line a 9-inch springform pan with two large sheets of parchment paper, allowing the paper to overhang significantly on all sides. Do not worry about neatness; the rustic look is desired.
- In a large bowl, beat the softened cream cheese with an electric mixer until completely smooth. Scrape down the sides of the bowl.
- Gradually add the sugar and beat until just combined and smooth. Do not overmix.
- Add the eggs one at a time, mixing on low speed after each addition until just incorporated.
- Pour in the heavy cream, vanilla extract, and salt. Mix on low speed until the batter is uniform.
- Sift the flour over the batter and mix briefly on low speed until no streaks of flour remain. The batter will be thin.
- Pour the batter into the prepared pan.
- Bake for 50 to 60 minutes. The edges should be set and deeply browned, and the center should still jiggle significantly when the pan is gently shaken.
- Remove the cheesecake from the oven. It will deflate as it cools.
- Let the cheesecake cool completely at room temperature for at least 3 hours.
- Chill the cheesecake in the refrigerator for a minimum of 6 hours, preferably overnight, before serving.
Notes
- Use room temperature ingredients for the smoothest batter texture.
- Do not use a water bath; this recipe relies on high heat for the characteristic char.
- If you prefer a loaf pan, use an 8×4 inch pan lined with parchment paper and adjust the baking time slightly, checking for doneness around 45 minutes.
- The center will look underdone when you remove it; this is correct for a creamy texture.
- Prep Time: 15 min
- Cook Time: 60 min
- Category: Dessert
- Method: Baking
- Cuisine: Spanish
Nutrition
- Serving Size: 1 slice
- Calories: 450
- Sugar: 35
- Sodium: 250
- Fat: 35
- Saturated Fat: 22
- Unsaturated Fat: 13
- Trans Fat: 0.5
- Carbohydrates: 30
- Fiber: 0.5
- Protein: 9
- Cholesterol: 220

Comments are closed.