
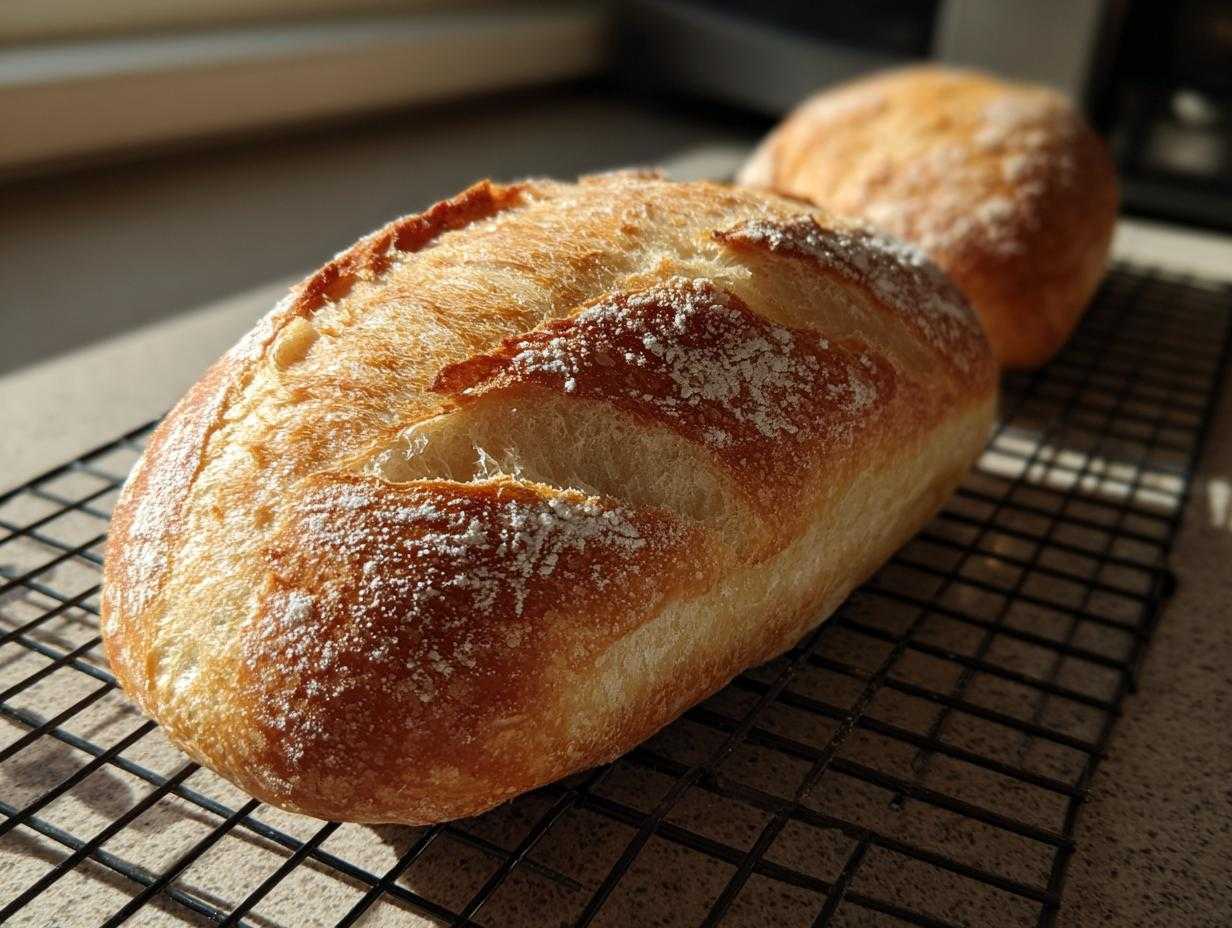
Oh my goodness, you just *have* to smell my kitchen right now! Seriously, the aroma of freshly baked bread—that yeasty, slightly sweet scent—is pure heaven. If you’ve ever walked into a bakery and regretted that you couldn’t just bottle that smell, I finally have the answer for you. I’m sharing my absolute favorite guide for making **Easy Homemade Soft and Crusty French Bread** right in your own oven. Forget those dry, sad loaves from the store; this recipe nails that perfect duality: a beautifully crackly, **bakery-style bread** exterior that shatters just right, protecting the wonderfully soft and fluffy interior. I’ve perfected this over years, making it for every family Sunday dinner, and trust me, it’s simple enough for your very first time making bread!
Why This Easy French Bread Recipe is Your New Favorite
Look, bread baking can feel intimidating, right? But I promise you, this **Quick French Bread Recipe** is a total game-changer. It’s all about that texture contrast! You get the truly satisfying crunch from the crust, but the inside stays incredibly soft and fluffy—that’s what we’re aiming for with **Soft French Bread at Home**.
The best part? It comes together so fast. From start to finish, you’re looking at under two hours, and most of that is just the dough doing its magical rising thing. This loaf shines as a perfect **Dinner Side Bread** or when you slice it open wide—it makes the best foundation for a hearty lunchtime sandwich. Honestly, once you smell this baking, you won’t ever go back to the store-bought stuff. And it pairs perfectly with something rich, like my Garlic Herb Butter Roasted Chicken!
Ingredients for the Best Homemade French Bread Recipe
Gathering your supplies is the easiest part, and getting these measured right is half the battle won! When you’re making bread from the ground up, precision matters, especially with the yeast! Trust me, you want to make sure you have everything ready before you start mixing. Here are the essentials for this **Homemade French Bread Recipe**:
- 3 cups all-purpose flour
- 1 teaspoon salt
- 1 packet (2 1/4 teaspoons) active dry yeast
- 1 cup warm water (about 105-115°F)
- 1 tablespoon granulated sugar
- 1 tablespoon olive oil, plus more for greasing
- 1 egg white, lightly beaten (for egg wash)
Ingredient Notes and Substitutions for Your French Bread
I always stress quality ingredients because they really shine through in simple loaves like this. Let’s quickly talk about a couple of things:
First, that water temperature for the yeast? That’s my professional little tip for you! If the water is too cold, your yeast just naps; too hot, and you kill it dead. Aim squarely for that 105°F to 115°F window—it’s the perfect warm hug for the yeast so it wakes up happy and foamy. You’ll see it bloom!
The egg white wash sounds fancy, but it’s just there for color and sheen. A quick brush gives you that gorgeous, glossy golden-brown crust we all love. If you skip it, the crust tones down, but it’ll still bake up!
I specified all-purpose flour because we are aiming for that lovely soft interior; it keeps the crumb light. If you sneak in bread flour, you’ll get a chewier loaf—which is delicious, don’t get me wrong—but it pulls you away from the classic **fluffy loaf recipe** texture we established here in the basics.
Step-by-Step Instructions for Easy French Bread
Okay, here we go! This is where the magic happens. Don’t rush any of these stages, especially the rising. Think of it like giving your dough time to develop character. If you want the absolute best result when you **make French bread from scratch**, patience is your secret weapon.
Activating the Yeast and Mixing the French Bread Dough
First things first: wake up that yeast! Grab your warm water—remember that sweet spot around 110°F—and stir in the sugar. Sprinkle that yeast packet over the top. Go walk away for about 5 to 10 minutes. When you come back, you should see froth! If it’s foamy, yay! Your yeast is alive and ready to work its yeasty wonders for this **simple yeast bread**.
Next, whisk your flour and salt together in a big mixing bowl. Then, pour in that bubbly yeast mixture and the olive oil. Mix it all up with a wooden spoon until it looks like a messy, shaggy cloud. That’s exactly right for this stage—don’t overmix it here!
Kneading and First Rise for a Fluffy Loaf Recipe
Now we get our hands dirty! Dump that shaggy dough onto a lightly floured counter. We need to knead this for about 6 to 8 minutes until it feels totally different—it should be smooth, just starting to look plump, and feel elastic under your fingers. You want that beautiful, pliable dough that promises a great result for your **fluffy loaf recipe**.
Lightly oil a clean bowl. Pop the dough in, turn it over so it gets a little coat of oil all around, cover it up tight, and find it a nice warm spot in your kitchen. Let it chill out and double in size. This first rise takes time, usually 60 to 90 minutes, depending on how warm your kitchen is.
Shaping and Final Proofing of Your French Bread
Once it’s ballooned up, gently punch the air out—we call that deflating. Turn it onto your counter and gently shape it into a long, even cylinder, maybe 12 or 15 inches. Be gentle here; we don’t want to knock all the air out we just worked so hard to create!
Place your shaped **French bread** onto a parchment-lined baking sheet. We cover it loosely again—maybe with the towel you used before—and let it have a second nap. This one is shorter, just 30 minutes. This soft dough needs that final boost before baking.
Tip! If you want your dough to rise perfectly, check out some of my other baking homemade bread tips; they really help beginners nail the environment!

Achieving the Bakery Style Bread Crust
This is the secret sauce for that amazing crunch! Crank your oven up to 400°F (200°C). While it heats, put an empty, shallow pan on the bottom rack. When the oven is hot, place your shaped loaf in, give the top a light brush with that beaten egg white wash, and then make about three or four diagonal cuts on the top with a super sharp knife—just half an inch deep.
When you slide your bread in, be careful! Quickly pour about half a cup of very hot water into that hot pan on the bottom rack, and slam that oven door shut right away. That burst of steam is what creates that magnificent **bakery style bread** shell. Bake for 20 to 25 minutes until it sounds hollow when you tap the bottom. If you’d rather skip the steam drama, you can find an easier route to a softer crust in this guide from external friends here.

Baking Homemade Bread Tips for Perfect French Bread
So, you’ve got your loaf in the oven, but how do you guarantee success? I’ve learned a few tricks over the years to make sure this **Homemade French Bread Recipe** turns out right every single time. It’s not just about the ingredients; it’s about managing the heat!
First, oven consistency is key. You need a screaming hot oven (that 400°F we set) to get the action started quickly, especially if you used that steam trick we just talked about. If your oven runs notoriously hot or cold, grab a cheap oven thermometer. You want to make sure that dial on your oven is actually telling the truth! A wildly inaccurate temperature is a silent killer for great bread.
When those 20 or 25 minutes are up, it’s time for the moment of truth. Don’t just look at the color; you need to test for doneness! My absolute favorite way to check if the internal structure is set and the moisture is right is the hollow tap test. Carefully use an oven mitt to take the bread out of the pan. Gently flip it over and tap the bottom of the loaf with your knuckle. If it sounds satisfyingly hollow, like you’re knocking on a sturdy wooden door, it’s done! If it sounds dull or squishy, give it another few minutes.
If you find that your crust is getting too dark before the inside is done, you have two easy options. You can quickly lay a piece of aluminum foil loosely over the top—just draping it, not sealing it—or you can turn the oven down by 25 degrees and keep baking until that hollow tap sounds perfect. If, on the other hand, you want that shatteringly crisp crust, you can check out how my friends over at Taste Within Aya get that incredible crunch in their baguettes; it’s brilliant stuff for anyone chasing that crusty exterior thrill! You can see their crust secrets here.
Remember, mastering the bake takes practice, but this recipe gives you a fantastic foundation. For more wisdom on keeping things consistent in the oven, I always refer back to my main post on baking homemade bread tips!
Serving Suggestions for Your Fresh French Bread
Now that you’ve poured all that love into making the **best homemade bread**, the real fun begins: eating it! I mean, why else would we bake, right? This **French bread** is so incredibly versatile—it steps up for every meal, from humble weeknight dinners to weekend feasts. Don’t let it sit around plain; it deserves some attention!
The absolute easiest and most rewarding way to enjoy a slice of this warm, crusty delight is right out of the loaf. Slice it thick, melt a generous pat of good salted butter on top, and just—*sigh*—enjoy. It’s amazing how simple ingredients can create such comfort.
For an appetizer, you can’t beat dipping. Set out a little dish of really high-quality olive oil with a tiny splash of balsamic vinegar mixed in. It’s classic for a reason! You get that little acidic tang against the soft crumb of your **Dinner Side Bread**. Dip, swirl, repeat! This is practically mandatory when we’re serving something saucy, like if I make my Spaghetti Aglio e Olio with Kale—plenty of bread on hand to sop up every last bit of that garlic oil!
And of course, these loaves are champion sandwich makers. Because we aimed for that perfectly **tender crumb bread** interior, slicing it wide for layering meats and cheeses results in a sandwich that won’t immediately fall apart after the first bite. It holds up beautifully and absorbs just the right amount of moisture from tomatoes or dressings without getting soggy too fast. Honestly, this is the ideal **Bread for Sandwiches** starter!
Storage and Reheating Instructions for Homemade French Bread
Now, listen up, because this is important, especially for a loaf like this! Because our main goal was that melt-in-your-mouth soft interior, this particular **Homemade French Bread Recipe** (which is absolutely worth the effort!) doesn’t have the hard, sealed-off structure that keeps supermarket bread good for a week. This soft crumb goes stale faster than a hard artisan loaf, so we have to treat it gently.
The golden rule: eat it the day you bake it! I know, I know, but it’s the truth! If you have leftovers—and I hope you do because that’s a win—you want to wrap it loosely in a brown paper bag and keep it on the counter at room temperature. Do *not* put it in the fridge! Cold temperatures actually speed up the staling process for homemade bread, turning that beautiful soft crumb hard and dry way too quickly.
If you find your loaf has stiffened up by Day Two, don’t worry about throwing it out! We have a quick resurrection trick saved just for this moment. You need to hit it with a blast of high heat to wake up the moisture trapped inside.
Five Minutes to Freshness: Reheating Your French Bread
This works beautifully whether you have half a loaf or the whole thing. Preheat your oven—yes, the oven again!—to about 325°F (160°C). You aren’t baking it again; you’re just warming it up.
Wrap that slightly stale French bread loosely in aluminum foil. This traps just enough steam to soften the crumb without letting the crust get soggy. Pop it in the preheated oven for about 5 to 8 minutes. You want it hot all the way through!
When it comes out, unwrap it immediately and let it sit directly on the wire rack for about two minutes before slicing. That little bit of air exposure lets the crust firm back up slightly, giving you back that crisp exterior while the inside melts in your mouth again. It’s like magic! This simple reheating trick is perfect for reviving your **Dinner Side Bread** just before serving.

Frequently Asked Questions About Making French Bread
I know you might have a few lingering questions swirling around, especially if this is your first time diving into **making French bread from scratch**! That’s totally fair; baking always brings up little uncertainties. I’ve gathered the most common ones I hear from folks trying this recipe out, so let’s knock those right out!
Can I make this French Bread Recipe faster, like a One Hour Bread Recipe?
That’s the million-dollar question, isn’t it? Who doesn’t love convenience? While this recipe is certainly quick compared to slow-fermented loaves—you’re probably looking around 1 hour 40 minutes total, which is fantastic for a **French bread** loaf—I strongly caution against trying to rush those rise times significantly.
The flavor and the beautiful, airy structure don’t just happen; they are *developed* during that resting time where the yeast gets busy. If you try cramming that 60-to-90-minute first rise into 30 minutes, you’ll end up with a dense, slightly gummy loaf that probably won’t feel as fluffy as you hoped. You need that time investment for the best texture outcome!
How do I ensure my French Bread has a very soft interior?
If you are chasing that ultra-soft, pillow-like inside—that glorious **tender crumb bread** texture—you really need to focus on two key areas we discussed: the kneading and the warmth.
First, commit to that 6 to 8 minutes of kneading until the dough is smooth. That develops the gluten structure just enough to create those air pockets we love. Second, make sure your rising environment is genuinely warm, but not hot. A slightly warm spot makes the yeast much happier, giving you a better rise and, ultimately, that lighter, softer interior.
What if I don’t have a baking stone for my French Bread?
Oh, don’t you even worry about that! I usually just grab a standard baking sheet myself for this recipe, and honestly, the results are nearly identical if you use one little helper: parchment paper. Skip the stone entirely if you don’t have one!
As I noted in the instructions, just line your regular baking sheet with a good sheet of parchment paper before you place your shaped loaf on it for the final proofing. This keeps the bottom from sticking and creates a nice flat surface for baking. Plus, cleanup afterward is just lifting the paper off! It works perfectly for creating that classic **Homemade French Bread Recipe** shape.
Nutritional Estimate for This French Bread Loaf
Okay, so while we are absolutely focused on how this tastes and how beautiful it looks coming out of the oven, I know some of you curious cooks like to keep an eye on the numbers! I’ve pulled together the estimated nutritional breakdown for a single slice of this **Easy French Bread** loaf. Remember, this is just a ballpark figure; your actual results might shift around depending on the brand of flour you use or exactly how thick you slice it!
I tried to keep the ingredients simple, which helps keep unnecessary fats and sugars out, letting those natural flavors shine. This loaf sings because it relies on simple flour, water, and yeast—classic staples for any **Beginner Bread Baking** adventure!
- Serving Size: 1 slice
- Calories: 150
- Sugar: 1g
- Sodium: 250mg
- Fat: 2g
- Saturated Fat: 0.5g
- Unsaturated Fat: 1.5g
- Trans Fat: 0g
- Carbohydrates: 29g
- Fiber: 1g
- Protein: 4g
- Cholesterol: 0mg
There you have it! It’s a lovely, straightforward profile for a slice of fresh, **Crusty Exterior Bread**. Just keep in mind these are estimates. If you’re using premium olive oil, that fat count might nudge up a tiny bit, but trust me, every bit of that fat flavor is worth it for that delicious, **tender crumb bread** texture we worked so hard to achieve!
Share Your Homemade French Bread Success
Alright, my friends, we have reached the best part: the enjoying part! But before you slather that beautiful, warm loaf with butter—which I fully support, by the way—I would absolutely love to hear from you. If you followed along and created this wonderful **Simple Yeast Bread** masterpiece, please let me know how it went!
Did you manage to get that crackly crust just right? Was the inside as soft and fluffy as you dreamed it would be? Don’t keep that triumph to yourself! Head over to the comments section below and give me your feedback. A five-star rating means the world to me and tells other folks that this **Homemade French Bread Recipe** is worth trying.
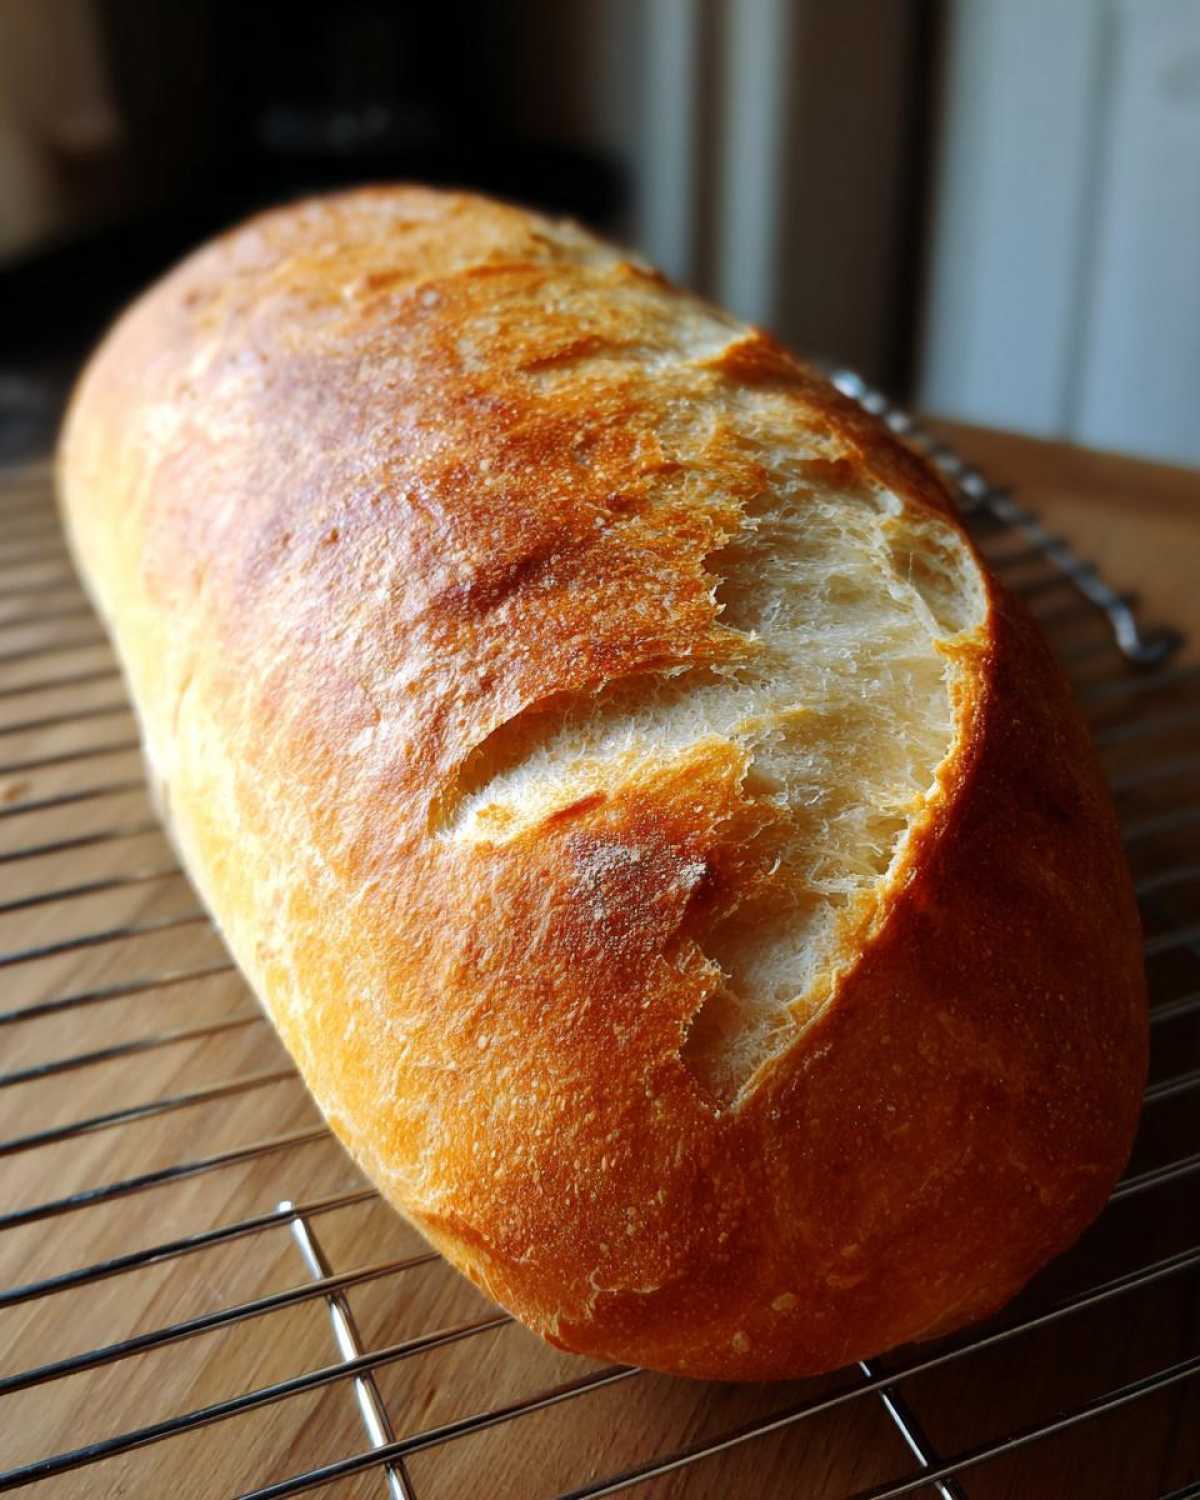
Seriously, nothing makes me happier than seeing photos pop up of your creations! If you snapped a picture of your finished loaf sitting fresh on the cooling rack or being served proudly at your dinner table, please tag me on social media or shoot me a message through my contact page!
Building this community, Forkful Heaven, is all about sharing the joy we find in cooking. Your feedback helps me keep making recipes that are easy, encouraging, and truly delicious. Thank you so much for baking with me today. Enjoy every single slice of that wonderful, crusty bread!
Print
Easy Homemade Soft and Crusty French Bread
- Total Time: 140 min
- Yield: 1 large loaf
- Diet: Vegetarian
Description
You will find this recipe delivers soft, fluffy French bread with a desirable crusty exterior, perfect for dinner or sandwiches. It is much easier than you think to bake this bakery-style loaf at home.
Ingredients
- 3 cups all-purpose flour
- 1 teaspoon salt
- 1 packet (2 1/4 teaspoons) active dry yeast
- 1 cup warm water (about 105-115°F)
- 1 tablespoon granulated sugar
- 1 tablespoon olive oil, plus more for greasing
- 1 egg white, lightly beaten (for egg wash)
Instructions
- In a small bowl, dissolve the sugar in the warm water. Sprinkle the yeast over the top and let it sit for 5 to 10 minutes until foamy. This shows your yeast is active.
- In a large bowl, whisk together the flour and salt.
- Pour the yeast mixture and the olive oil into the flour mixture. Mix with a wooden spoon until a shaggy dough forms.
- Turn the dough out onto a lightly floured surface. Knead for 6 to 8 minutes until the dough is smooth and elastic. You want a soft, pliable dough.
- Lightly grease a large bowl with olive oil. Place the dough in the bowl, turning it once to coat. Cover the bowl with plastic wrap or a clean kitchen towel.
- Let the dough rise in a warm place for 60 to 90 minutes, or until it has doubled in size. This first rise develops the flavor.
- Gently punch down the risen dough. Turn it out onto a lightly floured surface and shape it into a long, even loaf, about 12 to 15 inches long. If you want a true baguette shape, make it longer and thinner.
- Place the shaped loaf on a baking sheet lined with parchment paper or on a baking stone. Cover loosely and let it rise again for 30 minutes. This second rise is shorter.
- Preheat your oven to 400°F (200°C). If you want a crispier crust, place a shallow pan on the bottom rack while preheating to create steam later.
- Brush the top of the loaf lightly with the beaten egg white wash. Use a sharp knife to make three or four diagonal slashes across the top of the dough, about 1/2 inch deep.
- Bake for 20 to 25 minutes, or until the crust is golden brown and the bread sounds hollow when tapped on the bottom. For extra crust, carefully pour about 1/2 cup of hot water into the preheated shallow pan on the bottom rack immediately after placing the bread in the oven, then quickly close the door.
- Transfer the finished French bread to a wire rack to cool completely before slicing. Enjoy this fresh baked bread!
Notes
- For a softer crust, skip adding water to the oven for steam and brush the loaf with melted butter immediately after it comes out of the oven.
- If your kitchen is cold, place the dough bowl inside your oven with just the light on to create a warm spot for rising.
- This homemade French bread recipe works well for making simple sandwiches or serving alongside dinner.
- Prep Time: 20 min
- Cook Time: 25 min
- Category: Baking
- Method: Baking
- Cuisine: French
Nutrition
- Serving Size: 1 slice
- Calories: 150
- Sugar: 1
- Sodium: 250
- Fat: 2
- Saturated Fat: 0.5
- Unsaturated Fat: 1.5
- Trans Fat: 0
- Carbohydrates: 29
- Fiber: 1
- Protein: 4
- Cholesterol: 0


Comments are closed.