

Get ready to bake a cake that’s truly out of this world! When I first saw a Galaxy Mirror Glaze Cake, I was mesmerized. It looked like a piece of the night sky had landed on a dessert plate. That’s when I knew I had to try making one myself. It’s perfect for birthdays, anniversaries, or any moment you want to add a little extra sparkle. My journey in the kitchen, inspired by my uncle’s Texas restaurant, has always been about creating edible magic. This recipe is a culmination of that passion, designed to give you a show-stopping dessert that wows everyone.
What Makes This Galaxy Mirror Glaze Cake Special
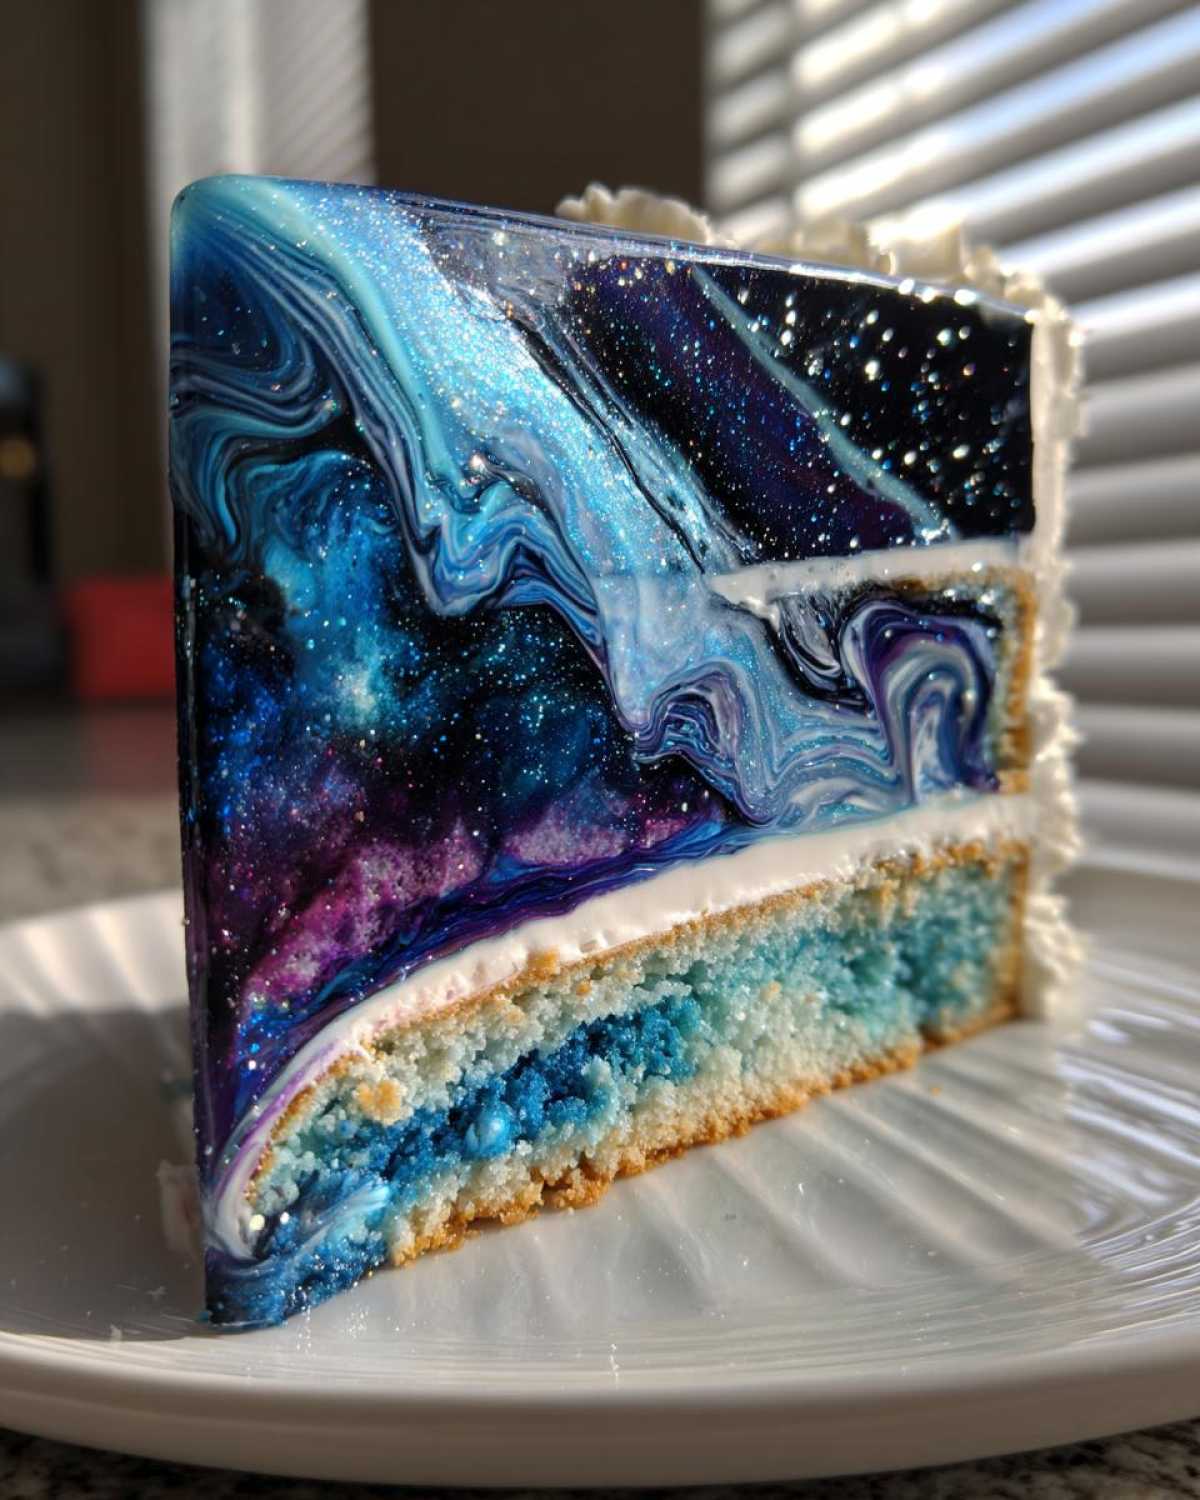
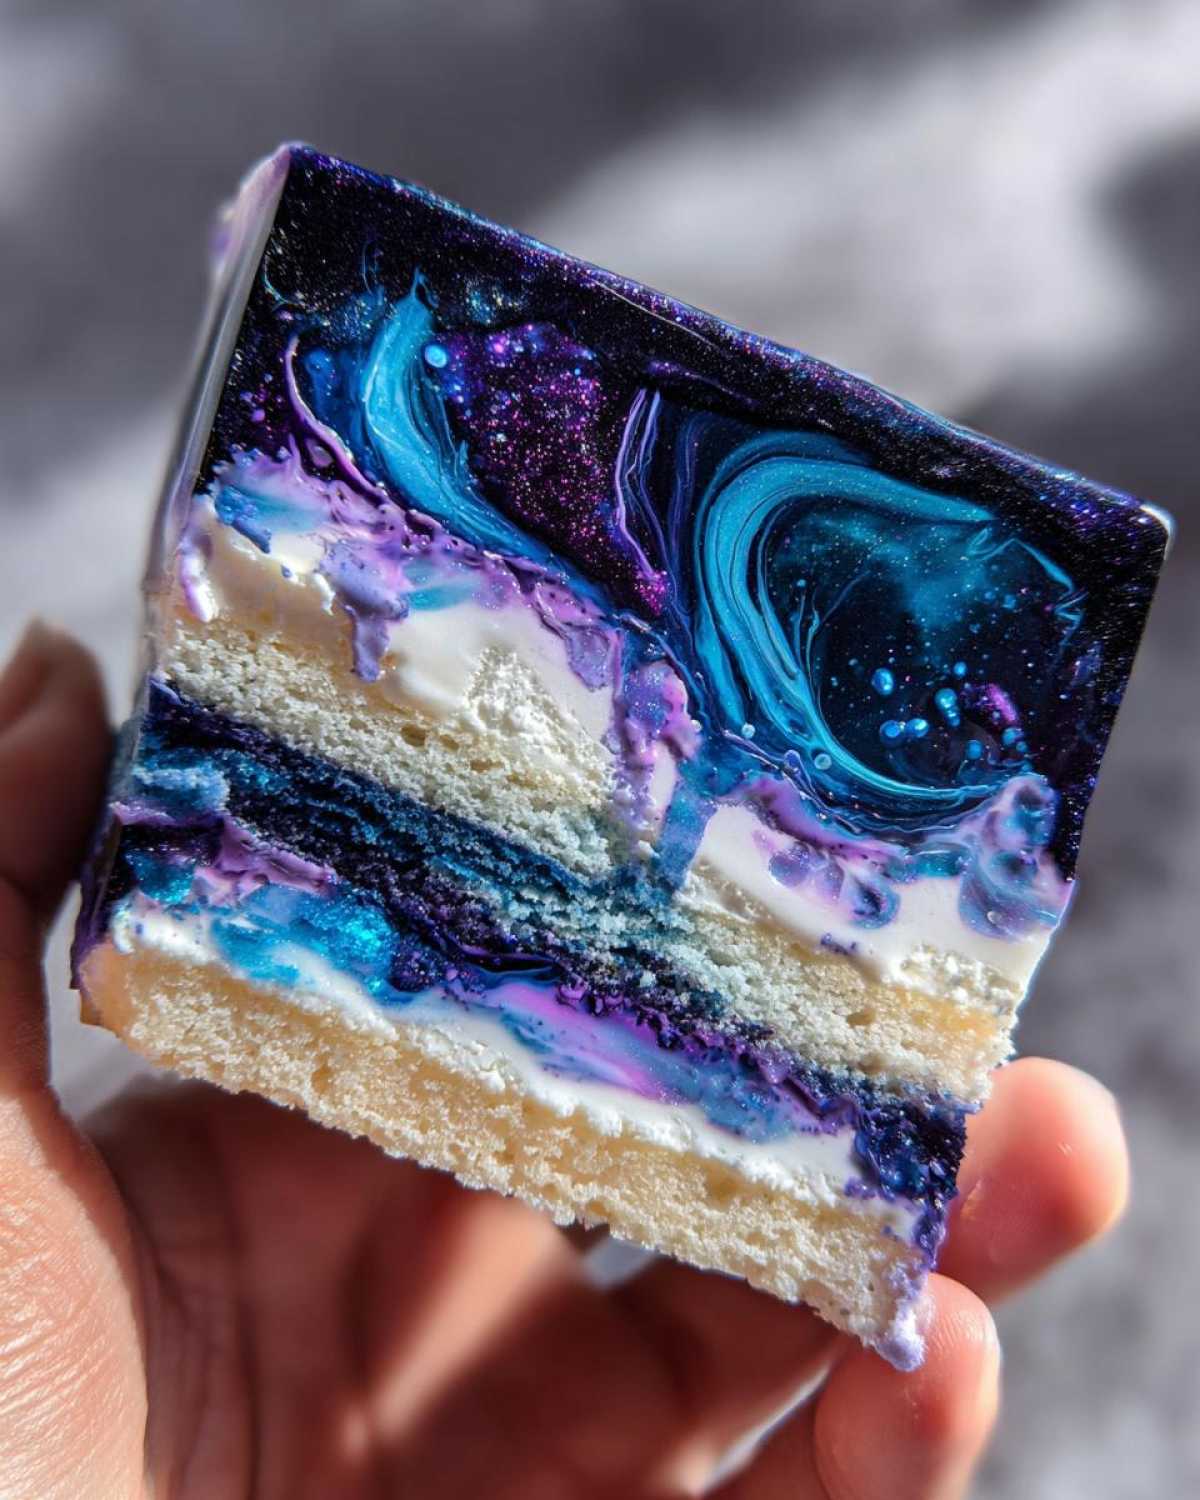
This Galaxy Mirror Glaze Cake isn’t just a dessert; it’s a visual masterpiece. The swirling cosmic colors create a stunning, almost mystical effect that’s sure to impress your guests. It’s the kind of cake that makes people pause and marvel before they even take a bite. For me, creating this cake brings back those early feelings of wonder from my uncle’s kitchen. It’s a chance to bring a little bit of that magic into your home, making any occasion feel extraordinary with this truly show-stopping dessert.
Understanding the Magic of Mirror Glaze
So, what exactly is this magical coating? Mirror glaze is a type of icing made from gelatin, sugar, and condensed milk that creates a smooth, super shiny surface. It’s like a liquid mirror! We use it on this Galaxy Mirror Glaze Cake to give it that incredible, reflective depth, making those cosmic colors pop and swirl just like distant nebulae. It’s the secret to that dazzling, out-of-this-world finish.
Gathering Your Galaxy Mirror Glaze Cake Ingredients
To create your very own slice of the cosmos, you’ll need a few key players. Think of these as your stardust and nebulae for this edible art project. We start with the base of our glaze: granulated sugar, a bit of water, sweet condensed milk, and unsweetened cocoa powder for that deep, dark space backdrop. Heavy cream adds richness.
The magic for that smooth, reflective finish comes from gelatin powder, bloomed in cold water. You’ll also need gel food coloring in white, blue, purple, and black. Gel colors are best because they give intense hues without adding too much liquid. And for that extra twinkle? Edible glitter is a fun, optional addition that really makes your Galaxy Mirror Glaze Cake shine.
- 1 cup granulated sugar
- 1/2 cup water
- 1/2 cup sweetened condensed milk
- 1/4 cup unsweetened cocoa powder
- 1/2 cup heavy cream
- 1 tablespoon gelatin powder
- 1/4 cup cold water
- White, blue, purple, and black gel food coloring
- Edible glitter (optional)
Mastering the Galaxy Mirror Glaze Cake Preparation
Now for the fun part! Let’s bring our cosmic vision to life. This is where the magic truly happens, transforming simple ingredients into a dazzling Galaxy Mirror Glaze Cake. I remember my first attempt; I was a little nervous, but following these steps made it so much easier. Just take your time, and trust the process. It’s all about building those layers of flavor and visual appeal.
Preparing the Base Glaze
First, we need to get our gelatin ready. Sprinkle the gelatin powder over 1/4 cup of cold water in a small bowl. Let it sit for about 5 to 10 minutes. It’ll get nice and thick, like a jelly. Meanwhile, grab a saucepan. Combine the granulated sugar, 1/2 cup of water, sweetened condensed milk, and cocoa powder. Heat this mixture over medium heat. Stir it all up until the sugar is completely dissolved and it looks smooth. This is key for a lump-free glaze later.
Bring this smooth mixture to a boil, then turn the heat down and let it simmer gently for just 3 minutes. Take it off the heat. Now, stir in that bloomed gelatin until it’s all dissolved. Finally, whisk in the heavy cream. Your base glaze is almost ready for its cosmic makeover!
Coloring and Achieving the Galaxy Effect
This is where your Galaxy Mirror Glaze Cake gets its personality. Pour the warm glaze through a fine-mesh sieve into a heatproof bowl. This catches any tiny lumps, ensuring a super smooth finish. Now, divide the glaze into separate bowls – one for each color: white, blue, purple, and black. Add your gel food coloring to each bowl. Gel colors are great because they’re concentrated. If you’re feeling extra sparkly, add some edible glitter to one or more of your colors now.
The temperature is super important here. Let these colored glazes cool down to about 85-90°F (29-32°C). This temperature is just right. Too hot, and the glaze will be too runny. Too cool, and it won’t flow nicely. I usually use a thermometer to get it perfect. This temperature control is what gives you that amazing mirror effect on your Galaxy Mirror Glaze Cake.
Glazing Your Masterpiece
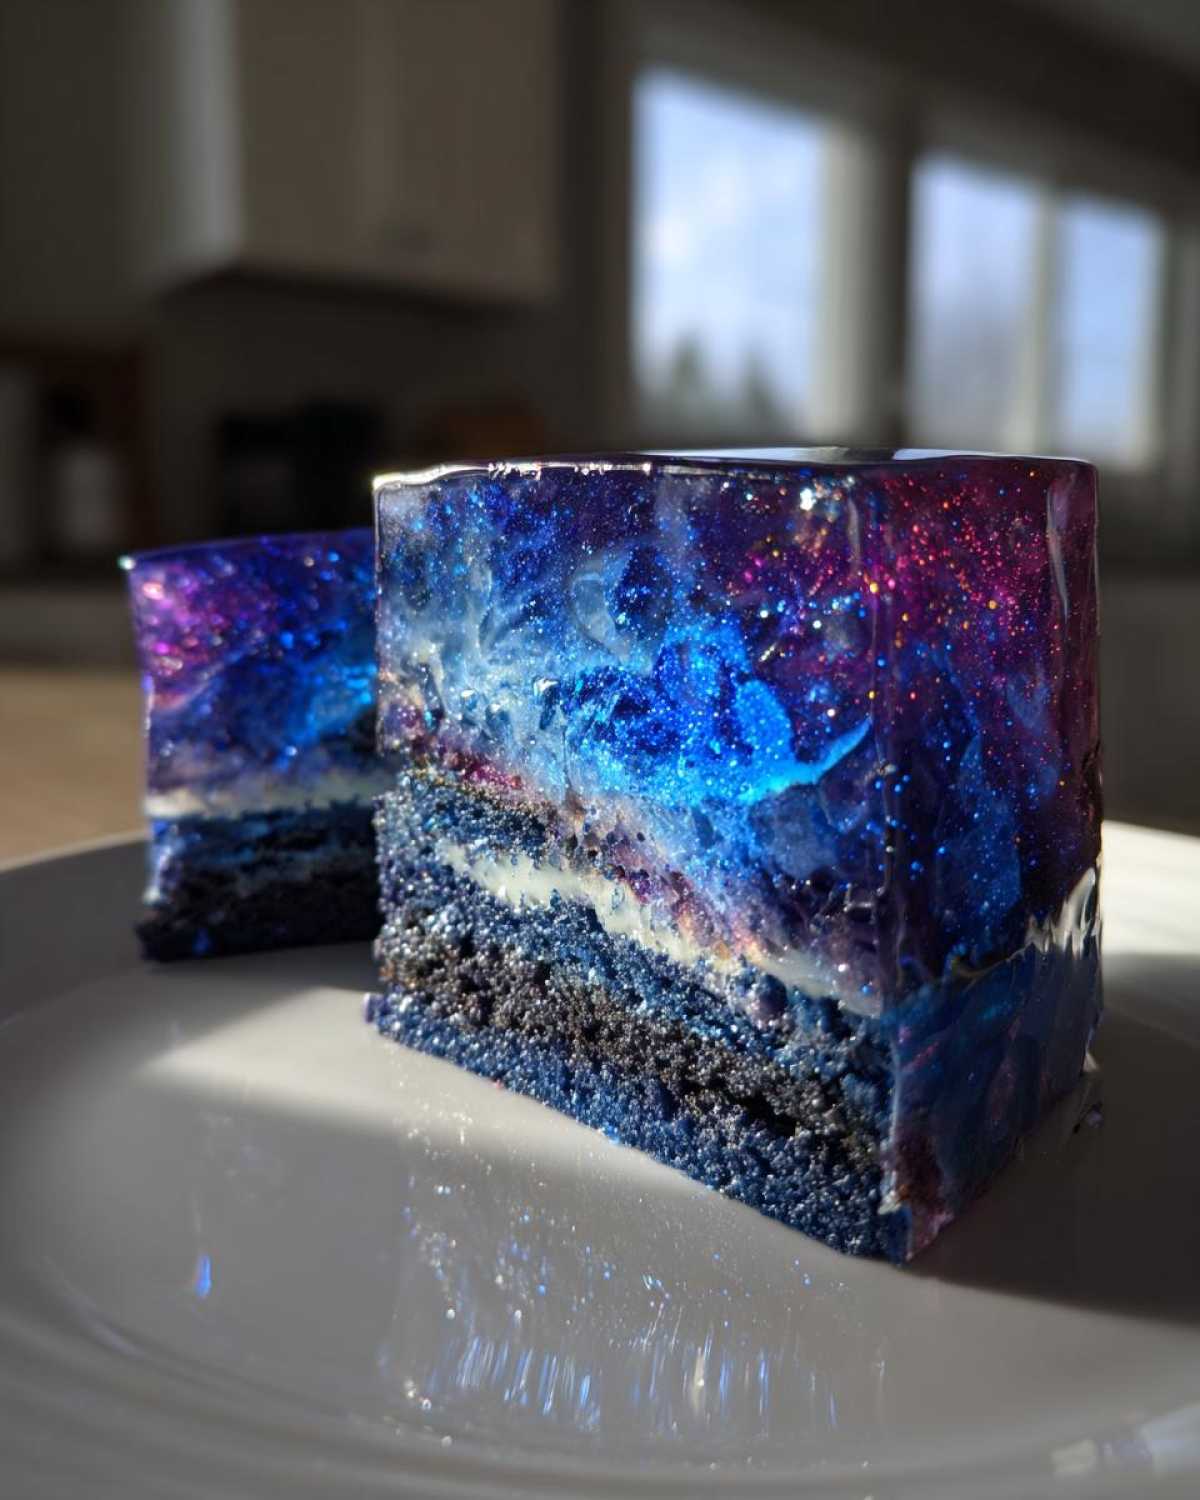
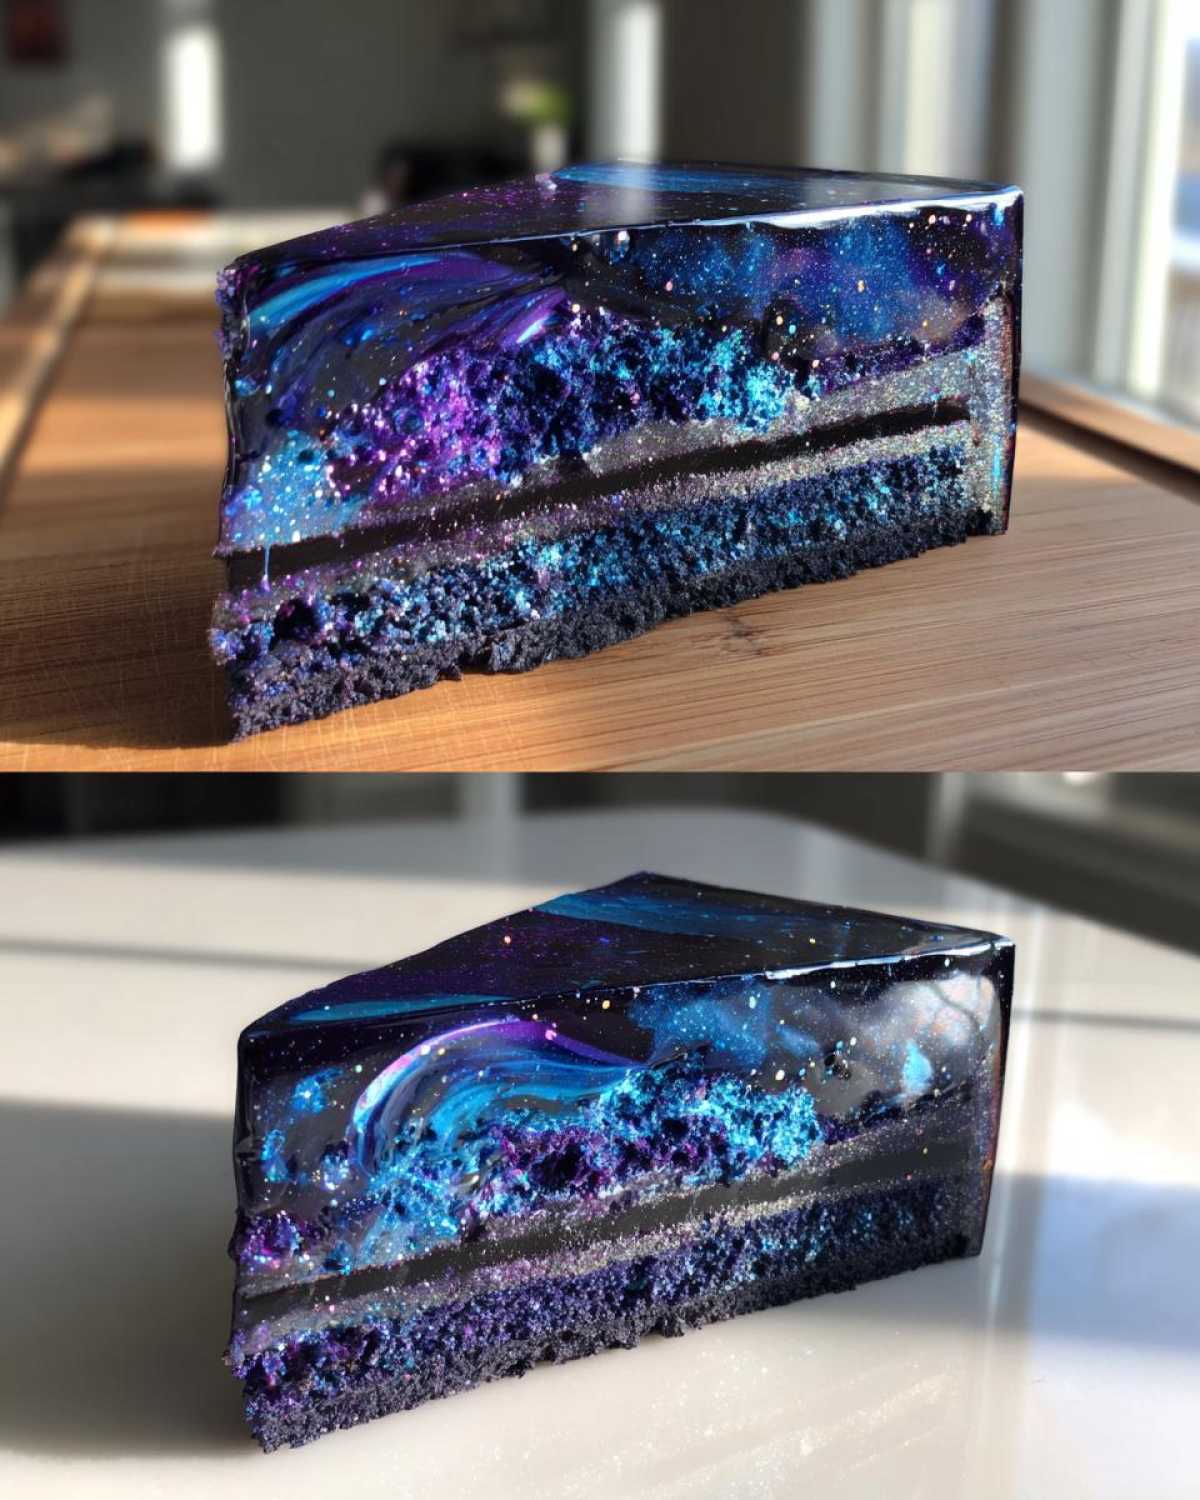
It’s time to make your cake shine! Make sure your cake is nicely chilled and has smooth, even sides. This makes the glaze cling perfectly. Grab your bowls of colored glaze. Start pouring them over your cake. I like to pour the darker colors first, like black and deep purple, then drizzle the lighter blues and white over them. Don’t overthink it; random swirls look the most natural and cosmic.
Let the glaze drip down the sides of the cake. This creates a beautiful, natural waterfall effect. Resist the urge to touch it too much! Once it’s all coated, let your stunning Galaxy Mirror Glaze Cake sit in the refrigerator for at least 30 minutes. This helps the glaze set up beautifully.
Tips for a Perfect Galaxy Mirror Glaze Cake
Creating a show-stopping Galaxy Mirror Glaze Cake is totally achievable with a few key pointers. First off, your cake needs to be super smooth and chilled. Think of it as your canvas. If the cake surface is bumpy, the glaze won’t look as sleek. I always make sure my cake is well-frosted, usually with a smooth ganache, before the glaze goes on.
Temperature is your best friend here. Remember that 85-90°F (29-32°C) sweet spot for the glaze? It’s crucial. If it’s too warm, it’ll run off too fast. If it’s too cool, it won’t spread evenly. Don’t be afraid to use a thermometer! For anyone new to mirror glazes, I highly recommend practicing first. Pour some glaze over an upside-down bowl. It’s a great way to get a feel for the flow and color mixing without risking your beautiful cake. These little tips really help make your Galaxy Mirror Glaze Cake shine!
Frequently Asked Questions About Galaxy Mirror Glaze Cake
Got questions about creating your cosmic masterpiece? I’ve got answers!
Can I make the mirror glaze ahead of time?
Yes, you can! Make the base glaze and store it in an airtight container in the fridge for up to 3 days. Reheat it gently over low heat or in the microwave in short bursts, stirring often, until it reaches the correct temperature (85-90°F / 29-32°C) before dividing and coloring. I find this saves so much time on decorating day!
What kind of cake works best under the mirror glaze?
A super smooth and well-chilled cake is essential for a flawless Galaxy Mirror Glaze Cake. Cakes covered in a smooth layer of chocolate ganache or a very firm buttercream work best. This stable, even surface allows the glaze to set beautifully without melting the frosting underneath.
How do I fix a mirror glaze that’s too thick or too thin?
If your glaze is too thick, gently warm it up a bit more until it reaches the right temperature. If it’s too thin and won’t set, you might need to add a tiny bit more bloomed gelatin. Be careful, though; too much gelatin can make it rubbery. It’s all about finding that perfect flow!
Estimated Nutritional Information
Creating a Galaxy Mirror Glaze Cake is all about the visual and taste experience! Because recipes can vary slightly with different ingredients or portion sizes, the exact nutritional information can differ. Think of these numbers as a general guide. The focus here is on the joy and deliciousness this dessert brings to your special moments.
Share Your Galaxy Mirror Glaze Cake Creations
I absolutely love seeing your baking adventures! Did you create your own stunning Galaxy Mirror Glaze Cake? Please share a photo in the comments below or tell me about your experience. Hearing from you and seeing your amazing creations makes my day. Rate this recipe if you loved it, too!
Print
Galaxy Mirror Glaze Cake: Cosmic Beauty
- Total Time: 40 minutes plus chilling time
- Yield: 1 cake
- Diet: Vegetarian
Description
Create a stunning galaxy mirror glaze cake with swirling cosmic colors. This guide will help you achieve a dazzling, out-of-this-world look for any special occasion.
Ingredients
- 1 cup granulated sugar
- 1/2 cup water
- 1/2 cup sweetened condensed milk
- 1/4 cup unsweetened cocoa powder
- 1/2 cup heavy cream
- 1 tablespoon gelatin powder
- 1/4 cup cold water
- White, blue, purple, and black gel food coloring
- Edible glitter (optional)
Instructions
- Bloom the gelatin: In a small bowl, sprinkle gelatin powder over 1/4 cup cold water. Let it sit for 5-10 minutes until it thickens.
- In a saucepan, combine granulated sugar, 1/2 cup water, sweetened condensed milk, and cocoa powder. Heat over medium heat, stirring constantly until the sugar dissolves and the mixture is smooth.
- Bring the mixture to a boil, then reduce heat and simmer for 3 minutes.
- Remove from heat and stir in the bloomed gelatin until fully dissolved.
- Stir in the heavy cream until well combined.
- Strain the glaze through a fine-mesh sieve into a heatproof bowl to remove any lumps.
- Divide the glaze into separate bowls for each color. Add white, blue, purple, and black gel food coloring to the bowls. Add edible glitter to one or more colors if desired.
- Let the glazes cool to around 85-90°F (29-32°C). This is crucial for the mirror effect.
- Pour the different colored glazes over your chilled, frosted cake in a random, swirled pattern. Start with darker colors and add lighter ones on top.
- Allow the glaze to drip down the sides.
- Let the cake set in the refrigerator for at least 30 minutes before serving.
Notes
- Ensure your cake is well-chilled and has a smooth, even surface before applying the glaze.
- The temperature of the glaze is key. Too hot and it will be too thin; too cool and it won’t flow properly.
- Practice on an upside-down bowl first if you’re new to mirror glazes.
- Prep Time: 30 minutes
- Cook Time: 10 minutes
- Category: Dessert
- Method: Baking and Glazing
- Cuisine: American
Nutrition
- Serving Size: 1 slice
- Calories: N/A
- Sugar: N/A
- Sodium: N/A
- Fat: N/A
- Saturated Fat: N/A
- Unsaturated Fat: N/A
- Trans Fat: N/A
- Carbohydrates: N/A
- Fiber: N/A
- Protein: N/A
- Cholesterol: N/A

Comments are closed.