
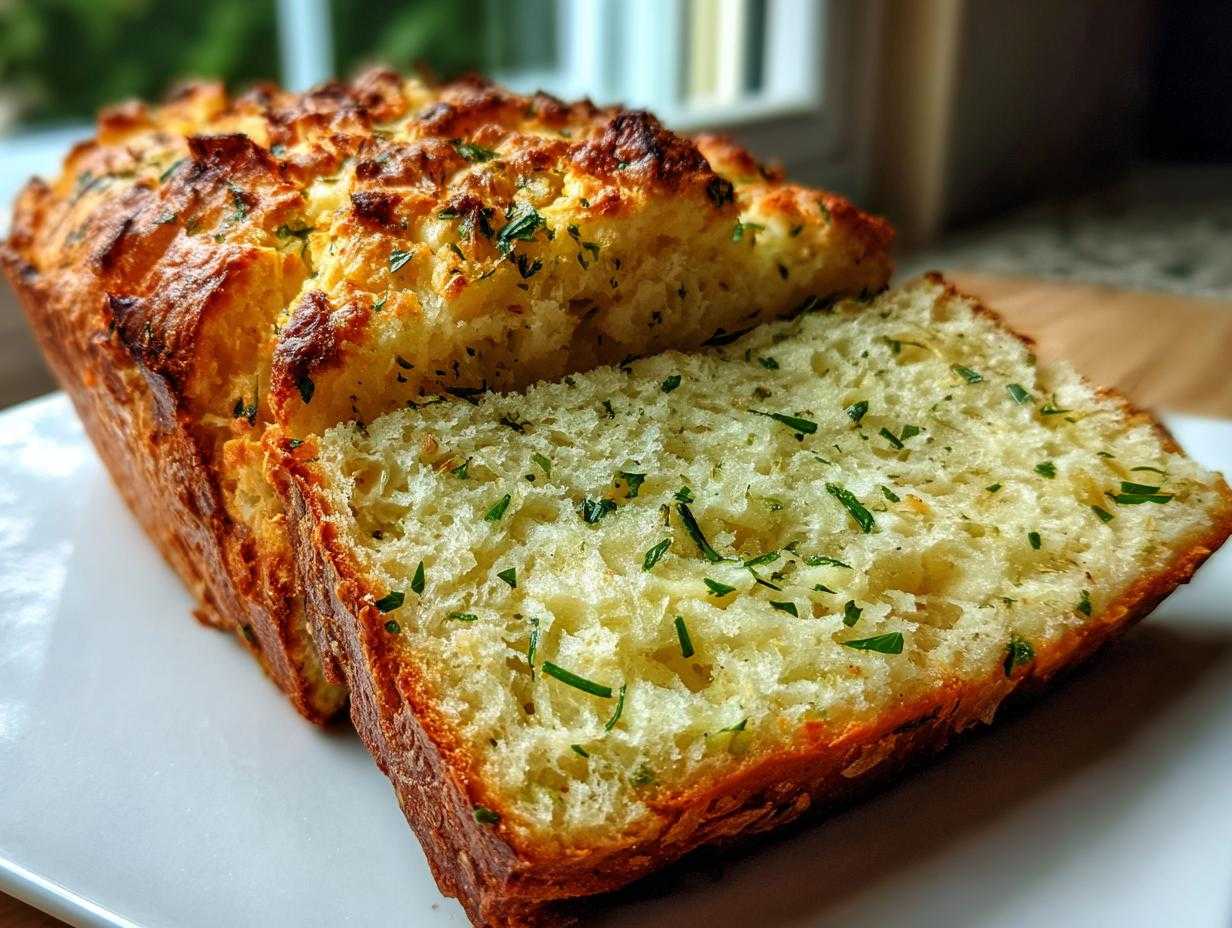
If you think making amazing, savory bread means spending your entire Saturday kneading dough and waiting for multiple rises, I’m here to completely change your mind. Honestly, for those of us who love that fresh, incredible taste but just don’t have the time, the bread machine is an absolute lifesaver. This recipe right here is my go-to shortcut for turning out the most aromatic, perfectly sliceable Italian herb and cheese bread you can imagine. It’s foolproof, even if you’re a total beginner bread machine user, because the machine handles all the heavy lifting. You just load it up, press start, and get ready for that heavenly smell to take over your kitchen!
Why This Is the Best Italian Herb and Cheese Bread for Your Bread Machine
When you’re craving something savory yet easy, this bread machine herb bread truly shines. Forget the messy counter tops and the guesswork; this machine does the hard work. I love that it bakes up with such robust flavor—that mix of tangy Parmesan and aromatic herbs is just fantastic.
It’s amazing how this simple method gives you bread that slices so beautifully. It’s sturdy enough for big sandwiches but still tender—a real winner for weeknight dinners. If you’re new to this gadget, trust me, this cheesy loaf is the perfect introduction. It really makes you appreciate how brilliant these machines are!

Achieving the Perfect Sandwich Loaf Texture
The secret to that perfect, sturdy slice—the kind you need for big deli sandwiches—lies in the kneading power of the machine itself. It develops the gluten better than I often do by hand, especially when we use good quality bread flour. That extra protein in the bread flour is what gives you that consistent, tight crumb.
We choose the Basic White or Sandwich cycle because they manage the kneading time just right. This prevents the mozzarella and Parmesan from melting out too early or breaking down completely during the initial mixing. I like to think of the bread machine as doing the technical heavy lifting so all I have to worry about is enjoying the amazing smell. If you’ve ever tried my sourdough sandwich bread recipe, you know I love a good sliceable loaf, and this machine makes that happen every time.
Gathering Ingredients for Your Italian Herb and Cheese Bread
Okay, so gathering your ingredients is the simplest part of this recipe, which is great because who wants a fussy list when you’re using a machine? The measurements are pretty specific here because the balance of liquid to flour is key for a good bread machine cycle, but don’t stress—it’s just pouring and measuring!
You’ll need that warm water—think bathwater temperature, not boiling hot—and a good splash of olive oil for richness. Then comes the bulk: three cups of bread flour are mandatory for that structure we’re aiming for. We sweeten it just a touch with sugar to feed the yeast, and of course, we need salt for flavor and control.
Ingredient Notes and Substitutions for Cheesy Dinner Bread
Let’s talk flavormakers! The Italian seasoning is where the magic happens. If you look close at that blend, you’re getting that lovely hint of rosemary oregano bread flavor profile that screams comfort food. I use one tablespoon of the dried blend, but if you’re using fresh herbs crumbled in, you’ll want to use about three times that amount by volume, so use a light hand at first.
The cheeses are crucial! We use half a cup of sharp Parmesan, which lends that salty, savory punch, and half a cup of mozzarella for that perfect melt and stringiness. If you want a saltier, more intense flavor for your cheesy dinner bread, you can always bump the Parmesan up by a quarter cup and decrease the mozzarella slightly. Just make sure everything is shredded well so the machine can incorporate it nicely!
Step-by-Step Instructions for Easy Bread Machine Herb Bread
This is where the magic happens, and honestly, it’s so simple you won’t believe it. Once you’ve got everything measured out, the bread machine takes over the hard part. You just need to follow the order, which is super important for a successful bake in these gadgets. Don’t worry if you’ve never used one before; this method is totally foolproof for getting a beautiful, flavorful loaf!
Loading the Pan: Liquid First for Your Italian Cheese Bread
The absolute first rule for any bread machine recipe is liquids first! Pour your warm water and that lovely olive oil right into the bread pan. Next, pile in all your dry stuff directly on top of the liquids: the flour, the sugar, the salt, the garlic powder, and all that gorgeous Italian seasoning. This keeps the yeast separated initially, which is crucial.
Now, for the trick that ensures yeast happiness: make a tiny little volcano or well right in the center of that flour mound. Drop your active dry yeast right into that well. Seriously, watch that it doesn’t touch the salt or the liquid yet. If it does, your yeast might get a little fussy, and we don’t want that for our italian herb and cheese bread!
Adding Cheese and Herbs at the Right Time
Insert the pan into your machine and pick your cycle. I always recommend the Basic White or Sandwich Loaf cycle. Once the machine starts mixing (usually after about five minutes), let it churn until it signals that kneading is about to start. That’s your cue to pause it!
Quickly open the lid, sprinkle in both the Parmesan and mozzarella slices right over the top of the dough. Close that lid fast so the heat and moisture stay trapped inside. Letting the machine finish the cycle means those cheeses get mixed in during the kneading phase, which is perfect for getting them distributed evenly throughout the dough without overworking things. This timing is the key maneuver for successful bread machine herb bread!

Tips for Success Making Parmesan Herb Bread
Even though this recipe is designed to be incredibly easy—hello, bread machine!—there are a few little tricks I’ve picked up over the years to make sure your parmesan herb bread comes out perfect every single time. Think of these as the insider secrets that elevate your loaf from good to absolutely glorious.
First thing’s first: pay attention to that cycle selection. If your machine has a dedicated Sandwich Loaf setting, use it! That cycle almost always uses a slightly heavier kneading process and a delayed final rise, which results in a denser, tighter crumb. That structure is what makes it so wonderful for slicing up thick pieces for lunch.
If you want a crust that begs to be pulled apart, try this: if your machine lets you pause mid-cycle before the final bake, quickly brush the very top of the unbaked dough with a tiny bit of olive oil or even just water. This helps lock in moisture for a softer crust, or you can skip that if you prefer a crisper chew. I love serving the heel pieces with my garlic herb butter roasted chicken!
Another thing people forget is the temperature of those liquids. If your water is too cold, the yeast won’t wake up properly, and your bread will be flat. Too hot, and you kill the yeast dead! Aim for that sweet spot around 85 degrees Fahrenheit, just warmer than comfortable to the touch. That happy environment ensures a strong rise and a great final product, even loaded with heavy cheese like this one.

Finally, don’t rush the cooling process. I know it’s tempting—that smell is intoxicating! But if you slice into this italian herb and cheese bread while it’s still warm, all the steam escapes, and you’ll end up with a gummy texture instead of that beautiful sliceable loaf we worked so hard for. Let it cool completely on the rack. Patience is delicious!
Serving Suggestions for Your Cheesy Dinner Bread
Now that you have this stunning, fragrant loaf of italian herb and cheese bread cooling on the rack, the fun really begins! Honestly, this bread is so flavorful on its own, you could just tear off chunks while standing over the counter—don’t lie, we all do it! But if you’re looking to serve it up properly, either for Sunday dinner or just a casual Tuesday night, I have a few ideas that really let that Parmesan and those herbs shine.
The density of this loaf means it works beautifully as a sturdy dipper. It’s fantastic alongside creamy soups, or even just a big bowl of marinara. Since it’s a savory, cheesy dinner bread, we want to pair it with things that can handle that heartiness without getting soggy or flavor-washed. But my favorite way to serve it is definitely when we’re leaning into classic Italian flavors.
Pairing with Italian Flavors
When I make this for dinner, I usually whip up a big, simple side salad loaded with crisp greens, cucumbers, and a sharp, acidic vinaigrette. That bright, fresh acidity just cuts right through the richness of the cheese in the bread. It’s the perfect balance!
If you’re making a pasta night, this bread is mandatory for wiping the plate clean. It needs something creamy and rich to sop up that extra sauce. Think about a simple carbonara, or if you’re feeling ambitious, my rich homemade Alfredo sauce recipe. That creamy garlic goodness mixed with the rosemary and oregano baked into the bread? Pure comfort, my friends. It elevates even the simplest meal!
Storage and Reheating Instructions for Italian Herb and Cheese Bread
Okay, you resisted the urge to eat the entire loaf in one sitting, good job! Now, how do we keep this fantastic italian herb and cheese bread fresh? Since we used a bread machine, the crust can firm up quickly once it cools completely. The best way to store this for slicing later is tightly wrapped in plastic wrap, and then maybe foil, to keep that air out—room temperature is fine for up to three days.
If you happen to have leftovers after that, I’d slice it up and pop those slices into a freezer bag. When you are ready to enjoy it again, reheat those cheesy slices right from frozen! Just pop them in a toaster oven or a regular oven at about 350°F for a few minutes until warmed through. It wakes up the herbs and softens the cheese right back up!
Frequently Asked Questions About Bread Machine Herb Bread
I know when you’re wrestling with a new appliance, you might have a few lingering questions about how to get the absolute best flavor out of your bake. Bread machines are fantastic, but they have their own little quirks, right? Don’t worry, I’ve pulled together the things I get asked most often about this parmesan herb bread so you can skip the troubleshooting and jump right to enjoying that fresh loaf.
Can I use fresh herbs instead of dried in this Italian herb and cheese bread?
Absolutely you can! Fresh herbs taste incredible, but they bring a lot more moisture than the dried stuff, so you have to adjust. If a recipe calls for one teaspoon of dried rosemary, you’d use about one tablespoon of fresh, finely chopped rosemary. Because we use the Basic White cycle, I always suggest adding those fresh, glorious herbs right along with the other dry ingredients—flour, salt, seasonings—before you make that little well for the yeast. This way, they get mixed in thoroughly during that initial, gentle incorporation phase.
Why is my bread machine loaf dense?
That is the number one frustration with any easy bread machine recipe, I promise! Density almost always comes down to one of three things. First, check your yeast! Did it look fizzy and active? If your water was too cold, the yeast just didn’t wake up enough to make the dough rise properly. Second, check your measurement of the flour—don’t pack it into the cup; spoon it in lightly. Third, if you used refrigerated cheese instead of room-temperature cheese, that extra cold shock can sometimes slow down the yeast right when it needs to get going. If you follow the layering sequence exactly, you’ll avoid that heavy brick!
What is the best cycle for this garlic herb bread?
For this particular savory delight, you have two fantastic options, and both are designed for a sturdy loaf. I highly recommend setting your machine to the Basic White Bread cycle if you want a slightly taller rise. However, if you are planning on making a pile of sandwiches and want a really tight, uniform slice, use the dedicated Sandwich Loaf cycle! That cycle is set up to knead longer and allow for a slower, more controlled final rise, which just crushes the cheese perfectly into the structure of what we call the perfect garlic herb bread.
Understanding the Nutrition of This Parmesan Herb Bread
I always get asked about the nutritional side of things, especially when cheese and oil are involved! Look, this is homemade bread, and it’s meant to be comforting and delicious, not a health food pamphlet, so take these numbers with a grain of salt—literally, we put a lot of salt in there!
I ran the recipe through my standard calculator just to give you a general idea of what you’re looking at per slice. Please remember, these are just estimates, especially since the exact size of your slice—and how much cheese you sneak onto the topping—can totally change the final count. But this gives you a good baseline for a nice slice of your Parmesan herb bread.
- Serving Size: 1 slice
- Calories: 180
- Sugar: 2g
- Sodium: 350mg (Yes, it’s savory!)
- Fat: 5g
- Saturated Fat: 2g
- Unsaturated Fat: 3g
- Trans Fat: 0g
- Carbohydrates: 28g
- Fiber: 1g
- Protein: 7g
- Cholesterol: 10mg
You can see it has some decent protein coming from the flour and the dairy, which is great if you’re using this as a hearty base for an open-faced lunch. If you’re watching your sodium intake, this is probably a good indicator to go light on the salty toppings, but honestly, the flavor payoff is worth it! Enjoying this cheesy dinner bread in moderation is the key to staying happy in the kitchen!
Share Your Delicious Italian Herb and Cheese Bread Creation
Well, my friends, if you’ve made it this far, I’m betting your kitchen smells absolutely incredible right now! Pulling that beautiful, golden, cheesy loaf out of the bread machine is such a satisfying moment, isn’t it? We took simple ingredients and, with just a little bit of machine magic, turned it into glorious, sliceable Italian herb and cheese bread.

I truly hope this simple method has made baking savory loaves feel easy and accessible for you. Whether you’re using this as the base for an amazing open-faced lunch or just slathering butter on a warm heel piece (I see you!), I want to hear all about it!
Please, please, leave a comment below and let me know how it turned out for you. Did you use the Sandwich cycle? Did you sneak a little extra Parmesan on top like I suggested? Your feedback is what keeps Forkful Heaven spinning, connecting us all through food. I love seeing your successes! If you snap a picture of that gorgeous loaf, tag me on social media so I can admire your handiwork.
If you’re looking for other easy wins for busy weeks—because sometimes we need savory bread one day and quick breakfasts the next—you should check out my recipe for easy egg muffins. But for now, grab a slice of that amazing cheesy dinner bread, pour yourself a glass of something good, and know that you totally nailed it. Happy cooking!
Print
Easy Bread Machine Italian Herb and Cheese Loaf
- Total Time: 3 hr 40 min
- Yield: 1 loaf
- Diet: Vegetarian
Description
Make a flavorful, sliceable Italian herb and cheese bread right in your bread machine. This recipe is perfect for beginners and yields a great sandwich loaf or dinner side.
Ingredients
- 1 cup water (warm, about 80-90°F)
- 2 tablespoons olive oil
- 3 cups bread flour
- 1 1/2 teaspoons salt
- 2 tablespoons granulated sugar
- 1 tablespoon dried Italian seasoning blend
- 1 teaspoon garlic powder
- 1/2 cup shredded Parmesan cheese (plus extra for topping)
- 1/2 cup shredded mozzarella cheese
- 2 teaspoons active dry yeast
Instructions
- Add the warm water and olive oil to your bread machine pan first.
- Add the bread flour, salt, sugar, Italian seasoning, and garlic powder on top of the liquid ingredients. Create a small well in the center of the flour.
- Place the active dry yeast into the well you created. Do not let the yeast touch the salt or liquid yet.
- Insert the pan into your bread machine and select the Basic White Bread cycle (or the Sandwich Loaf cycle if available).
- Wait for the machine to complete the mixing phase. When the machine signals the beginning of the kneading cycle (usually after about 5-10 minutes of mixing), pause the machine.
- Add the shredded Parmesan and mozzarella cheese through the lid opening. Close the lid immediately.
- Allow the bread machine to complete the full cycle.
- Once the cycle finishes, carefully remove the bread pan and turn the loaf out onto a wire rack. Let it cool completely before slicing for the best sandwich loaf texture.
Notes
- For a crispier crust, lightly brush the top of the dough with water before the final rise if your machine allows manual pausing.
- If you want extra cheesy dinner bread, sprinkle a little extra Parmesan cheese on top right before the final bake.
- Store leftover bread tightly wrapped at room temperature for up to 3 days.
- Prep Time: 10 min
- Cook Time: 3 hr 30 min
- Category: Baking
- Method: Bread Machine
- Cuisine: Italian-American
Nutrition
- Serving Size: 1 slice
- Calories: 180
- Sugar: 2
- Sodium: 350
- Fat: 5
- Saturated Fat: 2
- Unsaturated Fat: 3
- Trans Fat: 0
- Carbohydrates: 28
- Fiber: 1
- Protein: 7
- Cholesterol: 10


Comments are closed.