

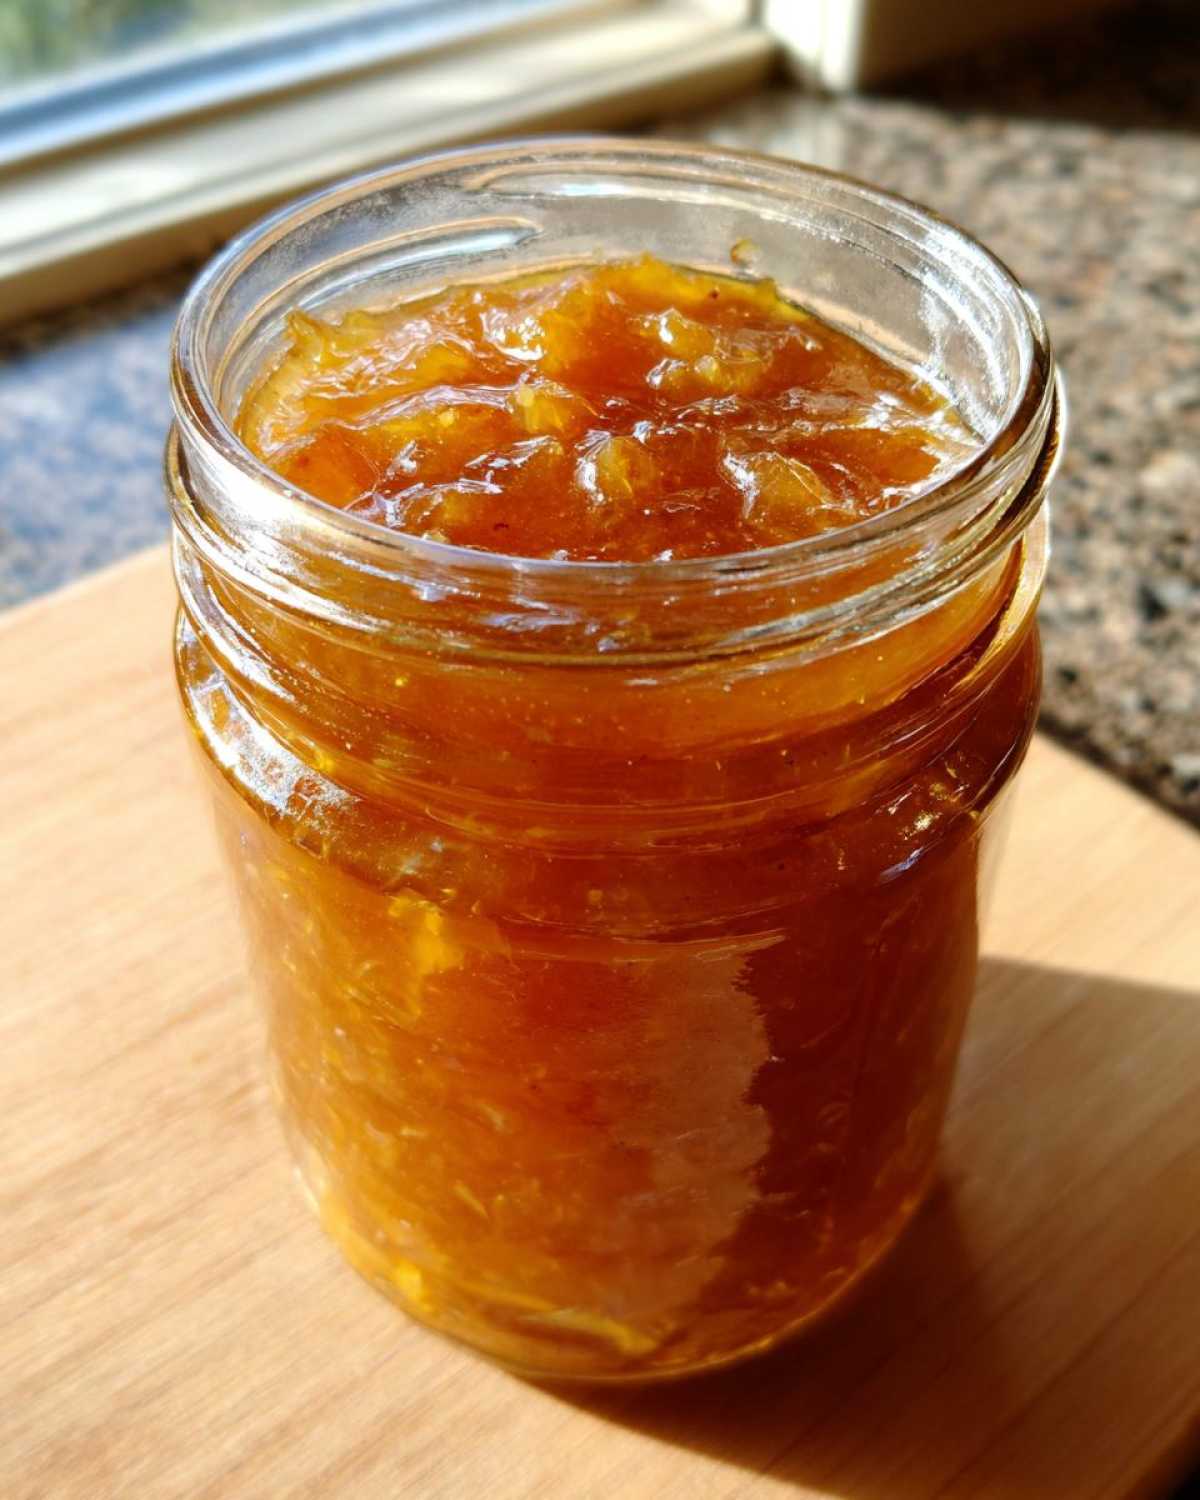
Capture Summer’s Sweetness: Easy Pear Preserves Canning Recipe
No heading needs to be written for the introduction. As summer produce reaches its peak, I get so excited to capture that vibrant flavor. My passion for preserving the season’s bounty really shines through with canning. It’s a wonderful way to keep that taste fresh for months. I’m Alexander Knight, and sharing these homemade preserves feels like sharing a piece of sunshine. This recipe for pear preserves is a family favorite. It’s simple, bursting with sweet pear flavor, and brings a smile to my face every time.
Why You’ll Love These Pear Preserves
These pear preserves are a dream to make. You’ll love how easy they are. The fresh pear flavor really comes through. They’re so versatile, too. Spread them on toast or use them in baking. The satisfaction of making them yourself is amazing. It’s a true taste of homemade goodness. You get that intense fruit flavor without any fuss.
A Taste of Texas Tradition: My Canning Journey
My canning journey really started in Texas. My uncle had a restaurant. He showed me so much about food. Preserving was one of his skills. He taught me how to capture flavors year-round. I remember him canning peaches one summer. The smell was incredible. That memory stuck with me. Now, I love sharing these traditions. Making pear preserves connects me to those roots. It’s a sweet reminder of family.
Gather Your Ingredients for Perfect Pear Preserves
To create these delightful pear preserves, you’ll need a few simple things. First, grab about 3 pounds of ripe pears. Make sure they are ripe, but still firm to the touch. This gives you the best texture in your preserves. You’ll need to chop them up, and about 6 cups should do the trick.
Next, for sweetness, we’ll use 3 cups of granulated sugar. Don’t worry, this sugar helps the pears set beautifully. A little bit of brightness is key, so have 1/4 cup of lemon juice ready. This also helps with the preserving process.
For that warm, cozy flavor, we’re adding a touch of spice. You’ll need 1 teaspoon of ground cinnamon. Then, just 1/4 teaspoon each of ground cloves and ground nutmeg. These spices really make the pear flavor sing. Having all your ingredients prepped makes the cooking process so much smoother.
Step-by-Step Guide to Making Pear Preserves
Let’s get this canning party started! Making pear preserves is rewarding. It just takes a little planning. Follow these steps. You’ll have delicious jars soon.
Preparing Your Canning Supplies
First, get your canning gear ready. Wash your jars, lids, and bands. Use hot, soapy water. Then, sterilize the jars. Boil them for 10 minutes. Keep them hot until you need them. This is super important for safe canning. Cleanliness is key here.
Cooking the Pear Preserves to Perfection
Now for the fun part! Put your chopped pears in a big pot. Add the sugar and lemon juice. Give it a good stir. Let it sit for about 15 minutes. This helps the sugar draw out pear juices. Then, add the cinnamon, cloves, and nutmeg. Stir it all together.
Cook this mixture over medium-high heat. Bring it to a rolling boil. Keep stirring often. You want the preserves to reach the gelling point. This might take 20 to 40 minutes. How do you know it’s ready? Spoon a little onto a cold plate. If it wrinkles when you push it, it’s perfect! Stirring prevents scorching.
Filling and Sealing Your Pear Preserves Jars
Carefully ladle the hot preserves into your hot jars. Leave about a quarter-inch of space at the top. This is called headspace. Wipe the jar rims clean. Use a damp cloth. Put the lids on. Screw the bands on until they feel snug. Don’t overtighten them. This helps ensure a good seal. Handle everything with care. Hot jars are no joke!
Water Bath Canning Your Pear Preserves
Next, we water bath can. Place the filled jars in your canner. Make sure they are covered with water. Process them in boiling water for 10 minutes. If you live at a high altitude, you may need to adjust this time. After processing, carefully remove the jars. Let them cool on a wire rack. Leave them undisturbed for 12 to 24 hours. Check for a good seal. The lid should be curved inward. It shouldn’t pop when you press it. That’s how you know they’re sealed tight!
Essential Equipment for Pear Preserves Canning
To make canning pear preserves a breeze, you’ll need a few key tools. A large pot or Dutch oven is essential for cooking the fruit. You’ll also need canning jars, lids, and bands. Make sure they are the right size, like half-pint jars. A jar lifter is super helpful for safely moving hot jars. A canning funnel makes filling jars much less messy. Having these items on hand makes the whole process smoother. It ensures you have everything ready for success.
Tips for the Best Pear Preserves
To get the most delicious pear preserves, pick ripe but firm pears; mushy ones won’t hold their shape. My uncle always said the fruit should have a little give, but not be squishy. Feel free to tweak the spices too. If you love cinnamon, add a bit more! Getting that perfect gel is key. If your preserves seem too runny after cooking, don’t panic. You can re-boil them. Just skim off any foam and cook a bit longer. Test again on a chilled plate. Patience here really pays off for that lovely texture.
Frequently Asked Questions About Pear Preserves
Do you have questions about making these wonderful pear preserves? I get it! Canning can seem a bit tricky at first. Let me help clear things up.
How long do homemade pear preserves last?
Properly canned pear preserves can last for about a year. Store them in a cool, dark place. Always check the seal before opening. If the lid is popped or the preserves look off, it’s best to discard them.
What if my pear preserves didn’t gel?
Don’t worry! It happens to the best of us. You can often fix runnier preserves. Empty the jars back into a pot. Reheat them to a boil. Cook a bit longer, stirring frequently. Test for the gel point again. Remember, some pear varieties are less pectin-rich.
Can I use different spices in my pear preserves?
Absolutely! My recipe uses cinnamon, cloves, and nutmeg for a classic taste. But feel free to experiment. A pinch of cardamom or ginger can be lovely. Adjust them to your own taste.
How should I store my pear preserves?
Once your jars have cooled and sealed properly, store them in a cool, dark place, like a pantry or cupboard. Make sure the lids are concave and don’t flex when pressed. After opening a jar, always keep it in the refrigerator. It should be good for several weeks then.
Storing and Enjoying Your Homemade Pear Preserves
Once those beautiful jars of pear preserves have cooled completely, it’s time to store them. Keep sealed jars in a cool, dark place, like a pantry or cupboard. This helps maintain their quality. Properly sealed preserves can last for a whole year! It’s always a good idea to check the lid. Make sure it’s still concave and hasn’t popped before opening.
After you open a jar, pop it into the refrigerator. It will stay fresh for several weeks that way. Now for the best part: enjoying them! These preserves are fantastic on warm toast or biscuits. They’re also delicious swirled into yogurt or oatmeal. I love using them as a filling for thumbprint cookies. They really add a special touch to many dishes. So go ahead, taste that summer sunshine!
Understanding the Nutritional Value of Pear Preserves
It’s always good to have an idea of what you’re enjoying! Here’s an estimated nutritional breakdown for a serving of these delicious pear preserves. Keep in mind these numbers can vary a bit.
* **Serving Size:** 1 tablespoon
* **Calories:** Around 50
* **Sugar:** About 13g (mostly from the fruit and added sugar)
* **Carbohydrates:** About 13g
* **Fat:** 0g
* **Saturated Fat:** 0g
* **Protein:** 0g
* **Fiber:** 0g

Sweet Pear Preserves Canning: 1 Luscious Summer Treat
- Total Time: 1 hour
- Yield: Approximately 4-5 half-pint jars
- Diet: Vegetarian
Description
Capture the taste of summer with these delightful Pear Preserves. This easy canning recipe helps you preserve the season’s bounty, creating homemade preserves bursting with fresh pear flavor to enjoy all year long.
Ingredients
- 6 cups chopped ripe pears (about 3 lbs)
- 3 cups granulated sugar
- 1/4 cup lemon juice
- 1 teaspoon ground cinnamon
- 1/4 teaspoon ground cloves
- 1/4 teaspoon ground nutmeg
Instructions
- Prepare your canning equipment: Wash jars, lids, and bands in hot soapy water. Sterilize jars by boiling them in water for 10 minutes. Keep jars hot until ready to fill.
- In a large pot or Dutch oven, combine the chopped pears, granulated sugar, and lemon juice.
- Stir well to combine. Let the mixture sit for about 10-15 minutes to allow the sugar to draw out some of the pear juices.
- Add the cinnamon, cloves, and nutmeg to the pot.
- Cook over medium-high heat, stirring occasionally, until the mixture comes to a rolling boil.
- Continue to boil, stirring frequently, until the preserves reach the gelling point. This can take anywhere from 20 to 40 minutes. To test for gelling, place a small spoonful of preserves onto a chilled plate. If it wrinkles when pushed, it’s ready.
- Carefully ladle the hot preserves into hot, sterilized jars, leaving about 1/4 inch headspace.
- Wipe the rims of the jars with a clean, damp cloth.
- Place the lids on the jars and screw on the bands until fingertip tight.
- Process the jars in a boiling water bath for 10 minutes (adjust time for altitude if necessary).
- Remove jars from the canner and let them cool on a wire rack undisturbed for 12-24 hours. Check for a good seal; the lid should be concave and not flex when pressed.
Notes
- Ensure your pears are ripe but still firm for the best texture.
- Adjust spices to your preference.
- Proper canning techniques are crucial for safe preservation.
- Prep Time: 20 minutes
- Cook Time: 40 minutes
- Category: Preserves
- Method: Canning
- Cuisine: American
Nutrition
- Serving Size: 1 tablespoon
- Calories: 50
- Sugar: 13g
- Sodium: 0mg
- Fat: 0g
- Saturated Fat: 0g
- Unsaturated Fat: 0g
- Trans Fat: 0g
- Carbohydrates: 13g
- Fiber: 0g
- Protein: 0g
- Cholesterol: 0mg


Comments are closed.