

Oh, honey, let’s talk about those desserts that require zero oven time but still promise pure decadence, okay? Sometimes you just need that rich, comforting flavor without the hassle of preheating, and believe me, my Texan roots taught me a thing or two about satisfying a crowd quickly. That’s why I am absolutely bubbling over to share my go-to recipe for the Easy No-Bake Creamy Peanut Butter Pie. This isn’t some fussy, complicated thing; this is reliability in dessert form. It’s velvety smooth, gloriously sweet, and comes together so fast you’ll wonder why you didn’t make it sooner. Trust me when I say this creamy peanut butter pie is going to become your new staple for those moments when you need a guaranteed smile on everyone’s face.
Why This No-Bake peanut butter pie Recipe is a Crowd Pleaser Dessert
If you’re hosting or just trying to make Tuesday feel a little more special, this recipe is your secret weapon. It’s the definition of a Quick Peanut Butter Dessert because you’re just mixing, pressing, and chilling. That speed combined with the rich, unapologetic peanut butter flavor makes it an instant Crowd Pleaser Dessert every single time I bring it out.
I’ve relied on this method for everything from last-minute potlucks to big family feasts like Thanksgiving. You never have to worry about a cracked meringue or a curdled custard! You can even get ahead of the game and make it the day before, which is perfect when you’re juggling a big menu. Check out some of my other ideas for easy holiday hosting right here.
Achieving the Best peanut butter pie Texture
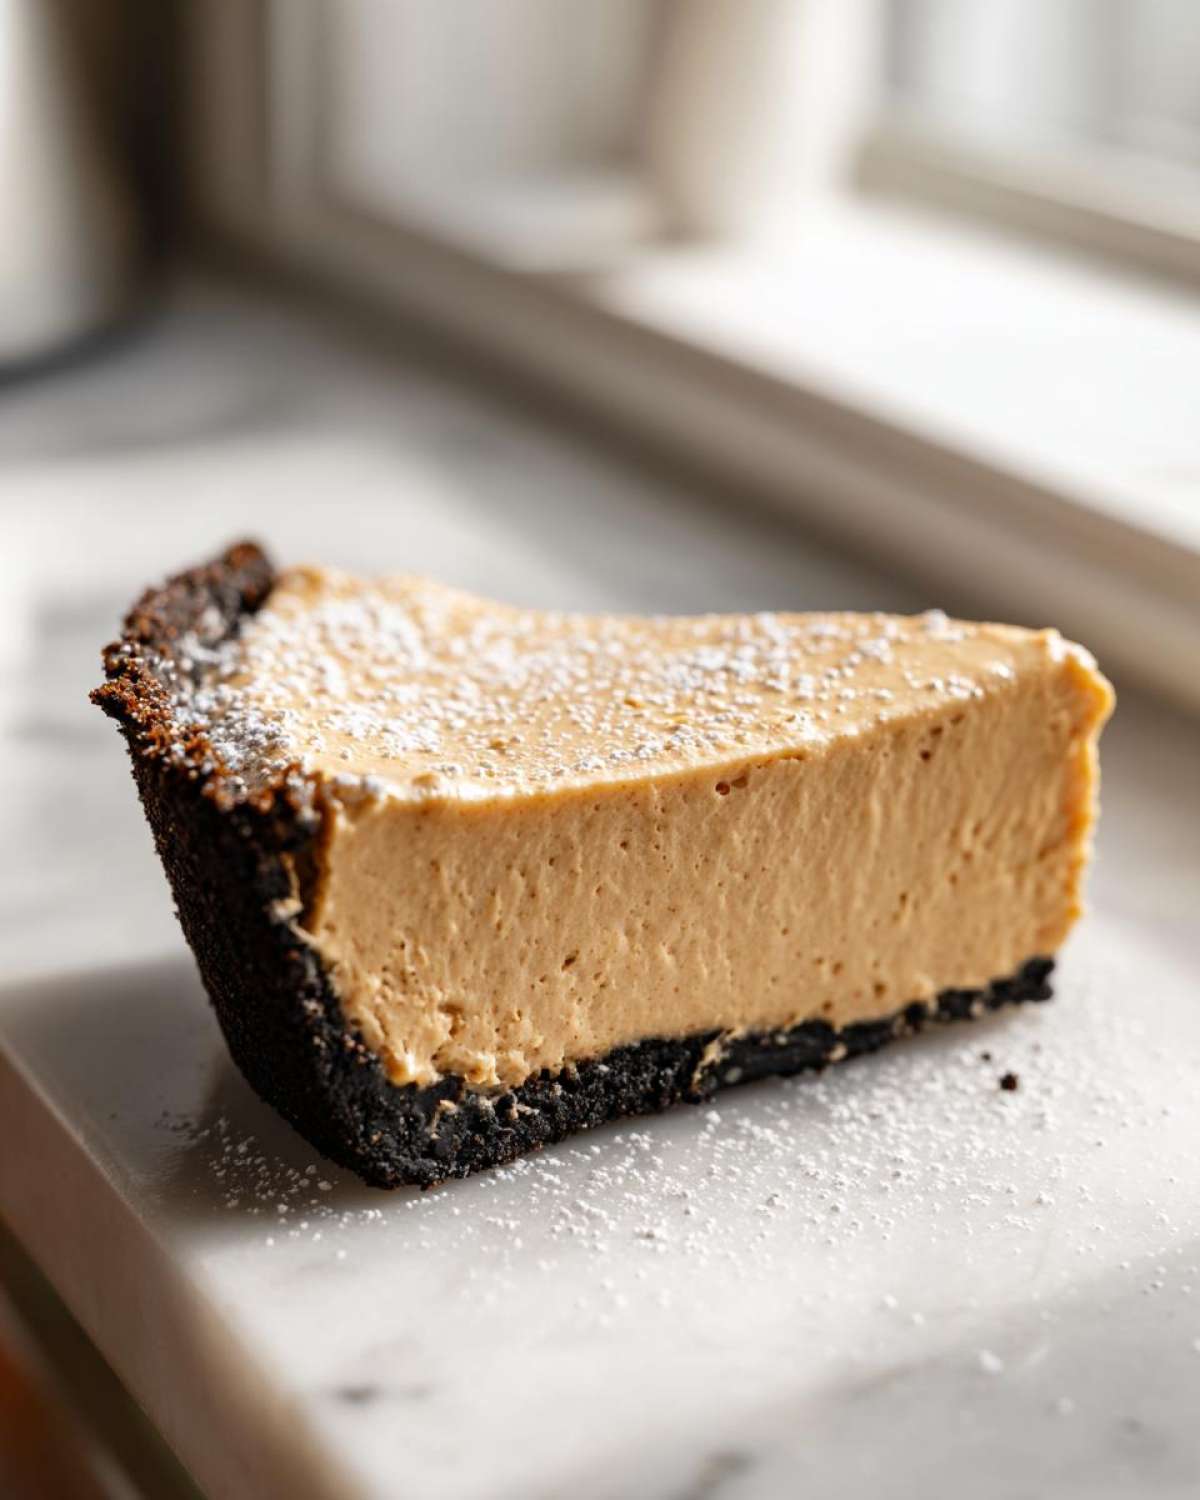
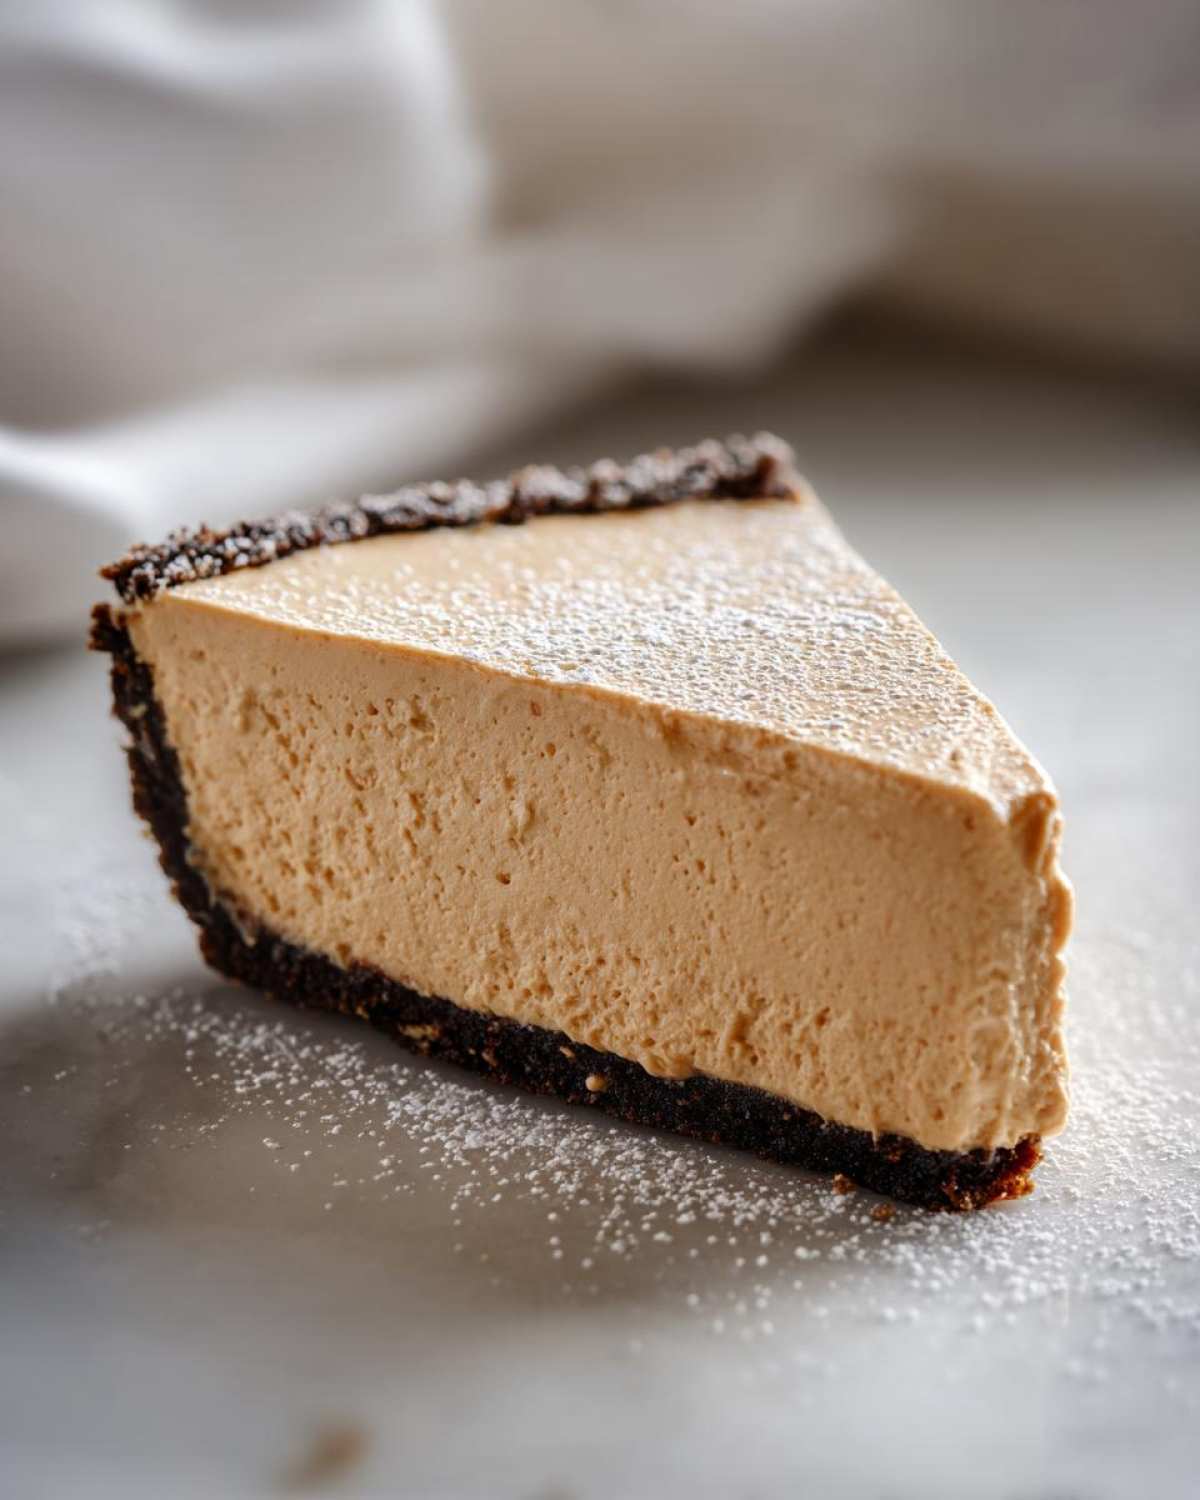
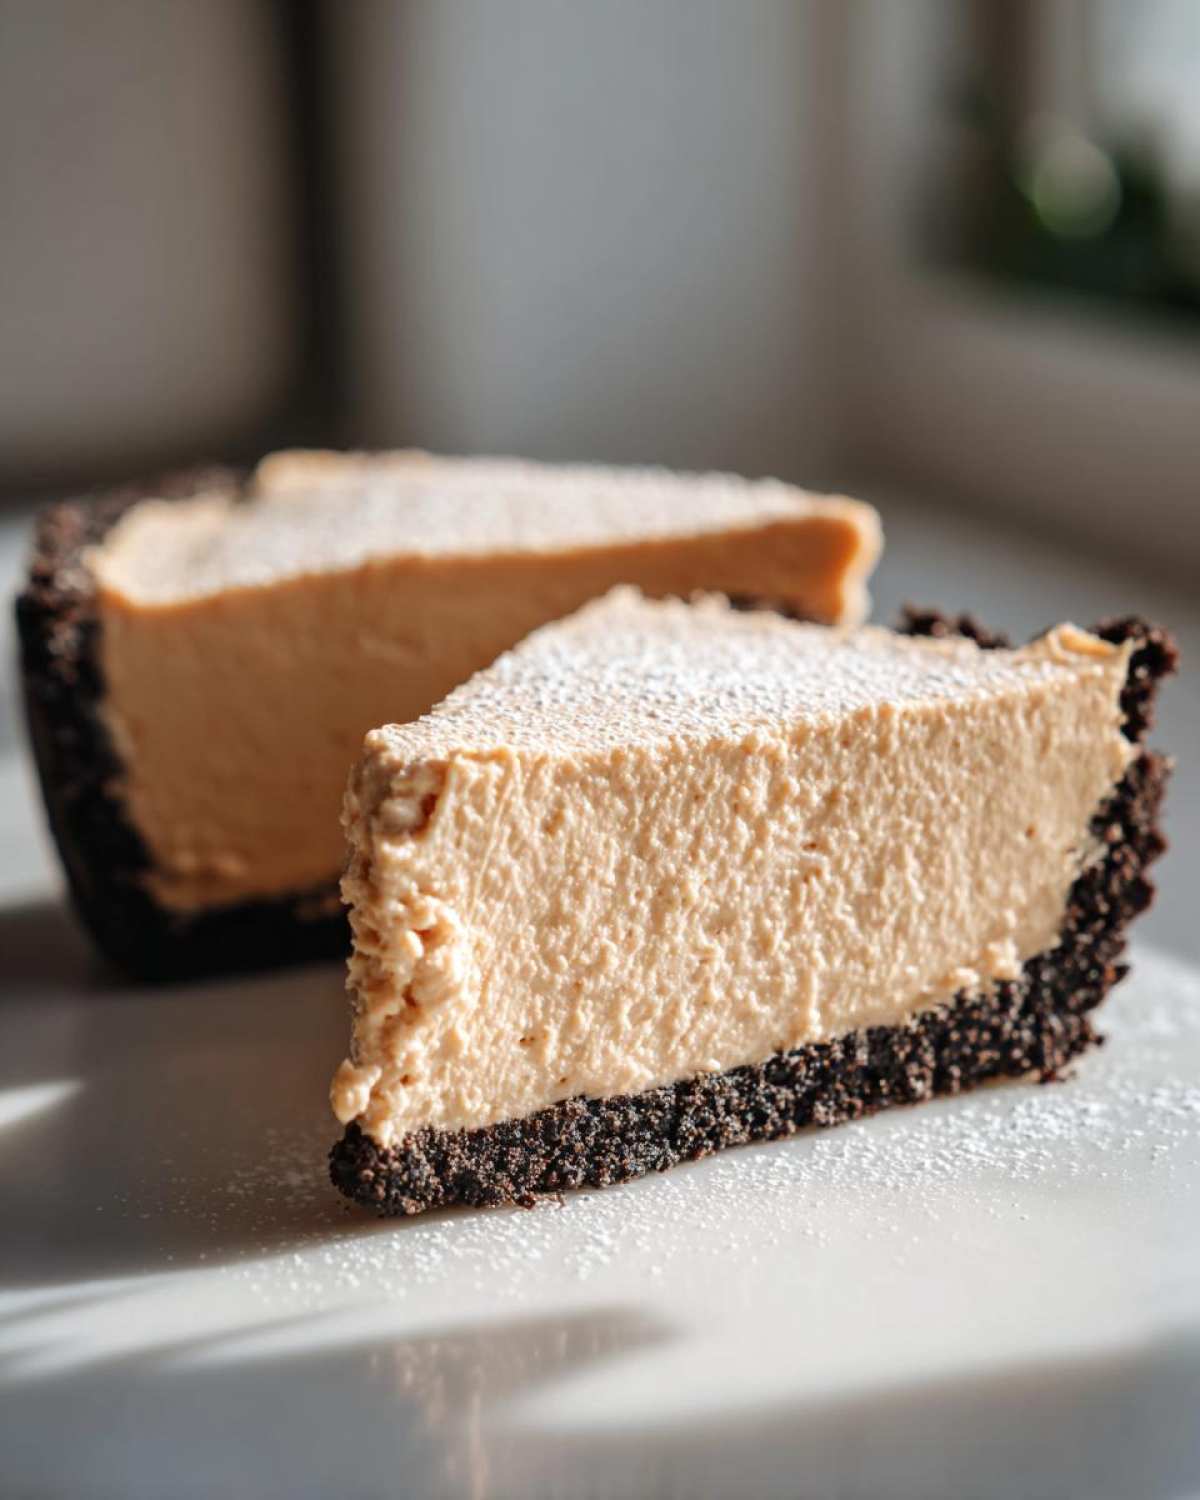
The real magic here is the texture contrast, which makes this feel so much more indulgent than its simple method suggests. You get that delightfully buttery crunch from the graham cracker crust—it holds together beautifully! Then, you hit the filling, which is just outrageously smooth and creamy. We’re talking luxurious, melt-in-your-mouth goodness thanks to that blend of cream cheese and sweetened condensed milk. It sets up perfectly firm in the fridge, so every slice you cut is clean, solid, and waiting to be drowned in chocolate.
Gathering Your Ingredients for this Easy peanut butter pie Recipe
Alright, let’s get down to business! Because this is a no-bake recipe, gathering your required treasures is really the hardest part—and even that takes less than twenty minutes, I promise. Since we are skipping the oven entirely, we rely totally on the quality of these few, powerhouse ingredients to deliver all that Creamy Peanut Butter Pie flavor we crave. We are building this beautiful dessert on a classic Graham Cracker Crust Pie base, so make sure you’ve got your crumbs ready! Don’t stress about fancy substitutions here; just grab what you need, and we’ll put them together in just a bit.
For the Graham Cracker Crust
- 1 1/2 cups graham cracker crumbs
- 1/2 cup unsalted butter, melted
- 1/4 cup granulated sugar
For the Creamy peanut butter pie Filling
- 1 (8 ounce) package cream cheese, softened (make sure this is room temperature, it matters!)
- 1 cup creamy peanut butter (None of that natural separation stuff—we need the smooth kind for this!)
- 1 (14 ounce) can sweetened condensed milk
- 1 teaspoon vanilla extract
For the Whipped Topping and peanut butter pie Toppings
- 1 cup heavy whipping cream
- 1/4 cup powdered sugar
- Optional topping: Whipped topping, chocolate chips, or mini peanut butter cups (or heck, all three! I won’t judge!)
Step-by-Step Instructions for Your No Bake peanut butter pie
Okay, this is where the fun really starts because we’re cooking with zero heat! Honestly, watching this incredible filling come together without ever touching the stove is one of my baking superpowers. We need to work efficiently here, especially on the crust, so everything stays cold and sets up nice and firm later on. Don’t worry if it seems loose at first—that’s what the chilling time is for! If you’re looking for other chilled treats, you should check out my thoughts on raw dough safety in my no-bake cookie dough bars recipe for a comparison on what needs to chill!
Preparing the Graham Cracker Crust
First things first, we need a solid foundation for our Homemade Peanut Butter Pie. Grab a medium bowl and toss in those graham cracker crumbs, the melted butter, and your granulated sugar. Use a fork, or maybe just your clean hands if you’re feeling rustic, and just mix it all around until every crumb looks uniformly damp. Now, press that mixture down firmly into the bottom and all the way up the sides of that 9-inch pie plate. I mean firm! Really pack it in there. Once it’s looking tight and tidy, pop that whole plate into the freezer for a good 15 minutes while we focus on the filling.
Mixing the Rich Dessert Pie Filling
Now for the star! In a separate, large bowl—preferably one hooked up to a stand mixer, but a hand mixer works great too—start beating that softened cream cheese until it’s completely smooth and there are zero lumps. That’s our base! Next, drop in the creamy peanut butter and beat everything together until it looks like one happy, unified creamy mixture. With the mixer running on low, slowly start drizzling in that can of sweetened condensed milk; you need to pour it in slowly so it incorporates without splashing! Stir in your vanilla extract after that.
Here’s a crucial thing for those fluffy textures: grab another clean bowl and whip up your heavy cream and powdered sugar until you’ve got stiff peaks—you know, when the whisk stands up straight! Now, gently, gently fold that glorious whipped cream into the peanut butter base. I mean fold, don’t stir! Stop mixing the second it all comes together. Overmixing destroys those lovely air bubbles we just created, and we want that fluffy, light feel in this Rich Dessert Pie.
Assembling and Chilling the Creamy peanut butter pie
Alright, pull that crust out of the freezer; it should be nice and cold! Pour or spoon that beautiful peanut butter filling right into the chilled graham cracker crust. Use an offset spatula or the back of a spoon to spread it out evenly toward the edges. Remember, this is a Make Ahead Dessert Recipe dream! Pop the whole thing gently into the refrigerator without bumping it, and let it chill for a minimum of four hours. Seriously, four hours, or even better, chill it overnight. This resting time is non-negotiable because it lets the filling firm up completely so you get those perfect, tall slices.

Tips for Success with Your Homemade peanut butter pie
Since we’re keeping this recipe super straightforward, I want to share a few tricks I’ve picked up over the years that guarantee you get that incredible, classic flavor without any fuss. Even though it’s super reliable, a few small tweaks can make this Homemade Peanut Butter Pie truly iconic. My uncle always said the difference between a good dessert and a great one is always in the details, right? And these little secrets are all about making sure your pie is rich and never runny.
Crust Variations: Graham Cracker Crust Pie vs. Oreo Crust peanut butter pie
So, while I absolutely adore the buttery warmth of the standard Graham Cracker Crust Pie we just made, I totally get reader requests asking for something chocolatey! If you’re a serious chocoholic, you can easily swap that crust out. For an Oreo Crust Peanut Butter Pie, just take about two full cups of those amazing chocolate sandwich cookies—and yes, that includes the filling!—and crush them up super fine.
You’ll mix those crushed Oreos with the melted butter (you might need just a tiny bit less butter, so start with 1/4 cup and check the texture). Press that dark, rich crumb into the pan exactly like you did the graham crackers. The chocolate crust pairs unbelievably well with the sweet, salty filling. It transforms the whole thing into something totally decadent, like one of my chocolate dessert recipes you can check out here.
Making This peanut butter pie Ahead of Time
This is where this pie really shines for busy entertainers! This is one of those wonderful No Oven Desserts that gets *better* with time. I highly recommend assembling the whole thing—crust, filling, everything—and then letting it chill in the fridge for at least four hours. But honestly? If you can wait overnight, do it!
When that Peanut Butter Pie sits in the cold for 12 to 24 hours, the flavors really deepen up. The saltiness of the peanut butter marries perfectly with the sweetness of the condensed milk, and the texture sets up to be perfectly dense and sliceable. You pull it out, add your toppings just before serving, and bam—you look like a baking genius without having spent an hour fiddling with an oven!
Serving Suggestions for Your peanut butter dessert
You have successfully navigated the chilling process, and now you have the most gorgeous, solid, creamy slice of heaven sitting in that pie plate! But wait—don’t just slice it straight onto a boring white plate! The presentation of this Peanut Butter Dessert is almost as fun as eating it. Since the pie itself is so rich and monochromatic (beautiful peanut butter color!), you need to add a little visual pop when you serve it up.
When I take this out of the fridge, I always start with a generous dollop of fresh, homemade whipped cream on top. I mean, why wouldn’t you? We already made the components for the topping, so use it! If you want to go full-on decadent, grab some good quality chocolate chips and melt them down just slightly so you can drizzle them artistically across the top—think messy, artistic swipes of dark chocolate against that pale filling.
If you’re feeling extra playful, chop up some of those mini peanut butter cups and sprinkle them all over the chocolate drizzle. It adds texture and screams, “Yes, this is an indulgent treat!” If you want more chocolate inspiration for your sweet tooth, check out this amazing chocolate dipped coconut bar recipe for ideas on pairing! Another great pairing? A small sprinkle of flaky sea salt right before serving elevates that sweet and salty flavor combination beautifully. Seriously, trust me on the salt!
Storage and Reheating Instructions for peanut butter pie Leftovers
Now, the million-dollar question: what happens when you actually manage to have peanut butter pie leftovers? Because honestly, sometimes these things vanish before I even get the chance to wrap them up! Since this is a glorious No Bake Peanut Butter Pie, storage is super simple, but you have to treat it right, especially since it doesn’t have that stabilizing crust of a baked pie.
The major rule here is keeping things cold. You absolutely have to store this pie covered tightly in the refrigerator. If you don’t cover it, that lovely creamy filling will start to absorb every single odor in your fridge—and trust me, we don’t want our glorious dessert smelling like last night’s garlic roasted potatoes!
Use plastic wrap laid directly over the exposed filling before covering the whole plate tightly with foil or a dome lid. This prevents condensation from weeping onto the top, which can make the filling look messy. If you’ve piled whipped cream or toppings on top, you might want to scrape those off first, because they don’t hold up as well after a day in the fridge.
How long does it last? Because of the cream cheese and heavy cream, this pie is best enjoyed within three to four days maximum. After that, the texture starts getting a little iffy, leaning towards gritty rather than silky. Pop it back into the fridge as soon as you’re done slicing!
And about reheating? Don’t! Don’t even think about it! This is a chilled dessert, remember? There’s nothing to reheat here. If you’ve taken it out and it’s sitting on the counter getting a little too soft while you eat, just pop the leftovers back in the fridge for twenty minutes to firm up again. Remember how much we loved that solid, creamy texture we worked so hard for? Keep it cold, and it’ll stay perfect!
Frequently Asked Questions About This Easy peanut butter pie Recipe
I totally get it; when you find a recipe that looks this good, you have questions! I’ve tried to cover everything in the main instructions, but these little FAQs often pop up between testing batches here at Forkful Heaven. These are the questions I get most often about making the absolute Best Peanut Butter Pie. Fire away with your own comments later, but here are the biggest ones!
Can I use crunchy peanut butter in this Creamy peanut butter pie?
That’s a great question about texture! Since this is meant to be our super Creamy Peanut Butter Pie filling, I highly, highly recommend sticking to creamy peanut butter. Crunchy peanut butter means you introduce little hard bits into the smooth filling base, which totally fights against that melt-in-your-mouth feel we’re chasing. If you *must* use crunchy, just know that you’re sacrificing a little bit of that silkiness for added texture. For the crust, the graham cracker crumbs provide enough little crunch elements already, let’s keep the main event smooth!
What is the minimum chilling time for this No Bake Peanut Butter Pie?
This is perhaps the most important question for any No Bake Peanut Butter Pie! Because we aren’t baking it to set the structure, we rely entirely on the refrigeration process. The minimum time you absolutely must respect is four hours, no exceptions. If you try to slice it at three hours, the filling will likely slump out as soon as you cut into it—and trust me, sticky mess is not the goal here!
However, I want to stress this again: four hours is the *minimum* to get it sliceable. If you can let it chill overnight, that’s when you hit jackpot city. It becomes wonderfully dense, totally firm, and the flavors have time to meld together. It truly becomes the perfect Make Ahead Dessert Recipe that way!
If you want to see how I handle keeping other recipes firm without baking, check out my guide on making safe, chilled treats over here—even though it’s soup, chilling is just as important for texture sometimes!
Estimated Nutritional Data for a Slice of peanut butter pie
Now, before we get lost in the deliciousness—and trust me, this is an indulgent treat!—I always like to give you folks a heads-up on the numbers. Because we are using sweetened condensed milk, cream cheese, and peanut butter, this Rich Dessert Pie is certainly designed to make a statement, flavor-wise! The details below are just my best estimate for one generous slice, based on standard, name-brand ingredients. If you start substituting things like lighter cream cheese or low-fat peanut butter, the numbers will shift on you!
This is more of a benchmark so you know what you’re dealing with when you serve up this great Peanut Butter Dessert, not a strict diet label. Every slice brings joy, and that’s what truly matters at Forkful Heaven!
Here’s the quick rundown:
- Serving Size: 1 slice
- Calories: 450
- Fat: 28g
- Saturated Fat: 12g
- Unsaturated Fat: 16g
- Trans Fat: 0g
- Carbohydrates: 45g
- Sugar: 35g
- Fiber: 2g
- Protein: 10g
- Sodium: 300mg
- Cholesterol: 45mg
See? That sugar content tells you this is a proper celebration dessert! We’re not fooling ourselves here; it’s divine! Just balance it out with a super light salad earlier in the week, and you’re golden. As always, treat these figures as a general guide. If you have any great ideas for cutting down the sugar while keeping that amazing creamy texture, let me know in the comments below!
Share Your Indulgent peanut butter dessert Experience
Well, that’s it! You’ve done it! You’ve created what I believe is one of the easiest *and* best ways to satisfy a serious sweet tooth. This peanut butter pie is total perfection, and I am just thrilled that I get to share this little piece of comfort with you. Seriously, the moment that cold, creamy filling hits your tongue sitting atop that crisp graham cracker crust? That’s pure bliss right there!
Now that you’ve got your masterpiece chilling, I absolutely cannot wait to hear about it! Please, head down to the comments section right now and tell me everything. Did you stick to the simple powdered sugar dust? Did you go absolutely wild with the Reese’s cups and chocolate drizzle? I love seeing how you all put your own spin on these comforting classics. Seeing your pictures and reading your success stories is seriously the best part of running Forkful Heaven.
If you made this No Bake Peanut Butter Pie and loved it—and I know you did!—do me a huge favor and give it a five-star rating right above the instructions. It helps other folks find this easy recipe when they’re craving something rich and quick. And if you know a friend who complains about needing simple, oven-free desserts, send this one their way!
If you’re already dreaming up your next baking adventure, why not try something equally fun but a little more chocolate-forward? My Banana Bread Brownies are just as easy to assemble and they bring a totally different kind of decadent flavor to the table. Happy eating, my friend! I can’t wait to see what you whip up next!
Print
Easy No-Bake Creamy Peanut Butter Pie
- Total Time: 4 hr 20 min
- Yield: 8 servings
- Diet: Vegetarian
Description
You need this simple, rich, and creamy no-bake peanut butter pie recipe. It features a buttery graham cracker crust and a decadent filling, making it a perfect crowd pleaser for any gathering.
Ingredients
- 1 1/2 cups graham cracker crumbs
- 1/2 cup unsalted butter, melted
- 1/4 cup granulated sugar
- 1 (8 ounce) package cream cheese, softened
- 1 cup creamy peanut butter
- 1 (14 ounce) can sweetened condensed milk
- 1 teaspoon vanilla extract
- 1 cup heavy whipping cream
- 1/4 cup powdered sugar
- Optional topping: Whipped topping, chocolate chips, or mini peanut butter cups
Instructions
- Prepare the crust: Mix graham cracker crumbs, melted butter, and granulated sugar in a medium bowl until combined. Press the mixture firmly into the bottom and up the sides of a 9-inch pie plate. Place the crust in the freezer while you prepare the filling.
- Make the filling: In a large bowl, beat the softened cream cheese until smooth. Add the peanut butter and beat until fully combined and creamy.
- Slowly pour in the sweetened condensed milk while mixing on low speed until smooth. Stir in the vanilla extract.
- In a separate bowl, whip the heavy whipping cream and powdered sugar until stiff peaks form. Gently fold the whipped cream into the peanut butter mixture until just combined. Do not overmix.
- Pour the creamy peanut butter filling into the chilled graham cracker crust. Spread evenly.
- Chill the pie in the refrigerator for at least 4 hours, or until firm.
- Before serving, top the pie with your choice of whipped topping, a drizzle of chocolate, or chopped peanut butter cups. Slice and enjoy this indulgent peanut butter dessert.
Notes
- For an Oreo crust peanut butter pie, substitute 2 cups of finely crushed Oreo cookies (filling included) for the graham cracker crumbs.
- You can make this pie a day ahead of time; it tastes even better after chilling overnight.
- If you want a slightly saltier contrast, use salted butter in the crust mixture.
- Prep Time: 20 min
- Cook Time: 0 min
- Category: Dessert
- Method: No-Bake
- Cuisine: American
Nutrition
- Serving Size: 1 slice
- Calories: 450
- Sugar: 35g
- Sodium: 300mg
- Fat: 28g
- Saturated Fat: 12g
- Unsaturated Fat: 16g
- Trans Fat: 0g
- Carbohydrates: 45g
- Fiber: 2g
- Protein: 10g
- Cholesterol: 45mg


Comments are closed.