
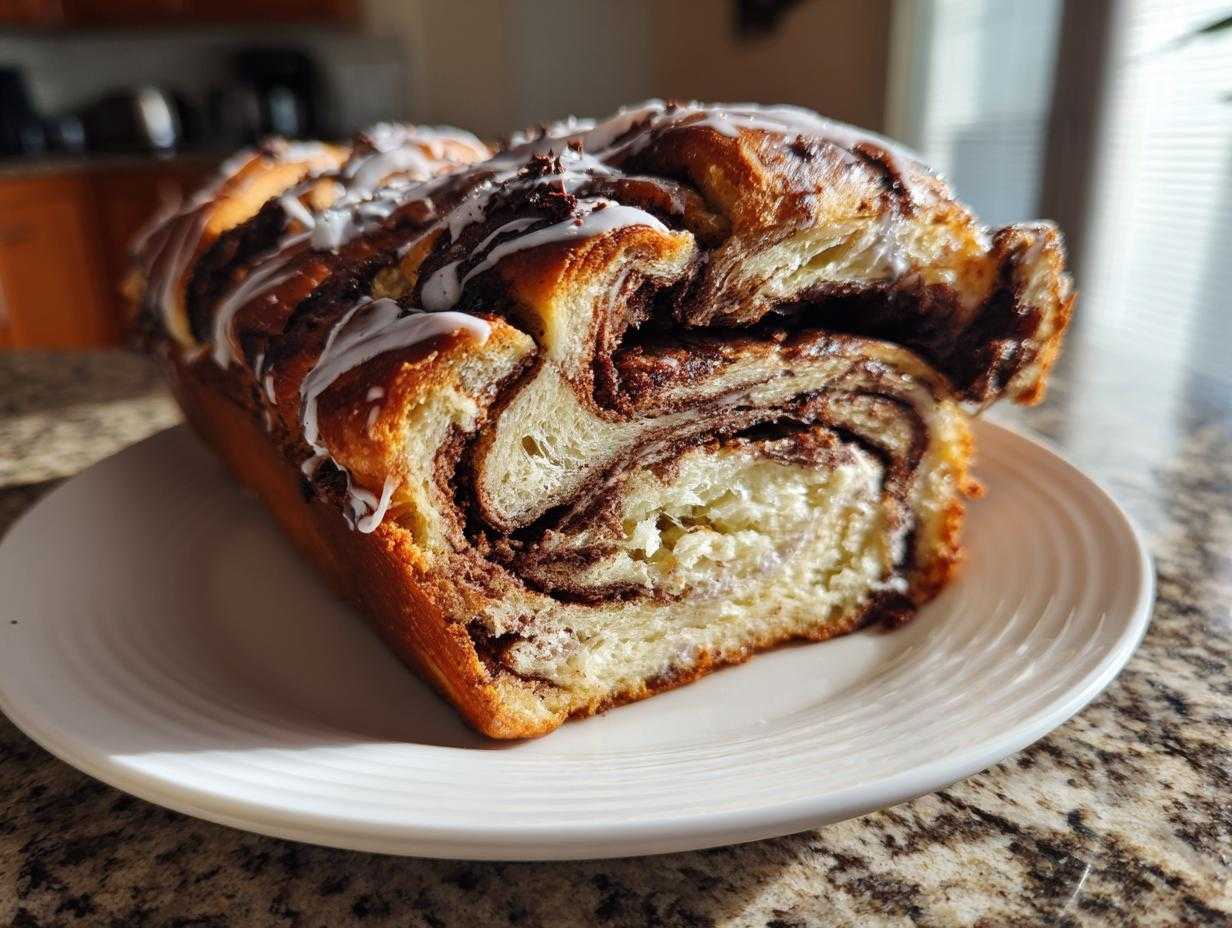
Oh my goodness, have you ever seen those gorgeous, tightly wound swirls of dark chocolate peeking out when you slice into a loaf? That breathtaking pattern—that’s what grabbed me about the **chocolate babka** in the first place! I used to think making a truly bakery-quality loaf at home was impossible, something reserved for professional pastry chefs. But trust me, after a few wonderfully messy weekends, I nailed it.
This isn’t just some quick bread; this is my ultimate showstopping yeast bread guide. We are talking rich, tender, brioche-style dough enveloping a decadent chocolate filling that melts in your mouth. Forget the slightly dry versions you find pre-packaged; this **Homemade Chocolate Babka** is the one that people will ask for every single year. You absolutely can conquer this weekend baking project!
Why This Homemade Chocolate Babka is a Bakery Classic Recipe At Home
What makes this **chocolate babka** so special? Honestly, it’s that unbelievable texture that screams luxurious. We’re starting with a real chocolate brioche recipe dough, so it’s soft, rich, and holds up beautifully without drying out. You’ll feel like a total baking superhero!
The secret to making this the **Best Chocolate Babka Recipe** is the contrast: that intensely flavorful, decadent chocolate filling against the pillow-soft bread. This isn’t just about taste, though. Achieving those perfect, gorgeous lines of chocolate—that’s the part that really sells the visual appeal. If you’ve ever wanted a true **Soft Swirled Bread** tutorial that actually works, this is it. Don’t shy away; mastering this **Tender Sweet Bread Tutorial** is easier than you think!

When you pull this loaf out, it smells incredible—like the best bakery in town, only better because you made it! You can check out my tips for perfecting other classic pastries here: cinnamon rolls and my blueberry muffins if you want to stock up on soft baked goods!
Ingredients for the Ultimate Chocolate Babka
Okay, let’s talk ingredients, because this rich **chocolate babka** demands quality, especially since we’re using that brioche-style dough. Measurements have to be spot-on here, folks! When you’re baking bread, especially one this soft, the temperature of your ingredients matters.
Make sure those four large eggs are sitting out on the counter well before you start. Room temperature eggs mix into the dough so much better and help create that lovely texture we’re aiming for. Also, notice we have butter in two forms: softened cut pieces for the dough itself, and melted butter strictly for brushing during the filling stage later on.
Here is everything you’ll need for this glorious loaf!
- 1 cup whole milk, lukewarm
- 2 1/4 teaspoons active dry yeast
- 1/2 cup granulated sugar, plus 1 teaspoon
- 4 large eggs, room temperature
- 1 teaspoon vanilla extract
- 3 3/4 cups all-purpose flour, plus more for dusting
- 1 teaspoon salt
- 1/2 cup (1 stick) unsalted butter, softened and cut into pieces
- 1/2 cup (1 stick) unsalted butter, melted, for brushing
- 1 cup powdered sugar, for glaze
- 2 tablespoons milk, for glaze
For the Decadent Chocolate Filling
This filling is what brings the drama! It’s super easy to whip up while the yeast is waking up. Remember, you want that brown sugar packed down tight to measure accurately for the richest flavor. And don’t skimp on the chocolate chips—chopping them roughly ensures they distribute nicely throughout the swirl.
- 1 cup (2 sticks) unsalted butter, very soft
- 1 cup packed light brown sugar
- 3/4 cup unsweetened cocoa powder
- 1 teaspoon vanilla extract
- 1/4 teaspoon salt
- 1 cup bittersweet chocolate chips, roughly chopped
Easy Babka Dough Technique: Making the Chocolate Brioche Recipe
Now we get into the real fun—making the dough for this incredible **chocolate babka**! Since this is basically a rich chocolate brioche recipe, it needs a little patience, but the stand mixer does most of the heavy lifting for us. First things first, wake up that yeast! Mix the lukewarm milk, a lick of sugar, and the yeast. If it gets foamy in about ten minutes, you’re golden. If it doesn’t foam? Toss it and start that part over; sad yeast means sad bread development, and we aren’t having that!
In the mixer bowl, toss in your flour, the main sugar, vanilla, and salt. Then, pour in your bubbly yeast mixture. Mix it low until it just seems to come together. Here’s where the magic happens for that soft swirled bread texture: add the softened butter pieces one by one. You have to be patient here! Let the dough fully incorporate that butter before adding the next piece. You need to knead this for a good 8 to 10 minutes on medium-low.
My expert tip? Don’t panic when the dough feels sticky against the sides of the bowl. It’s a high-fat dough, which is why it turns into that beautiful soft, elastic bread later. If you feel like you simply can’t manage the stickiness, dust your hands lightly instead of adding more flour, which can stiffen the final loaf.
First Rise and Filling Preparation
Once it’s smooth and elastic, get that dough into an oiled bowl, cover it tightly, and let it go! It needs 1.5 to 2 hours to double in size. Seriously, don’t rush this first rise for your **chocolate babka**; this is where the air gets trapped for that light, yet sturdy, finale loaf.
While that beautiful dough is puffing up, you can whip together the filling in about five minutes. Beat that soft butter until it’s creamy, then mix in the brown sugar, cocoa, vanilla, and salt. Just stir until it’s smooth. This **Decadent Chocolate Filling** will spread beautifully later! If you use a high-quality cocoa powder, you’ll get the best depth of flavor for this **Best Chocolate Babka Recipe**.
Step by Step Babka Instructions: Shaping the Moist Chocolate Swirl Bread
Alright, time to transform that puffy dough into the iconic shape of the **chocolate babka**! This part really requires you to focus, as achieving those defined layers is what makes this a true **Moist Chocolate Swirl Bread**. First, punch that risen dough down gently and turn it out onto a lightly floured surface, about the size of a big placemat—think roughly 12 by 18 inches. Don’t use too much flour, we don’t want a dry edge!
Next, take your **Decadent Chocolate Filling** and spread it evenly across the dough. Make sure you leave about an inch bare along one of the long edges. That empty strip is your seal! Sprinkle your chopped chocolate chips over the filling. Now, starting from the long edge *opposite* the bare strip, roll that dough up as tightly as you possibly can—you want a firm log for the best results. It’s amazing how much chocolate fits inside this thing!
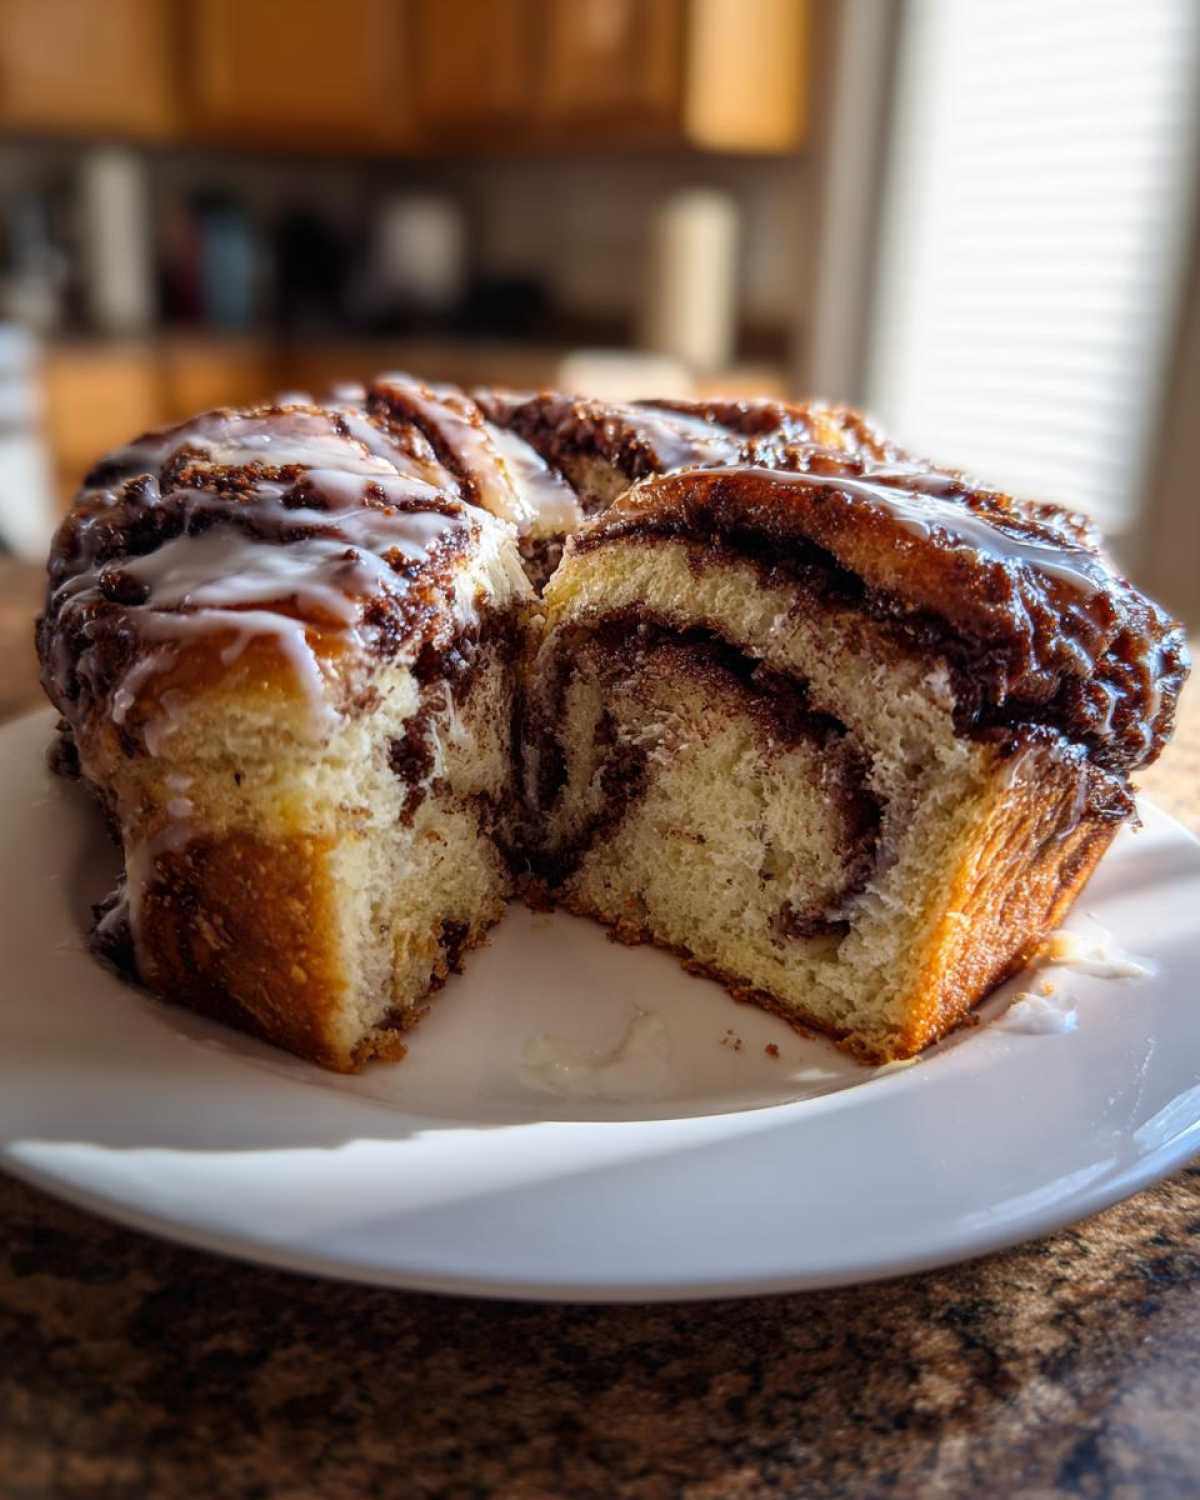
Here comes the part that makes bakers nervous: the slice and the braid. This is our crucial moment for learning **How to Braid Babka**! Using a really sharp knife or a bench scraper, slice that log right down the middle lengthwise. You need to reveal those beautiful, chocolatey layers you just created. Lay the two halves down next to each other, cut sides facing up. Then, just gently twist the two halves together. Try to keep those cut sides visible throughout the twist, which really highlights the swirl pattern. Pinch the ends shut to seal it up tight.
For a huge confidence boost and tighter definition in your swirl, try this trick: once rolled and filled (but *before* slicing), wrap the log tightly in plastic wrap and pop it in the fridge for about 20 minutes. That chilling firms up the butter in the filling and makes slicing remarkably clean! After braiding, gently move your loaf into your greased 9×5 pan, cover it loosely, and let it proof one last time. If you need help with basic bread handling, check out my thoughts on crusty Italian loaves for general dough handling!
Baking the Showstopping Yeast Bread and Chocolate Bread Glaze Tips
Now that our beautiful **chocolate babka** is resting in the pan, it needs one final nap. Let it proof, covered loosely, for about 45 to 60 minutes until it looks puffy and inflated. Make sure you preheat your oven to 350°F (175°C) during the last 15 minutes of this rise—we want it hot and ready!
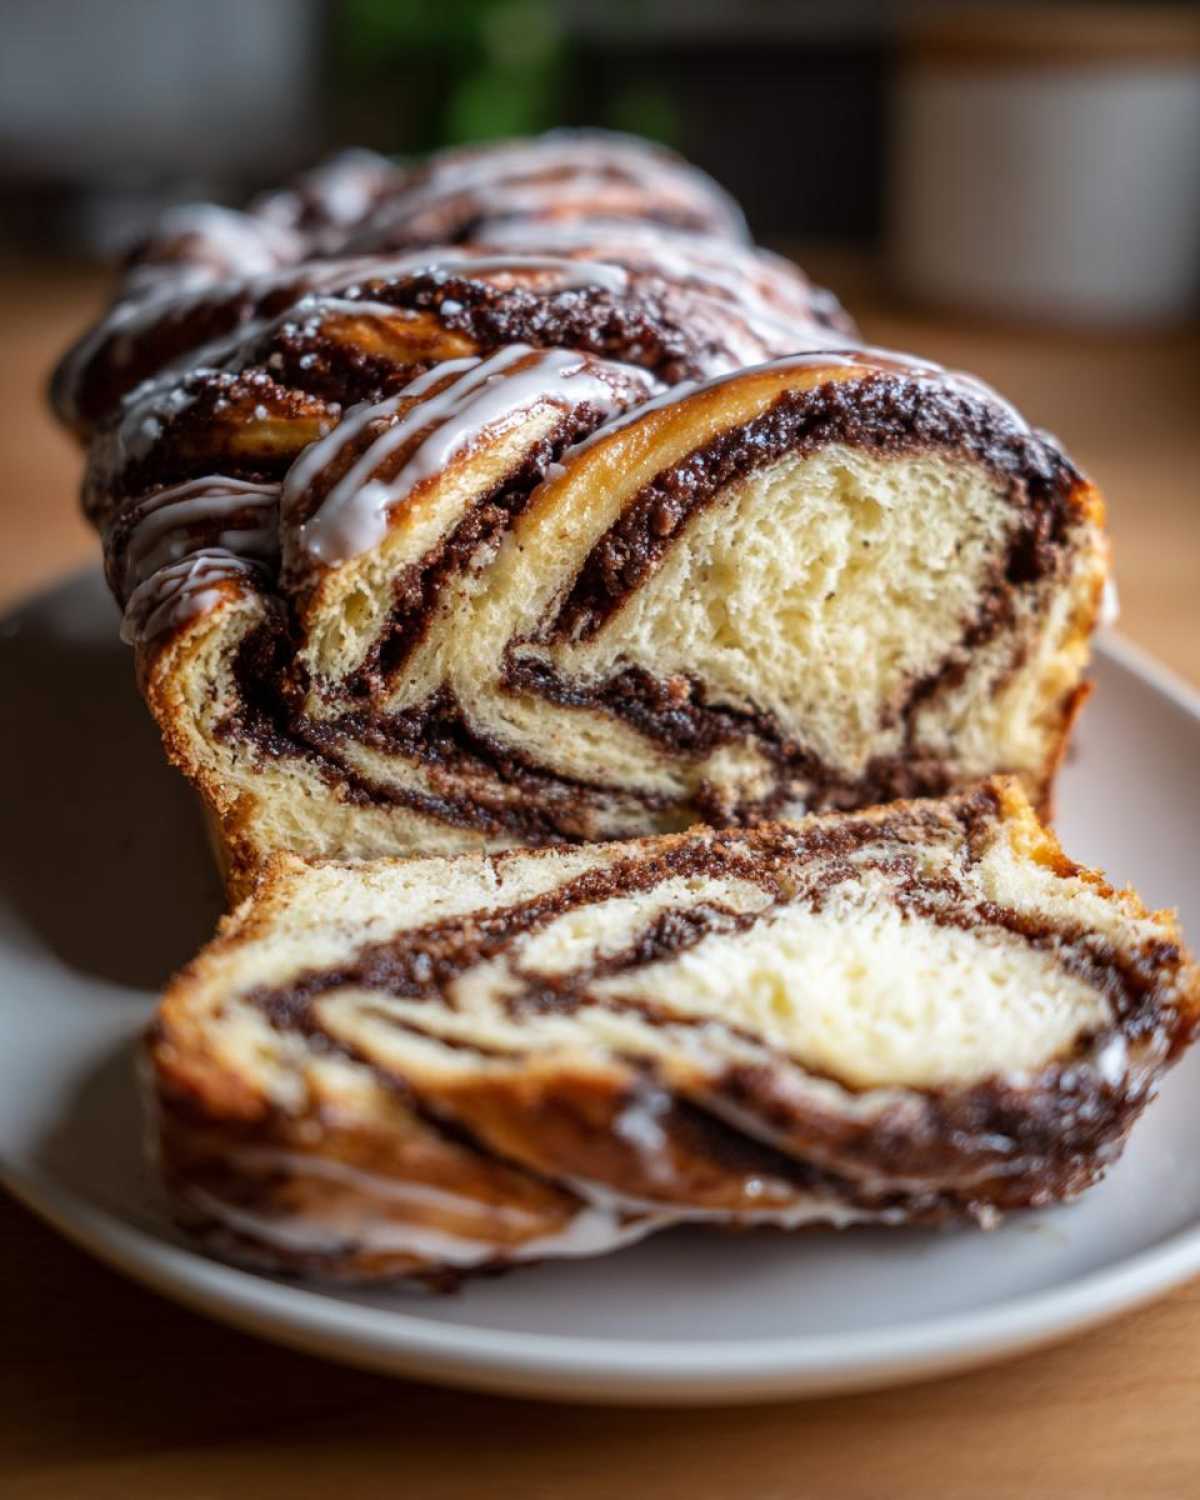
Baking time is usually 35 to 45 minutes. This part is just keeping an eye on it. If you notice that fantastic chocolate top is browning too fast, don’t panic! Just loosely tent a piece of aluminum foil over the top. That traps the steam just enough to slow the browning while the inside finishes cooking. You’re looking for an internal temp of 200°F (93°C) to know this **Showstopping Yeast Bread** is done perfectly.
Once it’s out, let it cool for just a few minutes before moving to the glaze. For the glaze, you want a simple, thin drizzle. Whisk the powdered sugar and just 2 tablespoons of milk together. Don’t add too much liquid, or it’ll just run right off! A thin glaze dries a little shiny and adds that final professional touch to your **chocolate babka**. If you need ideas for other dessert finishes, check out my buttercream frosting recipe for inspiration, though this simple glaze is traditional!
Tips for Success When Making Chocolate Babka
I want your adventure making this **chocolate babka** to be smooth, so I’ve gathered the little secrets I learned the hard way. When you’re working with a rich dough like this **Chocolate Brioche Recipe**, technique wins over speed every single time. You’ve already seen how important the first rise is, but the shaping stage needs a little extra love, too.
Remember the note I snuck in earlier about chilling the rolled dough? Seriously, this is my top tip for getting those crisp, defined swirls. Once you’ve rolled your rectangle out and spread that **Decadent Chocolate Filling** evenly, rolling it up tightly, then wrapping it well and chilling it for about twenty minutes before you slice it lengthwise. That chilling firms up the butter just enough so when you slice it for braiding, the layers don’t just squish together into a muddy mess. You get clean, sharp lines!

If you had to skip the stand mixer, or just felt like powering through the kneading by hand, you need to know when to stop. You’re aiming for the ‘windowpane test.’ That means you should be able to gently pull off a small piece of dough and stretch it thin enough that light passes through it without it tearing instantly. It takes about 15 minutes of good, strong kneading, but it’s worth it for this structure.
Also, keep the environment in mind! If my kitchen is warm, my butter melts too fast, and the dough gets slack. If it’s cold, the butter stays too hard, and the dough won’t hydrate properly. Try to work in a temperate spot. If you’re struggling with dough texture in general, I’ve got more great tips on handling soft doughs over in my sour cream coffee cake recipe, which has a similarly tender crumb!
Finally, don’t be afraid of the butter in the filling. If you try to use less, the filling won’t spread smoothly, and it might tear the dough when you roll it up, ruining the look of your **Moist Chocolate Swirl Bread**. Embrace the decadence—that’s what makes this the **Best Chocolate Babka Recipe**!
Storage & Reheating Instructions for Leftover Chocolate Babka
The best part about making a big, rich **chocolate babka** like this is having leftovers, but only if you store it right! That brioche-style dough is lovely when fresh, but dried out babka is a tragedy. You want to keep that tenderness intact.
For short-term storage—say, the next day or two—keep the loaf tightly wrapped in plastic wrap, and then place that bundle into an airtight container or a large zip-top bag. You want to stop air circulation as much as possible. Store it at cool room temperature, not in the fridge! I know, I know, we put everything in the fridge, but the cold really dries out sweet breads like this **Homemade Chocolate Babka** surprisingly fast.
If you’re not going to eat it within two days, you should definitely freeze it! Slice the entire loaf first—this is key. Wrap each slice individually in plastic wrap, and then toss those wrapped slices into a freezer-safe bag. It freezes beautifully for up to three months. Honestly, I often just bake two when I’m tackling the dough work, just so I can freeze one for later!
When you’re ready to enjoy a frozen slice of **chocolate babka**, just pull one out. You don’t even need to fully thaw it. Pop the wrapped slice right into the microwave for about 15 to 25 seconds. That little bit of warmth reactivates the fats, making the bread feel almost freshly baked, and the chocolate gets wonderfully gooey again. It’s the perfect quick breakfast treat!
Frequently Asked Questions About This Chocolate Babka Recipe
I totally get it! When you put this much love into a **Weekend Baking Project**, you want to make sure every step is right. I’ve had a few readers—and trust me, I’ve had these questions myself when I was first learning the **Easy Babka Dough Technique**—ask about substitutions and problem-solving. Hopefully, these little tips help you create the **Best Chocolate Babka Recipe** on your first go!
We want this **Homemade Chocolate Babka** to turn out perfectly every time, and sometimes you just need a quick answer to a specific hurdle.
Can I make the chocolate babka dough ahead of time?
Oh yes, you absolutely can! And I highly recommend it, especially if you want this for a weekend brunch, because it breaks up the work. Once your dough is kneaded (Step 4 in the instructions), instead of letting it rise on the counter, lightly oil it, put it in a big, tight container, and stick it in the fridge. The cold slows the yeast way down. You can let it cold-proof overnight—up to 24 hours! Just make sure you pull it out about 90 minutes before you plan to roll it out, just to let it warm up slightly so you can handle it.
What is the best way to get defined swirls in my chocolate babka?
This comes down to two things: consistency and rolling technique. First, your **Decadent Chocolate Filling** has to be smooth and spreadable, but not greasy or runny. If the butter in the filling is too soft, it just blends right into the dough instead of sitting on top. Second, you must roll that log *tightly*. Think about squeezing out every bit of air when you roll it up. The tighter the initial roll, the more dramatic and defined those beautiful swirls will be once you slice and braid it. A tight roll is key to a stunning cross-section!
My dough won’t rise! What went wrong?
That’s usually one of two culprits with this **Showstopping Yeast Bread**. The number one reason is the milk temperature. If the milk was too hot, it killed your yeast before it even started. If the milk was too cold, the yeast just took forever to wake up. Check your heating source! Secondly, humidity plays a role. If your kitchen is cold, give the dough a little blanket—cover the bowl with a towel and set it somewhere cozy, like inside an oven that is turned OFF but has the light on. That gentle warmth does wonders! If you end up with extra dough, you can use it to make my amazing chocolate babka bread pudding!
Can I substitute the chocolate chips or use Nutella instead?
You can certainly experiment, but for the *best* results in this specific recipe, stick with the bittersweet chocolate chips. Nuts and chips provide little pockets of solid texture that contrast nicely with the soft dough. If you use something like Nutella, it has a higher liquid/oil content, and it can turn the dough gummy or cause it to slump during the final rise and bake. If you must substitute, I’d recommend a thick, cocoa-heavy ganache filling made with very little cream, but using the chips is the easiest way to guarantee success for this **Holiday Dessert Bread**!
Is it okay if I skip the braiding and just use a standard loaf pan?
You absolutely can skip the slicing and twisting if you’re short on time or just want a simpler loaf structure! But hey, it wouldn’t be a classic **chocolate babka** without those swirls showing off, right? If you skip the slicing, just spread the filling evenly, roll it up tightly (as described in the shaping step), pinch the seam, and place it directly into the pan. It will bake up more like a beautiful, rich chocolate swirl loaf, but it won’t have the signature patterned top. It will still taste amazing!
Nutritional Estimate for This Recipe
Now, I have to give you the disclaimer right up front: I’m a baker, not a nutritionist, so these numbers are just an educated guess based on the standard ingredients in this **Homemade Chocolate Babka** recipe. Every brand of butter, every scoop of cocoa powder, and how thick you cut your slice is going to change things!
The important takeaway here is that this is truly an indulgent treat! It’s rich because it’s made with butter and chocolate—it’s what makes this **chocolate babka** so spectacularly good. Don’t worry too much about the exact figures; just promise me you’ll enjoy every single bite!
Here’s the breakdown based on serving one loaf in 12 slices. For the full legal rundown, feel free to check out our full disclaimer here.
- Serving Size: 1 slice
- Calories: Estimated around 450
- Sugar: High, around 35g (that rich filling adds up!)
- Fat: Roughly 28g (hello, butter!)
- Carbohydrates: Around 45g
- Protein: About 7g
The Ultimate Homemade Chocolate Babka
- Total Time: 3 hours 30 min
- Yield: 1 loaf
- Diet: Vegetarian
Description
A detailed recipe for making a soft, moist chocolate babka with rich, defined swirls using a brioche-style dough and decadent filling.
Ingredients
- 1 cup whole milk, lukewarm
- 2 1/4 teaspoons active dry yeast
- 1/2 cup granulated sugar, plus 1 teaspoon
- 4 large eggs, room temperature
- 1 teaspoon vanilla extract
- 3 3/4 cups all-purpose flour, plus more for dusting
- 1 teaspoon salt
- 1/2 cup (1 stick) unsalted butter, softened and cut into pieces
- 1/2 cup (1 stick) unsalted butter, melted, for brushing
- 1 cup powdered sugar, for glaze
- 2 tablespoons milk, for glaze
- For the Filling:
- 1 cup (2 sticks) unsalted butter, softened
- 1 cup packed light brown sugar
- 3/4 cup unsweetened cocoa powder
- 1 teaspoon vanilla extract
- 1/4 teaspoon salt
- 1 cup bittersweet chocolate chips, roughly chopped
Instructions
- Activate the Yeast: In a small bowl, combine the lukewarm milk, 1 teaspoon of sugar, and the yeast. Let stand for 5 to 10 minutes until foamy.
- Make the Dough: In the bowl of a stand mixer fitted with the dough hook, combine the remaining sugar, eggs, vanilla, flour, and salt. Mix on low speed until combined.
- Add Butter: Pour in the yeast mixture. Mix on low speed for 2 minutes, then increase speed to medium-low. Gradually add the softened butter pieces, one piece at a time, mixing well after each addition.
- Knead: Continue kneading on medium-low speed for 8 to 10 minutes until the dough is smooth and elastic. It will be soft.
- First Rise: Place the dough in a lightly oiled bowl, turning to coat. Cover and let rise in a warm place for 1.5 to 2 hours, or until doubled in size.
- Prepare Filling: While the dough rises, make the filling. In a medium bowl, beat the softened butter until creamy. Add the brown sugar, cocoa powder, vanilla, and salt. Mix until smooth and well combined.
- Shape the Dough: Punch down the risen dough. Turn it out onto a lightly floured surface. Roll the dough into a large rectangle, about 12 by 18 inches.
- Spread Filling: Spread the chocolate filling evenly over the entire surface of the dough, leaving a 1-inch border along one long edge bare. Sprinkle the chopped chocolate chips over the filling.
- Roll and Slice: Starting from the long edge opposite the bare border, tightly roll the dough into a log. Pinch the seam closed. Using a sharp knife or bench scraper, carefully slice the log in half lengthwise, exposing the layers.
- Braid: Lay the two halves side-by-side, cut sides facing up. Twist the two halves together, keeping the cut sides facing up as much as possible to show the swirl pattern. Pinch the ends together.
- Second Rise: Carefully transfer the braided log to a greased 9×5 inch loaf pan. Cover loosely and let rise in a warm spot for 45 to 60 minutes, until puffy. Preheat your oven to 350°F (175°C) during the last 15 minutes of the rise.
- Bake: Bake for 35 to 45 minutes. If the top browns too quickly, loosely tent it with foil. The internal temperature should reach 200°F (93°C).
- Glaze: While the babka cools slightly, whisk together the powdered sugar and 2 tablespoons of milk to make a thin glaze. Drizzle over the warm babka. Let cool before slicing.
Notes
- For the best swirl definition, chill the filled and rolled dough for 20 minutes before slicing it in half for braiding.
- If you do not have a stand mixer, you can knead the dough by hand for about 15 minutes until it passes the windowpane test.
- Use high-quality cocoa powder for a deeper chocolate flavor in the filling.
- Prep Time: 45 min
- Cook Time: 45 min
- Category: Dessert
- Method: Baking
- Cuisine: Eastern European
Nutrition
- Serving Size: 1 slice
- Calories: 450
- Sugar: 35
- Sodium: 150
- Fat: 28
- Saturated Fat: 17
- Unsaturated Fat: 11
- Trans Fat: 0.5
- Carbohydrates: 45
- Fiber: 3
- Protein: 7
- Cholesterol: 75


Comments are closed.