
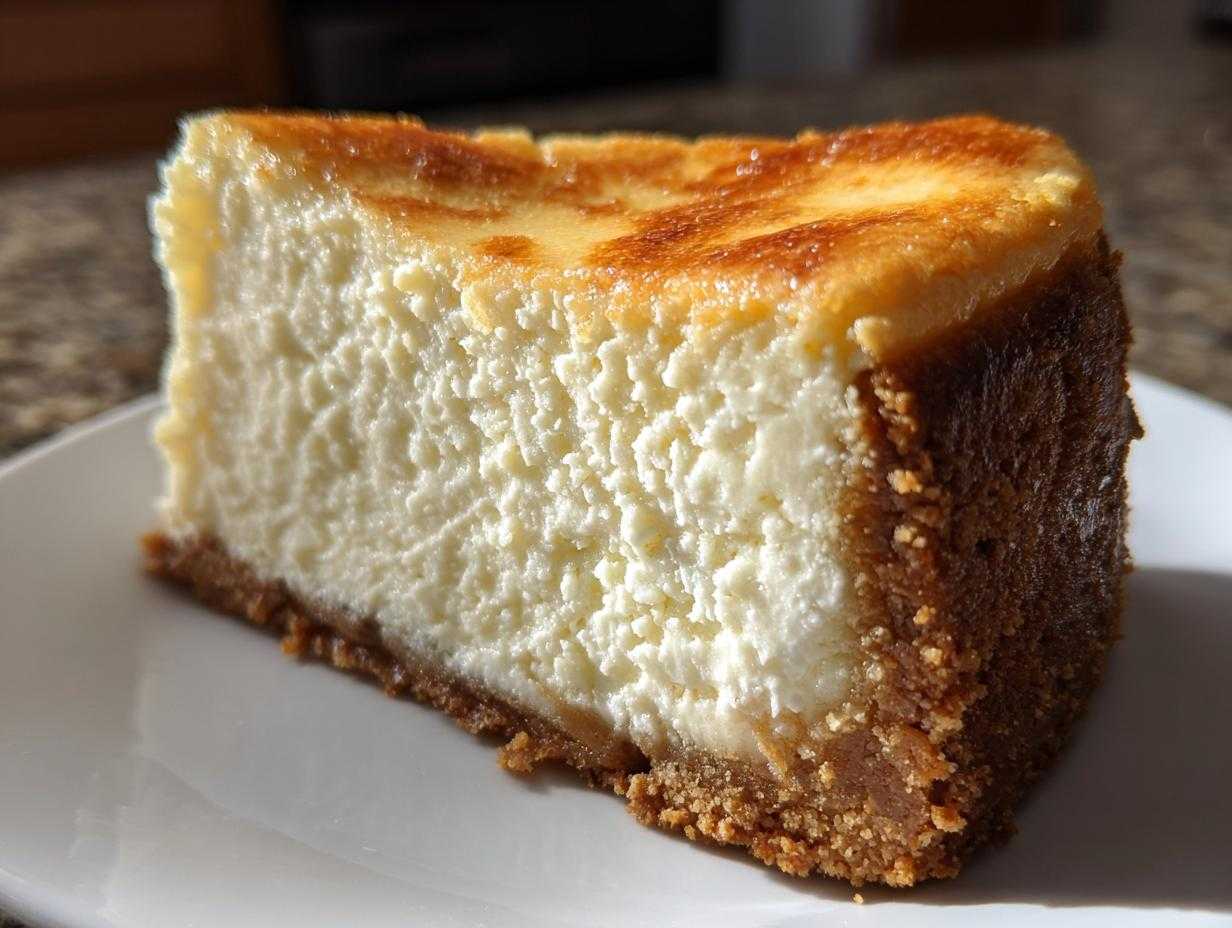
Okay, seriously, put down whatever store-bought dessert you were planning on grabbing. If you’ve ever been intimidated by cheesecake—scared of the water bath, terrified of that dreaded crack right down the middle—then you are in the absolute right place! I spent years chasing that perfect slice—the one that’s so impossibly rich, dense, and velvety smooth it melts before you even chew it. This isn’t just some recipe I found online; this is the ultimate, authentic new york cheesecake recipe I finally nailed after too many failed attempts. I sweated the small stuff, like ingredient temperatures and slow cooling, so you don’t have to. Trust me, we’re getting that hallmark tangy flavor and that flawless, tall, creamy finish. You are absolutely going to master this decadent dessert from scratch!
Why This New York Cheesecake Recipe Delivers Rich, Creamy Perfection
This isn’t just a sweet cream cheese pie; it’s a commitment to texture. What sets our Classic New York Cheesecake apart is the dedication to the perfect crumb. We’re aiming for that hallmark density you expect from Manhattan bakeries!
- The flavor is perfectly balanced—just the right amount of sugary sweetness cut by that beautiful, essential tang.
- It stays incredibly moist, even on day two.
- We promise a smooth, velvety surface, not a cratered mess!
Achieving That Signature Dense Cheesecake Texture
The secret weapon is simple: you must use four full packages of the highest quality, full-fat cream cheese, and everything needs to be at room temperature. Cold ingredients fight each other in the bowl! We’re not whipping air in here; we’re aiming for a Tall and Creamy Cheesecake that feels substantial when you cut into it.
Ingredients for the Classic New York Cheesecake
When we talk about assembling this New York Cheesecake Recipe, the exactness of the measurements is critical. This isn’t the time to eyeball things, especially when it comes to the dairy! My biggest rule, which I learned the hard way after a lumpy disaster, is that your cream cheese, sour cream, and eggs must be sitting out on the counter for a good hour or two before you even turn on the mixer. We need everything cooperative so it blends into that signature smooth base. Don’t substitute that full-fat cream cheese—it’s what gives us that incredible, Dense Cheesecake structure.
For the Buttery Graham Cracker Crust Recipe
This crust is simple, classic, and needs to be buttery enough to hold up against all that creamy goodness. Make sure your butter is melted perfectly before you mix it in!
- 1 1/2 cups graham cracker crumbs
- 1/4 cup granulated sugar (yes, just for the crust!)
- 6 tablespoons unsalted butter, melted
For the Creamy Baked Cheesecake Filling
Here’s where the magic happens. Remember, mix on low, keep the speed down, and don’t let anything go into the bowl until it’s totally smooth. We are baking this slowly; we are not aerating it!
- 4 (8 ounce) packages full-fat cream cheese, softened to room temperature
- 1 1/2 cups granulated sugar (for the filling)
- 1/4 cup all-purpose flour
- 1 teaspoon vanilla extract
- 1/4 teaspoon salt
- 1 cup sour cream, room temperature
- 4 large eggs, room temperature
Step-by-Step Instructions for New York Cheesecake
Okay, this is the part where we show off our patience! Baking a true Classic New York Cheesecake requires respect for the process, especially around the heat. If you follow these directions perfectly—especially the cooling part—you’ll see why this is the absolute Best Cheesecake Recipe out there. Forget those hairline cracks; we are making a centerpiece!
Preparing the Crust and Oven Setup
First things first: get your oven preheated to 350°F (175°C). Now, grab that 9-inch springform pan. This is crucial: wrap the outside bottom and sides tightly, like you’re wrapping a mummy, with heavy-duty aluminum foil. I use two layers just to be safe, because we absolutely cannot let any water from the bath leak in. Combine your graham crumbs, the crust sugar, and melted butter. Press that mix firmly into the bottom and about an inch up the sides of your foiled pan. Pop it into the hot oven for 10 minutes. Once it comes out, let it cool slightly while you adjust your oven temp down to 325°F (160°C).
Mixing the Filling Without Adding Air
This step is critical for that velvety texture! In a big bowl, beat your softened cream cheese until it’s 100% smooth—no lumps allowed! Scrape down the bowl. Now, *gradually* beat in the filling sugar, the flour, vanilla, and salt. Mix it just until it combines. Don’t get crazy! Next, mix in the room-temperature sour cream until it’s blended. Finally, the eggs. Add them one at a time on the absolute lowest speed. I stop mixing the moment the last yolk disappears. Seriously! Overmixing equals air, and air equals cracking chocolate.
Baking the Dense Cheesecake with a Water Bath
Pour that lovely, smooth batter over your cooled crust. Grab a large roasting pan—one that’s way bigger than your springform—and set the cheesecake pan inside it. Now, carefully pour hot, nearly boiling water into the roasting pan until the water comes about halfway up the sides of the springform pan. That’s your water bath, and it keeps things humid! Slide it into the 325°F oven for 60 to 75 minutes. You know it’s ready when the edges look set, but the very center two inches still wobbles gently if you nudge the pan—not sloshing, just a slight jiggle.

Crucial Slow Cooling for a No Crack Cheesecake Tips Result
This slow-down step is the hero of all No Crack Cheesecake Tips. Do not take it out yet! Turn the oven OFF. Take a wooden spoon—any sturdy wooden spoon will do—and prop the oven door open about two inches. Leave the cheesecake inside this gentle heat for one full hour. This slow transition from hot to room temperature is what prevents the sudden contraction that causes those awful fissures. After that hour, pull it out of the water bath and let it cool completely on a wire rack at room temperature before it even thinks about hitting the fridge.
Tips for the Best Cheesecake Recipe Every Time
Honestly, once you get the technique down for this Classic New York Cheesecake, you’ll feel like you can bake anything! It sounds really intense when you read the instructions about the water bath and the slow cooling, but it’s really just about taking it easy and respecting the ingredients. If you’re rushing, you’re going to get that crack. We are not rushing today!
I’ve found that the simplest tips, taken from my own mistakes, really make the difference between an ‘okay’ cake and the Best Cheesecake Recipe you’ll ever serve. Don’t fight the cream cheese; work with it when it’s cooperative!
Ingredient Temperature Matters for Smoothness
I can’t stress this enough: room temperature is not optional for this New York Cheesecake Recipe. If your cream cheese is even a little cold when you start mixing, you’re going to end up with lumps. You’ll be tempted to mix longer to break those lumps up, and bam!—you’ve incorporated too much air. That’s crack City, population: you!
Your eggs and sour cream need to be happy and warm too. When all those rich ingredients—the cream cheese, the sour cream, the eggs—are the same temperature, they emulsify beautifully, creating a structure that’s naturally sturdy and flawlessly smooth. It just mixes easier, mixes better, and results in that perfect Creamy Baked Cheesecake texture you’re looking for. If you have time, take everything out the morning you plan to bake. Waiting an extra hour is worth avoiding thirty minutes of scraping down a lumpy bowl!
If you love the tanginess that sour cream adds here, you might want to try my favorite sour cream coffee cake sometime—it’s fluffy, but that small amount of dairy keeps it moist for days!
Serving and Storing Your Homemade Cheesecake
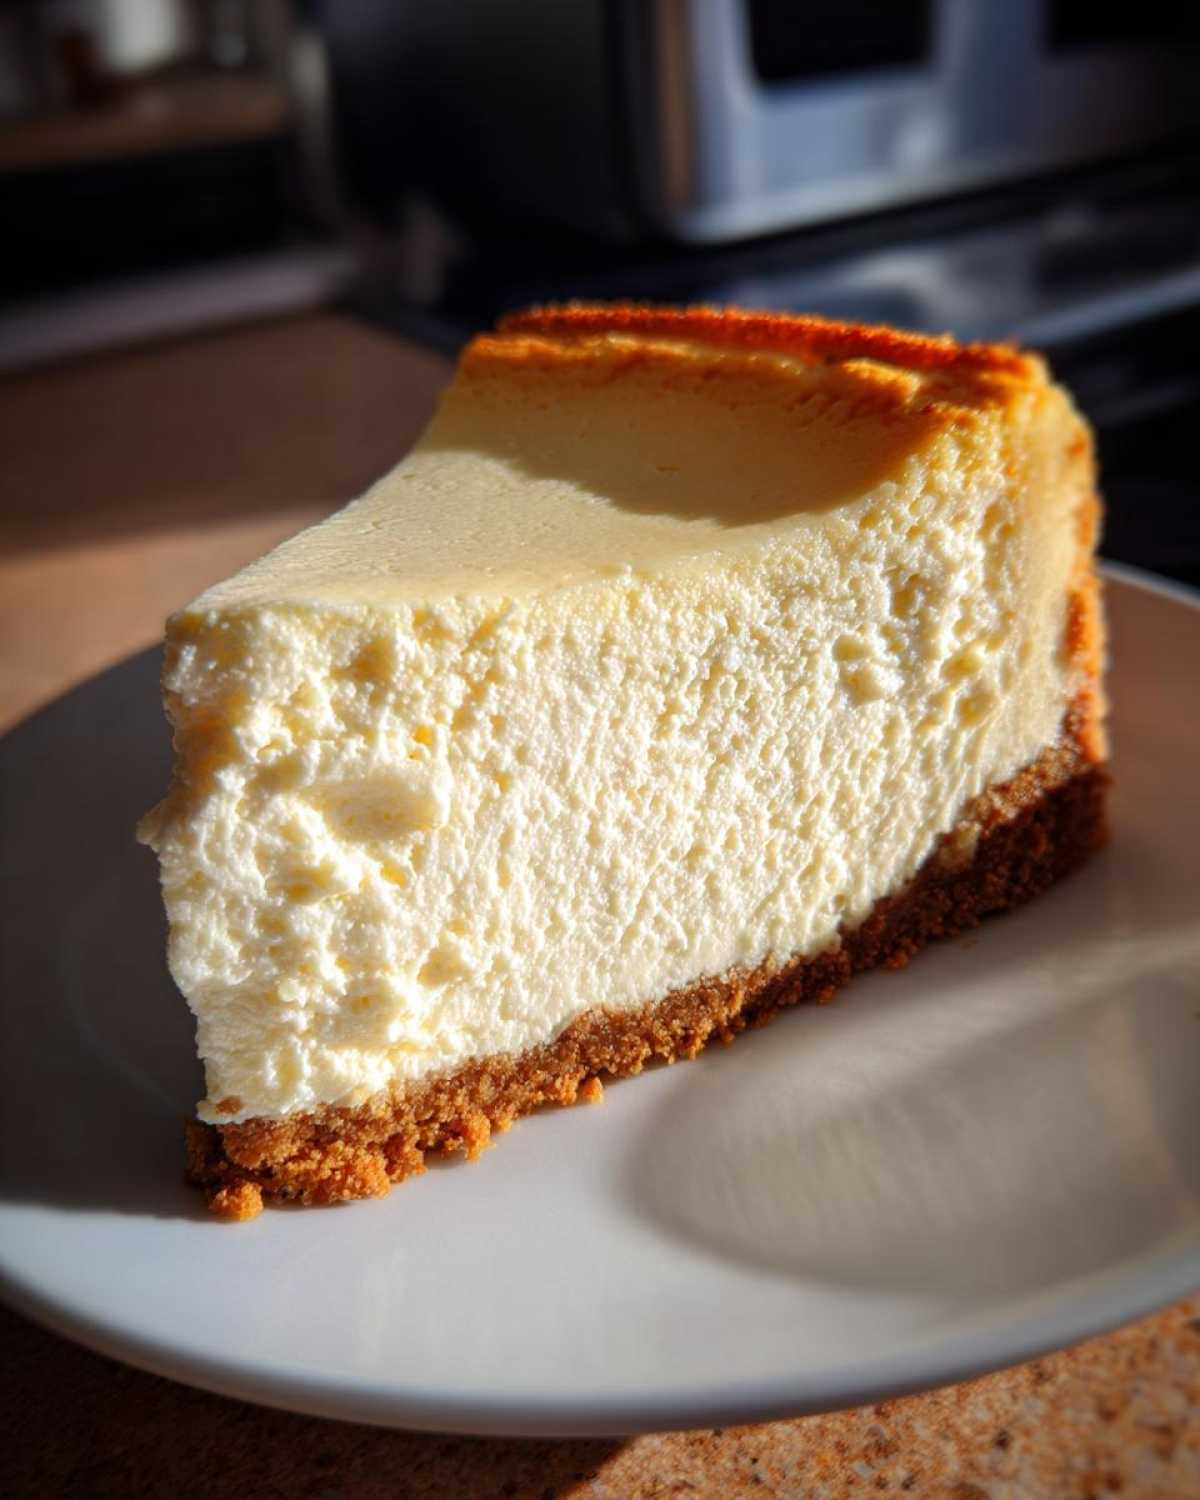
We made it! The baking and the slow cooling are done, which means you’ve successfully navigated the scariest part of making a Classic New York Cheesecake without cracks. But we aren’t done quite yet. You absolutely cannot slice this masterpiece right now, no matter how tempting that creamy top looks!
If you slice it now, it’s just going to crumble, and you’ll get a messy plate instead of that beautiful slice of Rich Dessert you earned. Patience is the final ingredient in this recipe, people!
Chilling Time for Optimal Rich Dessert Flavor
You need the chill factor! I know, waiting is the worst part, but this Dense Cheesecake needs time—and I mean time—for the starches and fats to firm up properly. My personal, non-negotiable rule is to let it chill for a full 12 hours, ideally overnight. If you are making this for a holiday dinner, make it the day before!
Seriously, the flavor deepens overnight too. That little bit of tang from the sour cream and cream cheese really settles in after 12 hours in the fridge. Once it’s thoroughly chilled, you can carefully release the sides of your springform pan. Here’s my little trick for the cleanest slice imaginable: before cutting, dip a long, thin knife into a glass of hot water, wipe it dry quickly, and then make your cut. Wipe and reheat the knife between every single slice! It glides right through that firm filling.
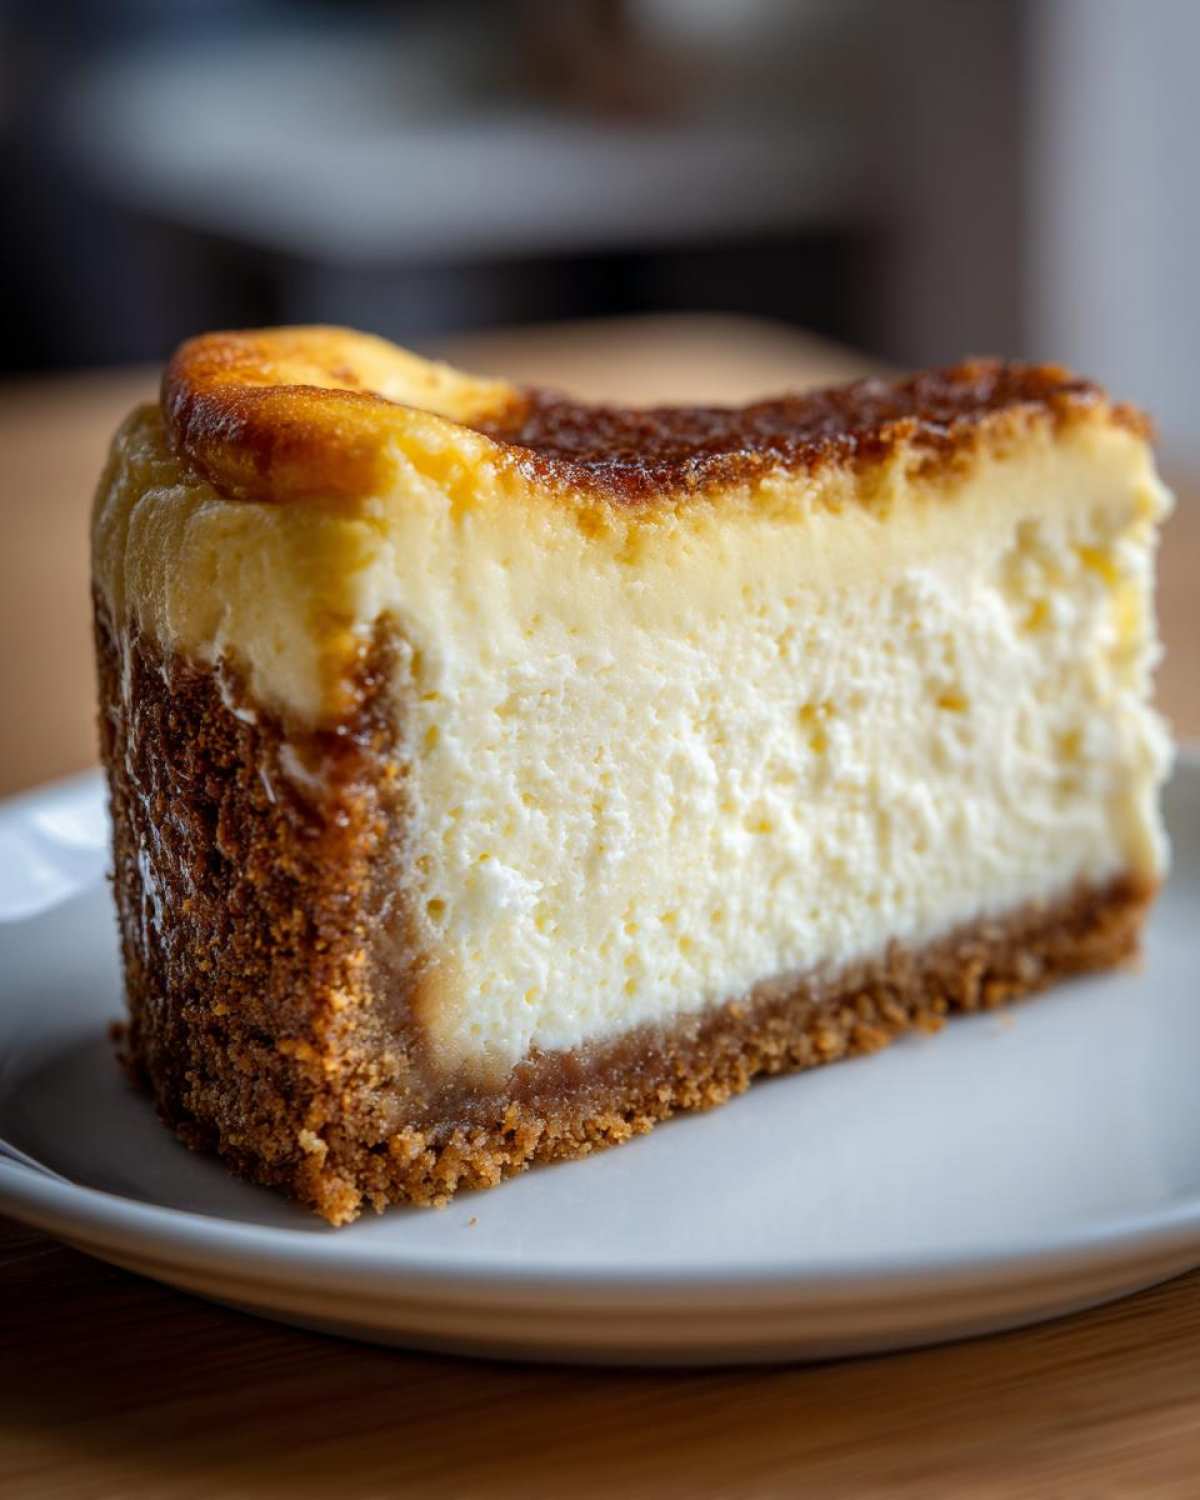
To store your gorgeous Homemade Cheesecake, cover it loosely with plastic wrap once it’s completely cool and set. It keeps beautifully in the refrigerator for about five days. It’s so satisfying knowing you made that spectacular Timeless Dessert from scratch!
Variations for Your Classic New York Cheesecake
We spent all this time perfecting the absolute foundational, most glorious Classic New York Cheesecake recipe, and you should definitely serve it plain the first time you make it! It really stands on its own merits. But listen, once you’ve mastered the crack-free technique, you can gently start layering on your flavor enhancements. We aren’t doing crazy things here; we are just adding little whispers of extra decadence to an already stellar Rich Dessert.
I usually stick to sour cream or maybe a lovely thin layer of fruit, but there are a couple of easy boosts that my friends always rave about when I bring this Homemade Cheesecake to gatherings. Remember, these are little extras, not distractions from the creamy core!
A Bright Lift: Zesting the Batter
If you want to just punch up that natural tanginess just a tiny bit, try adding some citrus zest to the filling right when you add the vanilla and sour cream. Lemon is the classic choice because it cuts through the richness perfectly. You just need the zest of one medium lemon—don’t scoop any of the white pith underneath, or it gets bitter! Just the bright yellow/orange shavings go in. It wakes up the cream cheese beautifully.
Simple Toppings That Don’t Weigh It Down
You absolutely do not need a heavy layer of chocolate ganache; that hides the texture! Instead, think thin, elegant layers. A simple, homemade tart cherry topping is fantastic. You just cook down fresh or frozen cherries with a little sugar and cornstarch until they thicken up. Let that cool completely before spooning it over the top. It adds color and a lovely flavor contrast.

If you’re thinking about something richer, you can always explore things like turtle cheesecake styles, but honestly, for the pure New York Cheesecake experience, keeping the top simple lets that dense, silky texture shine through. A little drizzle or a scattering of perfectly ripe berries is your best friend here!
Frequently Asked Questions About Making New York Cheesecake
I get so many messages after people try this recipe, usually asking about the one ingredient they forgot or the one step they skipped! It’s totally normal when dealing with a Timeless Dessert like this. Let’s clear up the last few lingering doubts so you can serve up the Best Cheesecake Recipe confidently!
Is the water bath for the Creamy Baked Cheesecake truly necessary?
Oh, my friend, yes! If you want that super tall, crack-free, Creamy Baked Cheesecake result, you absolutely need that water bath. Think of it this way: the oven is a dry, harsh heat source. The water bath creates a humid, gentle envelope around the springform pan. This humidity keeps the top layer of the batter from drying out too quickly, which stops it from seizing up and cracking when the center is still moist. It’s pure insurance against ruin!
What if my Classic New York Cheesecake batter has small lumps?
If you see tiny lumps right after you finish mixing the cream cheese—before you add the eggs—you can try one quick trick: whip it on low speed for another 30 seconds. If it’s still refusing to blend completely, stop immediately! If you see lumps *after* you’ve added the dry ingredients or eggs, you are in a tricky spot. Gently scraping the sides and beating briefly on low speed is your last resort. Please, please, do not overmix trying to get rid of them; a few tiny lumps are far better than over-aerating the entire thing, which guarantees a cracked top. This Classic New York Cheesecake is best served smooth, but not at the cost of structure.
How long does it take for my Homemade Cheesecake to chill properly?
I know you want to slice into that Homemade Cheesecake right away, but you really can’t rush the chilling. Six hours is the bare minimum you need for basic setting, but I won’t tell a lie—it’s never as good as when it has fully chilled overnight. That extended time in the fridge is what lets the texture firm up into that dense, rich slice we’re hoping for. Give it the full 12 hours!
Estimated Nutritional Data for This Timeless Dessert
Now, I have to be upfront with you lovely bakers! While this New York Cheesecake is truly a Timeless Dessert, it is certainly not a low-calorie snack. We are using full-fat cream cheese, tons of sugar, and a buttery crust. That’s what makes it so incredibly delicious and decadent!
The numbers below are very rough estimates based on my own calculations for one standard slice of this Rich Dessert made exactly according to the recipe. These figures do not include any sour cream topping or extra fruit sauces you might swirl on top. Please treat this like a ballpark guide, not a strict dietary analysis!
For a more official look at how nutrition impacts your online content, take a peek at our standard site disclaimer.
| Nutrient | Amount (Approx.) |
|---|---|
| Serving Size | 1 slice |
| Calories | 450 |
| Fat | 30g |
| Saturated Fat | 18g |
| Cholesterol | 120mg |
| Carbohydrates | 40g |
| Sugar | 35g |
| Protein | 8g |
| Sodium | 300mg |
Share Your Decadent Dessert Creation
Now that you’ve mastered the temperamental beast that is baked cheesecake, I absolutely need to know how it turned out! Seriously, seeing those tall, smooth, crack-free masterpieces filling up my comments section makes my whole week. Did you manage to stick to the slow cooling? Did you get that perfect wobble in the center?
If you followed along with this New York Cheesecake Recipe and ended up with the silkiest slice of your life, please, leave a rating! Five stars for the density, I hope! It means the world to me when someone else brings this Decadent Dessert into their home for a special occasion.
If you shared a photo on Instagram or whatever place people share photos now, tag me in it! I love seeing how everyone serves their final creation. I’m always looking for new topping ideas that won’t mess up that gorgeous, smooth surface. I’ve got some great, simple muffin recipes next up, but honestly, this cheesecake steals the show every single time.
Don’t be shy; if it cracked on you? Tell me about it! We can troubleshoot together next time. Every baker has a cracked cheesecake story, so don’t feel bad. We share the wins, and we share the wobbles!
Print
Classic New York Cheesecake Recipe
- Total Time: 90 min
- Yield: 12 servings
- Diet: Vegetarian
Description
Make a rich, dense, and creamy New York Style Cheesecake with a buttery graham cracker crust. Follow these steps for a smooth, crack-free result.
Ingredients
- 1 1/2 cups graham cracker crumbs
- 1/4 cup granulated sugar (for crust)
- 6 tablespoons unsalted butter, melted
- 4 (8 ounce) packages full-fat cream cheese, softened to room temperature
- 1 1/2 cups granulated sugar (for filling)
- 1/4 cup all-purpose flour
- 1 teaspoon vanilla extract
- 1/4 teaspoon salt
- 1 cup sour cream, room temperature
- 4 large eggs, room temperature
Instructions
- Preheat your oven to 350°F (175°C). Wrap the outside bottom of a 9-inch springform pan tightly with heavy-duty aluminum foil to prepare for a water bath.
- Make the crust: Combine graham cracker crumbs, 1/4 cup sugar, and melted butter. Press the mixture firmly into the bottom and about 1 inch up the sides of the prepared springform pan. Bake for 10 minutes. Remove and let cool slightly. Reduce oven temperature to 325°F (160°C).
- Make the filling: In a large bowl, beat the softened cream cheese with an electric mixer until completely smooth. Scrape down the sides.
- Gradually beat in the 1 1/2 cups sugar, flour, vanilla extract, and salt until just combined. Do not overmix.
- Beat in the sour cream until smooth.
- Add the eggs one at a time, mixing on low speed after each addition only until the yolk disappears. Stop mixing as soon as the last egg is incorporated. Overmixing adds air, which causes cracking.
- Pour the batter over the cooled crust. Place the springform pan inside a larger roasting pan.
- Carefully pour hot water into the roasting pan until the water reaches about halfway up the sides of the springform pan. This is the water bath.
- Bake for 60 to 75 minutes. The edges should look set, but the center 2 inches should still wobble slightly when gently nudged.
- Turn off the oven. Prop the oven door open slightly (about 2 inches) using a wooden spoon. Let the cheesecake cool inside the oven for 1 hour. This slow cooling prevents cracking.
- Remove the cheesecake from the water bath and foil. Let it cool completely on a wire rack at room temperature.
- Chill the cheesecake in the refrigerator for at least 6 hours, or preferably overnight, before serving. Run a thin knife around the edge before releasing the springform side.
Notes
- Use room temperature ingredients for the cream cheese, sour cream, and eggs to ensure a smooth batter.
- Do not open the oven door or disturb the water bath during the initial baking time.
- For the best texture, chill the cheesecake for a full 12 hours before slicing.
- Prep Time: 25 min
- Cook Time: 75 min
- Category: Dessert
- Method: Baking
- Cuisine: American
Nutrition
- Serving Size: 1 slice
- Calories: 450
- Sugar: 35g
- Sodium: 300mg
- Fat: 30g
- Saturated Fat: 18g
- Unsaturated Fat: 12g
- Trans Fat: 0.5g
- Carbohydrates: 40g
- Fiber: 1g
- Protein: 8g
- Cholesterol: 120mg


Comments are closed.