
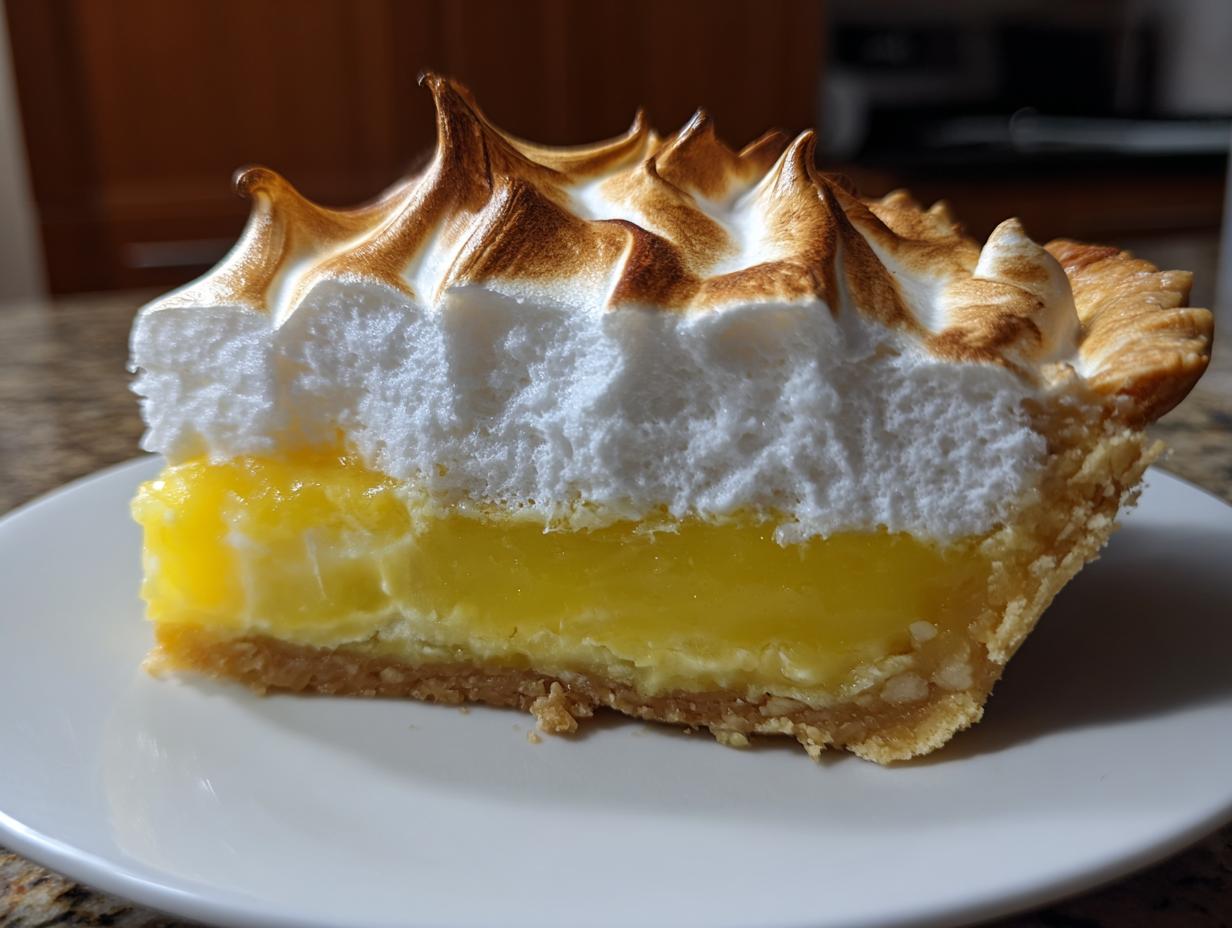
When I think about desserts that truly shout “celebration,” nothing beats a classic, towering Lemon Meringue Pie. It has such presence! It’s the kind of baking that feels a little intimidating, right? That’s why, when I started Forkful Heaven, mastering this pie was essential for me. After spending time in my uncle’s kitchen, I learned that dedication to technique is everything. This recipe, The Ultimate Homemade Lemon Meringue Pie, is the result of me finally conquering that notoriously tricky meringue topping and perfecting that zesty, from-scratch lemon custard. Trust me, you don’t need any box mixes here—just a little bit of elbow grease!
Why This Classic Lemon Meringue Pie Recipe is a Showstopper
This isn’t just any pie; this is genuinely a showstopping dessert that lights up any table, whether it’s for Easter brunch or a hot summer evening. I developed this recipe to make sure you get that pure, homemade satisfaction, avoiding all the sad, runny fillings out there. You deserve the best!
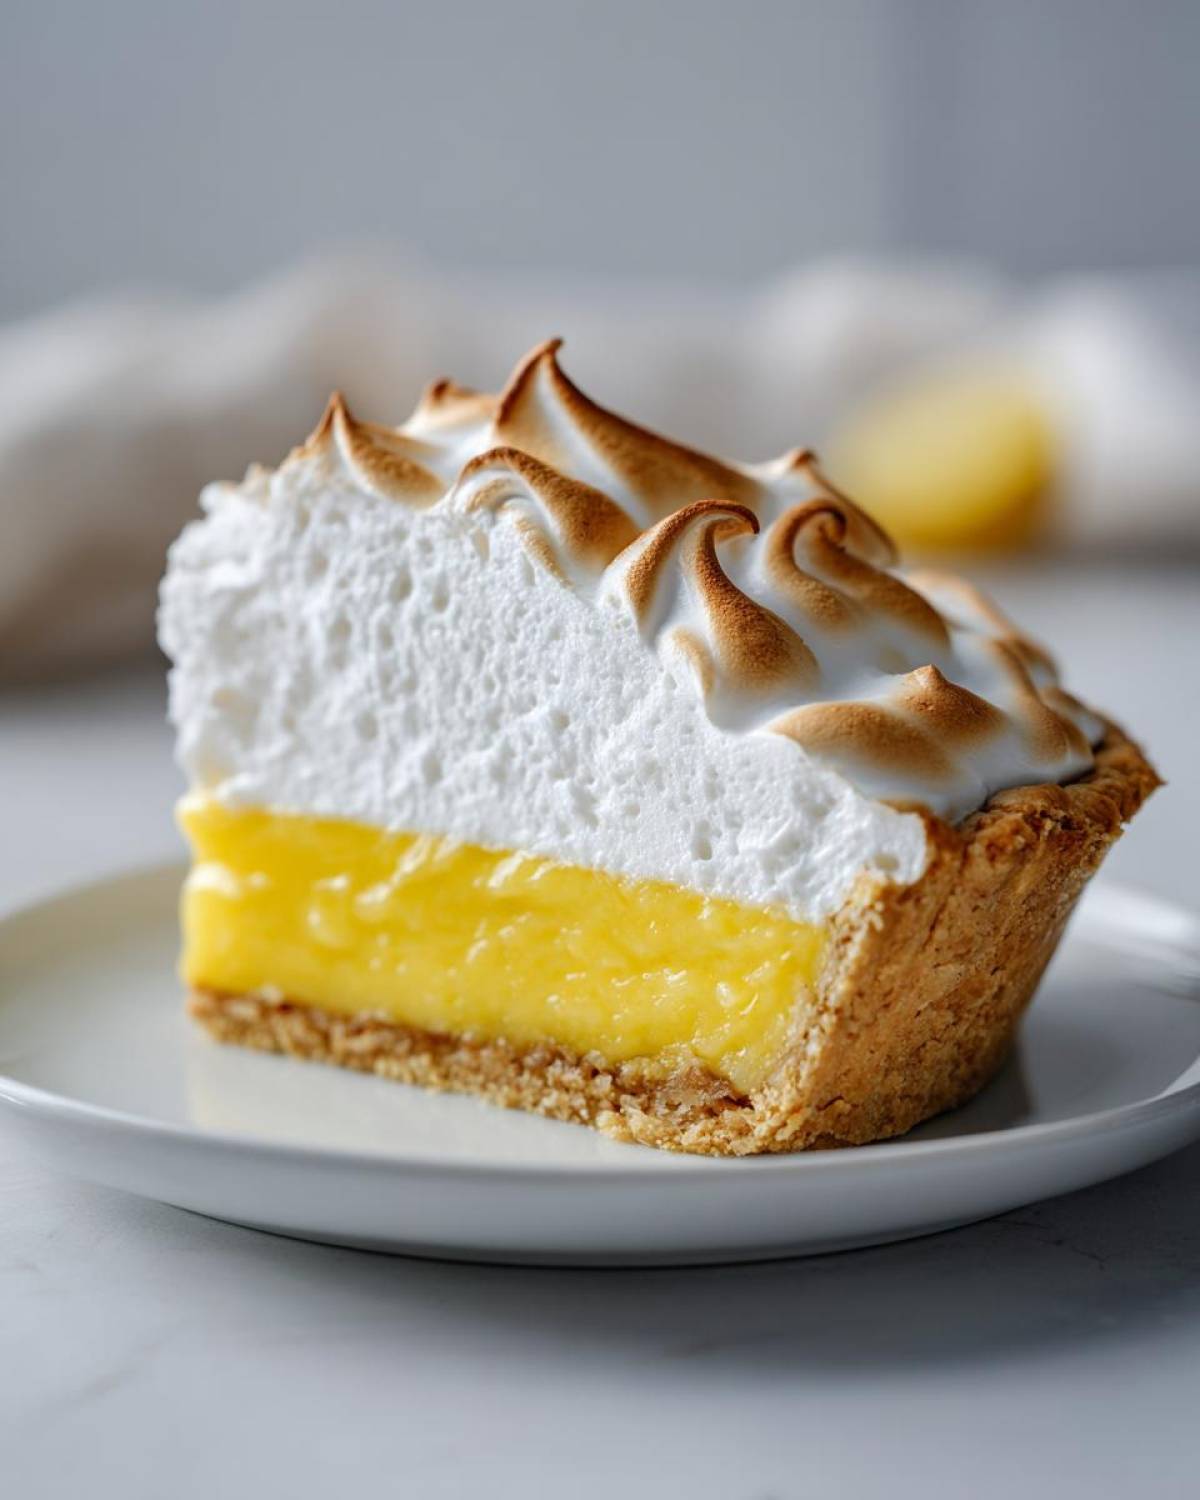
- Buttery Foundation: We start with a crisp, buttery pie crust that holds up beautifully under the filling—no soggy bottoms here!
- Intense Flavor: The filling delivers that incredible tangy sweet dessert punch. It’s bright, zesty, and perfectly balanced against the sugar.
- Cloud-Like Topping: Most importantly, we’re conquering the meringue. This recipe promises a tall, fluffy, and stable cloud that browns up perfectly.
Achieving the Perfect Balance of Zesty Lemon Meringue
The difference between a good pie and a *great* pie is the relationship between the lemon and the sugar in that filling. If it’s too sweet, you miss that vital zing! I push the fresh lemon juice right to the edge of what’s comfortable for a truly vibrant, zesty flavor. When you cut into it, you want the deeply tart custard to hug the sweet, airy marshmallow of the meringue. It’s a beautiful contrast, and it’s all about getting those ratios just right.
Gathering Ingredients for Your Homemade Lemon Meringue Pie
Okay, now that we know this is the best lemon meringue pie recipe, let’s get our ingredients lined up. Remember, we’re going completely from scratch here, so fresh is always best! I always have my list printed out because missing even a tiny bit of cornstarch can throw off that custard texture we’re aiming for. Don’t worry about having a homemade crust, but honestly, if you can whip up a quick buttery pie crust recipe, it takes this pie over the top! Here’s what you need to pull together this beauty.
Ingredients for the Buttery Pie Crust Recipe
For the base, you’ll need: 1 (9-inch) unbaked pie crust. Now, I always say, use your favorite recipe for the crust, but if you’re feeling ambitious, my favorite recipe for a light, flaky base makes all the difference in the final result.
Ingredients for the From Scratch Lemon Custard
This is where the magic tang happens. Make sure you have the following ready:
- 1 1/2 cups granulated sugar
- 1/3 cup cornstarch
- 1/4 teaspoon salt
- 1 1/2 cups cold water
- 4 large egg yolks, lightly beaten
- 2 tablespoons unsalted butter
- 1/2 cup fresh lemon juice
- 1 tablespoon lemon zest
Ingredients for the Fluffy Meringue Topping
These six ingredients are critical for that towering meringue that won’t shrink on you later. See the notes below about making sure those egg whites are perfectly room temperature!
- 6 large egg whites, at room temperature
- 1/2 teaspoon cream of tartar
- 1/2 cup granulated sugar (for meringue only!)
How to Prepare the Best Lemon Meringue Pie
This is it—the assembly line! Getting this timing right is how we achieve that perfect Classic Lemon Meringue Pie. Don’t feel rushed; just follow the flow. First things first, make sure your oven is preheated to 350°F (175°C) since we’ll need it right after the filling is done. Take your pre-baked pie shell—it should be lightly golden and just cooling down a bit—and set it ready to go.

Step-by-Step Lemon Meringue Pie Instructions
Start with the custard base. In a saucepan, grab your 1 1/2 cups of sugar and whisk it really well with the cornstarch and salt—you want zero lumps before adding liquid. Pour in the cold water and start stirring over medium heat. You have to stir constantly until it gets thick and actually boils for one full minute. Take it off the heat immediately!
Now, here’s the critical part for avoiding scrambled eggs: tempering the yolks (Step 4). Slowly drizzle about a ladleful of that hot sugar syrup into your 4 lightly beaten egg yolks while you whisk the yolks like crazy. This gently raises their temperature. Once that’s incorporated, pour the warmed yolks back into the saucepan with the rest of the syrup. Return it to the heat and cook, still stirring, until it boils and thickens again. Stir in your butter, fresh lemon juice, and zest until everything melts together beautifully. That custard should smell incredibly zesty!
Pour that hot filling right into your ready crust now. Seriously, pour it straight in while it’s piping hot!
Creating the Fluffy Meringue Topping and Baking
While that’s settling, make your meringue. Use a bowl that is totally, 100% grease-free—I always wipe mine down with a little vinegar just to be safe! Beat those room temperature egg whites with the cream of tartar until you get soft peaks. Then, slow and steady, add that last 1/2 cup of sugar while you beat the mix on high speed until you have stiff, glossy peaks. They should stand straight up when you lift the whisk!
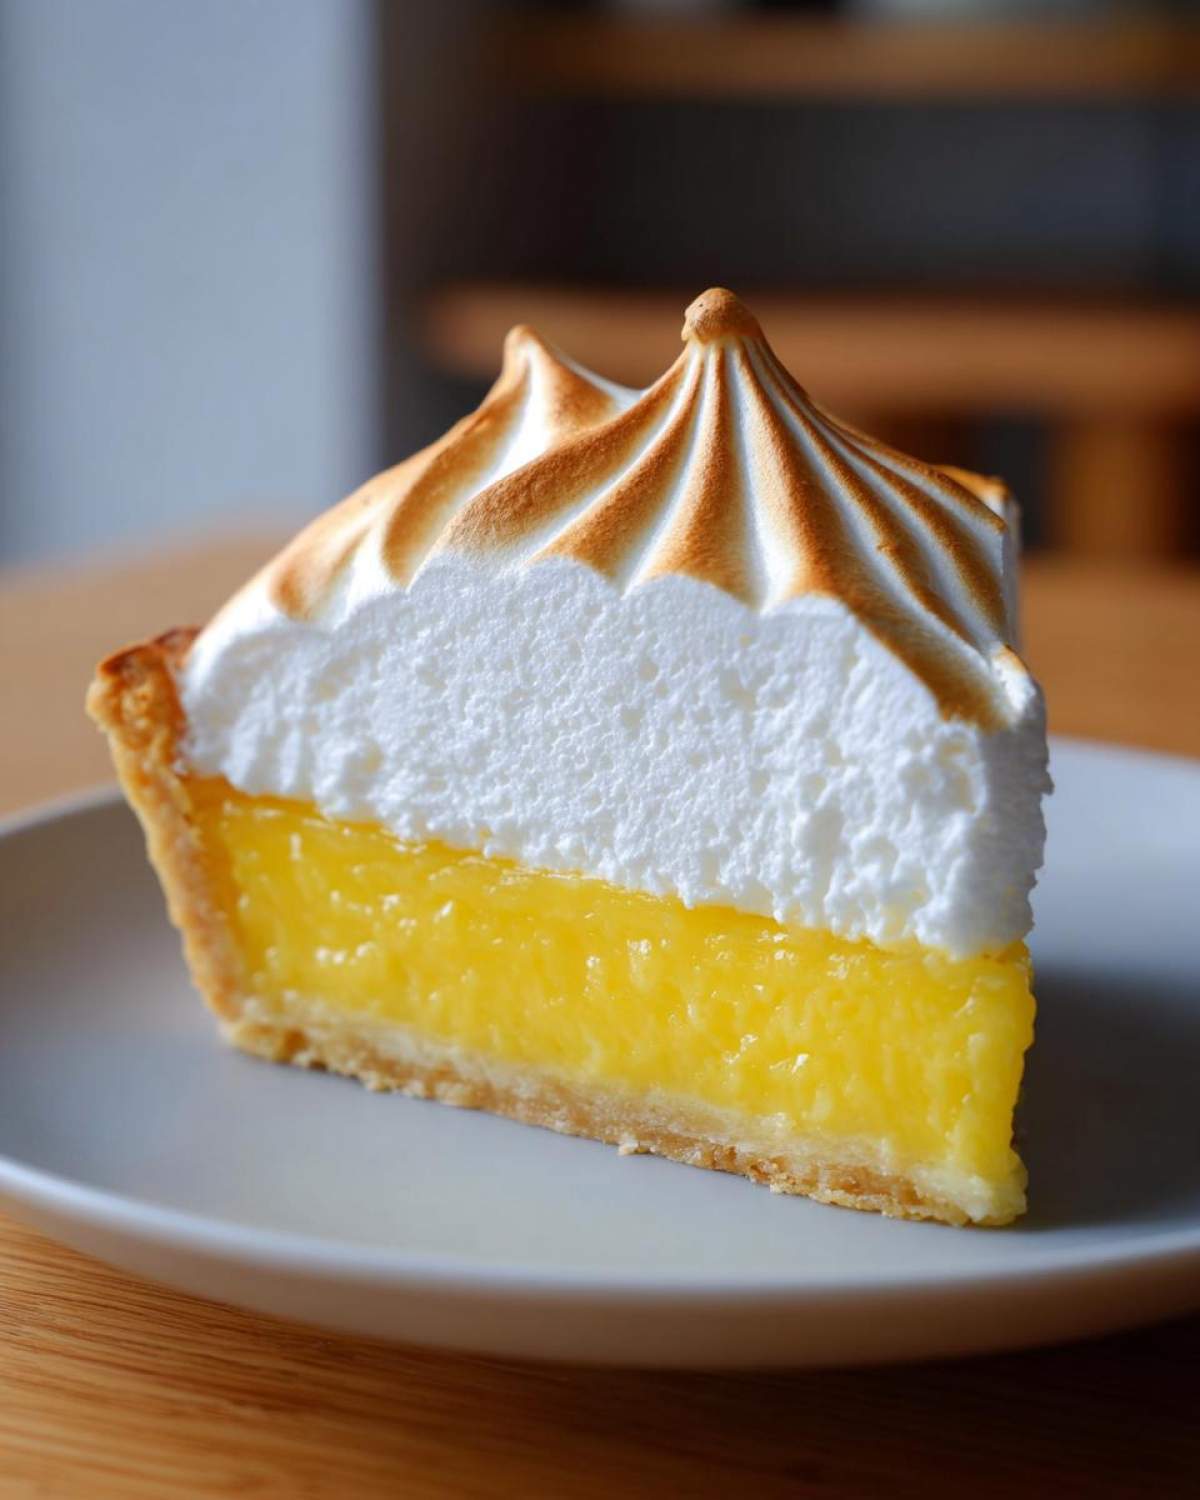
Spread that mixture right over that hot lemon filling. It needs to touch the edges of the crust all the way around; this seals it against shrinking. Use the back of a spoon to make some dramatic swirls on top. Pop this beauty into the 350°F oven for about 12 to 15 minutes until those tips are lovely golden brown. Then, resist the urge to touch it! It needs a long, slow cool-down at room temperature.
Tips for a No Weeping Meringue Topping on Your Lemon Meringue
Okay, let’s talk truthfully about the bane of every baker’s existence: meringue weeping. That ugly, bubbly layer of sugary water that forms between the filling and the meringue? I have been there, and it’s heartbreaking after all that hard work. But don’t you worry! We conquer weeping with a few non-negotiable rules, focusing on these crucial no weeping meringue tips.
First, that bowl! When you whip your egg whites for that fluffy meringue topping, the bowl *must* be surgically clean. I mean it—not a single trace of grease, oil, or yolk can be present. Even a tiny speck will stop those whites from achieving the proper structure needed to hold up.
Second, the temperature handshake is vital. You absolutely must spread the meringue while the from scratch lemon custard is still piping hot. This contact seals the meringue to the filling, preventing that moisture separation underground. And finally, make sure you seal the edges all the way to the crust! When you spread that final topping, make sure it touches the pastry edge all along the perimeter. Once it’s sealed, you won’t see those sad, weeping spots when you go to slice into your gorgeous lemon meringue pie recipe!
If you want to read more about troubleshooting baking dilemmas, I’ve linked one of my favorite resources for handling these tricky situations here: a great link for handling pie problems. You’ve got this!
Ingredient Notes and Substitutions for Lemon Meringue
I get asked all the time if you can cheat a little bit on the ingredients, especially when life gets busy. When it comes to this beautiful Homemade Lemon Meringue Pie, I have to be honest: some ingredients are just not worth substituting! If you tried to swap out my beloved fresh ingredients for bottled stuff, I might just show up at your kitchen door!
The biggest one is the lemon juice. Please, please, use fresh lemons. That bottled stuff tastes like lemon-flavored science projects compared to the vibrant burst you get straight from the fruit. I learned this the hard way back when I was trying to surprise my Uncle Joe with a pie for his birthday. I substituted bottled juice because I was out of lemons, and the whole filling tasted flat. He was polite, bless his heart, but you could tell it wasn’t the same. You need that authentic zest and juice!
Another non-negotiable for any spectacular meringue is the temperature of your eggs. For the fluffy meringue topping, those egg whites absolutely must be at room temperature. If they are ice-cold straight from the fridge, they won’t whip up to their maximum volume, and you’ll end up with a flatter, less stable topping. I usually separate my eggs the night before and just leave the whites covered loosely in the bowl on the counter.
If you’re curious about other bright, citrusy baked goods after mastering this pie, I have a fantastic zesty lemon cake recipe that relies on similar blindingly fresh citrus flavor, too, so you can keep that bright theme going!
Serving Suggestions for This Classic Lemon Meringue Pie
Presenting this beautiful Lemon Meringue Pie Recipe is always a moment of pride for me. Because the pie itself is so rich—so much tartness, so much sweetness, and that heavenly, crisp crust—the accompaniments really should be simple. You don’t want to distract from that perfect flavor balance we worked so hard to achieve!
This pie screams sunshine! It’s definitely one of my go-to summer dessert recipes, but honestly, I make it all the time during the early spring when I just need a flavor uplift. It makes any gathering feel instantly festive—a real stunner for any holiday table.

When I serve it, I like to keep the plate almost bare, or maybe offer a tiny, contrasting side. If you’re serving this after a heavy meal, skip the extra whipped cream! The meringue topping is already doing all the heavy lifting for fluffiness.
- A Hint of Green: If you are serving this as part of a full spread, I always pair it with something incredibly light and slightly savory on the side, like my pear and arugula salad. It’s a weird non-dessert pairing, I know, but the peppery arugula cuts through the richness perfectly before you dive into the pie!
- Simple Garnish: If you need a little something extra drizzled on the plate, keep it subtle. A tiny dusting of powdered sugar around the plate edge or maybe one very thin slice of candied lemon peel on top of the meringue peaks is all you need.
- Beverage Pairing: Since this is such a bright, acidic dessert, I find that cold, black iced tea works phenomenally well. It cleanses the palate between bites.
This pie is perfect for any of your spring baking ideas, and when you make it, just stand back and admire that height before you slice into it. It truly looks like it belongs in a bakery window!
Storage and Reheating Instructions for Lemon Meringue
This is where the patience you showed developing the fluffy meringue topping really pays off! If you try to sneak this beautiful Classic Lemon Meringue Pie into the fridge too soon after it comes out of the oven, you are begging for weeping. I learned this the hard way when I was rushing to get it chilling for a Sunday dinner. The quick temperature change is what causes that sugary water to sweat out from under the meringue, and frankly, it ruins the whole show.
You absolutely must let the pie cool completely on a wire rack at room temperature first. I usually give it a good four hours minimum. If your kitchen is very hot or humid, you might even let it go longer. This slow cooling process is key to baking trust into your pie—it signals to the filling and the meringue that they need to settle down together.
Once it’s fully cooled, *then* you can refrigerate it if you need to keep it for more than a few hours. Cover the pie loosely with plastic wrap so you don’t crush that gorgeous peak, but make sure the plastic isn’t touching the meringue surface. If it is touching, you might have to sacrifice a small part to the plastic wrap gods!
Don’t even think about reheating this pie! Seriously, no reheating. The filling is designed to set up perfectly when cooled, and heating it again will melt the meringue right down into a sad, sticky puddle. This pie is best served cool or at room temperature. If you’ve had it refrigerated, pull it out about 30 minutes before you plan to slice it so the filling softens up just a tiny bit. It tastes brightest when it isn’t ice-cold!
Frequently Asked Questions About Making Lemon Meringue Pie
I know you might still have a few jitters about making a showstopper like this, especially if you’ve had disastrous results in the past. It’s totally normal! That’s why I pulled together a few of the most common things I hear when folks try their hand at this Family Favorite Pie. Once you nail the technique, you’ll be making this all the time!
Can I make the lemon custard filling for this lemon meringue pie a day ahead?
Yes, you absolutely can make the from scratch lemon custard the day before! That’s actually a great strategy to save time. Just make sure you pour it into your pre-baked crust while it’s still hot, which we talked about in the instructions. Keep it covered loosely at room temperature until it cools down completely, then you can refrigerate it. The rule remains: ONLY add the meringue right before you plan to bake the final pie. If you try to store a pie that already has meringue on it, you’re tempting fate!
What is the best way to slice a lemon meringue pie cleanly?
This is the secret to getting those perfect, Instagram-worthy slices! Don’t just grab any old knife. You need a long, thin knife—the sharper the better, honestly. Dip that knife into a tall glass of very hot water, wipe it dry quickly on a clean towel, and then slice. That momentary heat melts just enough of the filling to glide right through without dragging the meringue up or making the custard smear. You’ll want to re-dip and wipe the knife between every single slice for maximum cleanliness. If you want all the detailed tips on mastering the pie from start to finish, check out my full guide on making your perfect lemon meringue pie.
What about using a store-bought crust? Yes, you can if you absolutely must, but I promise, that buttery crust you make yourself is what elevates this pie from great to legendary!
Appreciating Your Family Favorite Pie
Wow, if you made it through all those steps to create this showstopper, you deserve a massive pat on the back! This Lemon Meringue Pie Recipe really is something special, isn’t it? It takes time to master, but when you pull that finished pie out of the oven, golden and tall, you just feel like you’ve accomplished something huge in the kitchen.
I truly hope this becomes a new tradition for your folks, maybe even becoming your own go-to family favorite pie for holidays or those random Tuesdays when you just need sunshine on a plate. That’s what cooking is all about for me—creating those moments!
I want to hear all about it! Did your meringue get nice and glossy? Did your custard set up perfectly? I live for reading your successes! If you made this, please leave me a rating and drop a comment below telling me what you thought. It helps other bakers feel confident trying this recipe out.
If you’re looking for another comforting classic to add to your repertoire, maybe try my recipe for slow cooker apple butter next; it’s great for fall but surprisingly good year-round! And hey, if you want to compare notes with other home bakers, check out Grandma’s classic version over at Allrecipes for a little extra inspiration, though I still think our fresh lemon custard reigns supreme!
Thanks so much for baking with me today. Happy slicing!
Print
The Ultimate Homemade Lemon Meringue Pie (From Scratch with Tall, Stable Meringue)
- Total Time: 75 min
- Yield: 8 servings
- Diet: Vegetarian
Description
Make the best Lemon Meringue Pie from scratch. This recipe delivers a buttery crust, a perfectly tart lemon custard filling, and a high, fluffy, toasted meringue topping that resists weeping.
Ingredients
- 1 (9-inch) unbaked pie crust (buttery homemade preferred)
- 1 1/2 cups granulated sugar
- 1/3 cup cornstarch
- 1/4 teaspoon salt
- 1 1/2 cups cold water
- 4 large egg yolks, lightly beaten
- 2 tablespoons unsalted butter
- 1/2 cup fresh lemon juice
- 1 tablespoon lemon zest
- 6 large egg whites, at room temperature
- 1/2 teaspoon cream of tartar
- 1/2 cup granulated sugar (for meringue)
Instructions
- Prepare and partially bake your 9-inch pie crust according to your favorite recipe until lightly golden. Set aside to cool slightly.
- In a medium saucepan, whisk together the 1 1/2 cups sugar, cornstarch, and salt. Gradually whisk in the cold water until smooth.
- Cook the mixture over medium heat, stirring constantly, until it thickens significantly and comes to a boil. Let it boil for one minute, stirring constantly. Remove from heat.
- In a separate bowl, whisk the egg yolks. Slowly temper the hot sugar mixture into the yolks, whisking constantly to prevent scrambling.
- Return the entire mixture to the saucepan. Cook over medium heat, stirring constantly, until the mixture returns to a boil and thickens again. Remove from heat immediately.
- Stir in the butter, lemon juice, and lemon zest until the butter melts and is fully incorporated. The lemon custard should be bright and tangy.
- Pour the hot lemon custard filling into the pre-baked pie shell.
- Prepare the meringue: In a clean, grease-free bowl, beat the egg whites and cream of tartar with an electric mixer on medium speed until soft peaks form.
- Gradually add the 1/2 cup sugar, one tablespoon at a time, while beating on high speed until stiff, glossy peaks form. This creates a stable, fluffy meringue topping.
- Spread the meringue over the hot lemon filling, making sure the meringue touches the crust edge all the way around to seal it and prevent shrinking or weeping. Create decorative swirls with the back of a spoon.
- Bake immediately in a preheated 350°F (175°C) oven for 12 to 15 minutes, or until the meringue peaks are golden brown.
- Cool the pie completely on a wire rack at room temperature for at least 4 hours before slicing. Avoid rapid cooling to prevent the meringue from weeping.
Notes
- To prevent weeping, make sure your mixing bowl for the meringue is completely free of any grease or fat residue.
- For the tallest meringue, use room temperature egg whites and add the cream of tartar.
- Always spread the meringue over hot filling to seal the edges against the crust.
- Slice the pie using a sharp, thin knife dipped in hot water between each cut for clean servings.
- Prep Time: 30 min
- Cook Time: 45 min
- Category: Dessert
- Method: Baking
- Cuisine: American
Nutrition
- Serving Size: 1 slice
- Calories: 380
- Sugar: 45
- Sodium: 150
- Fat: 18
- Saturated Fat: 9
- Unsaturated Fat: 9
- Trans Fat: 0
- Carbohydrates: 52
- Fiber: 1
- Protein: 6
- Cholesterol: 110


Comments are closed.