
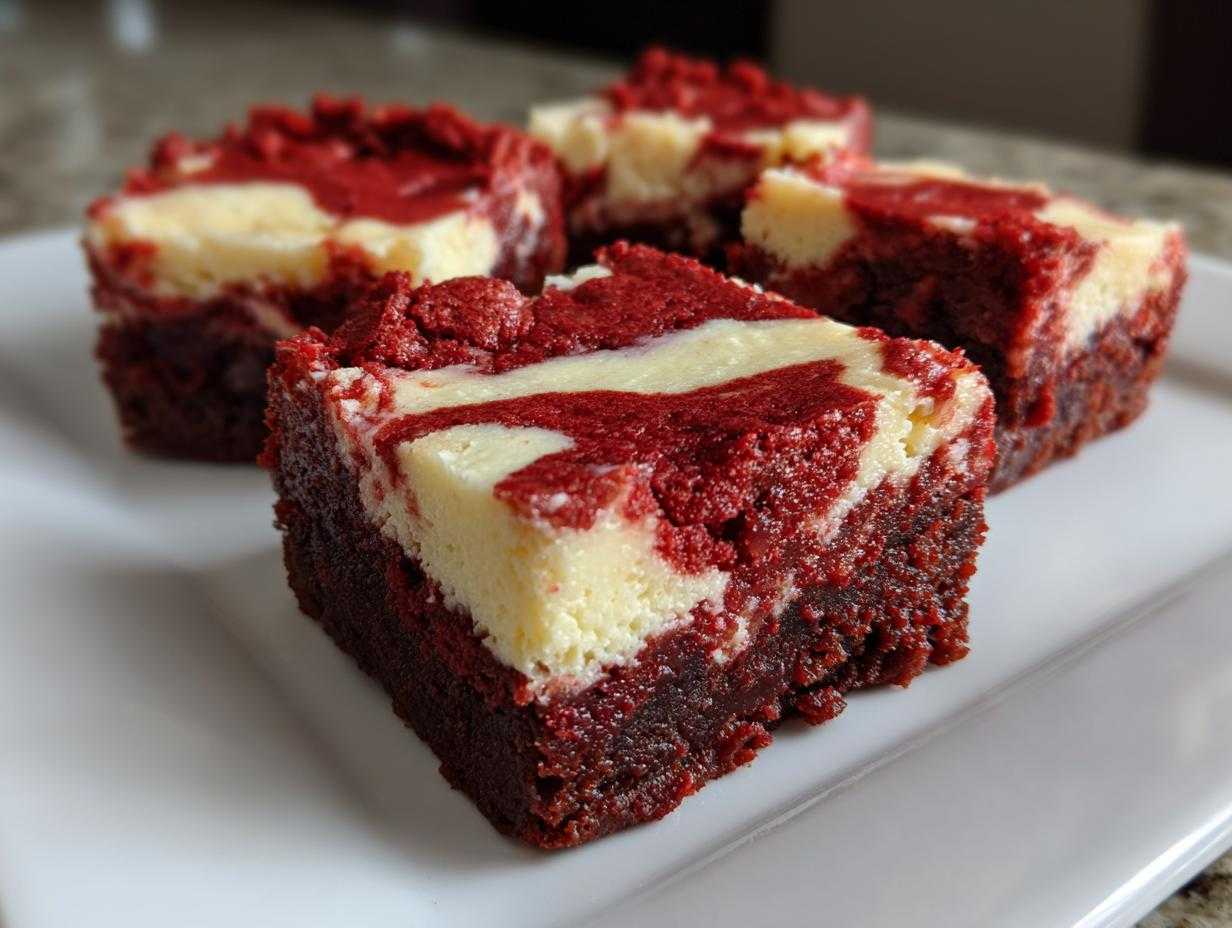
Oh, you know me—I live for those moments when two incredible desserts decide to hold hands and create something truly spectacular on a baking sheet. Forget single-note desserts; we’re going straight for decadent overdrive today! If you’ve ever wanted the dense, crackly top of a perfect brownie combined with the tangy, cloud-like richness of cheesecake, all wrapped up in that gorgeous crimson velvet color, then you’re in the right place. Trust me when I say, perfecting these red velvet cheesecake brownies was a journey, but the result—that impossibly fudgy base kissed by a creamy cheese swirl—is totally worth every minute of testing I did in my kitchen!
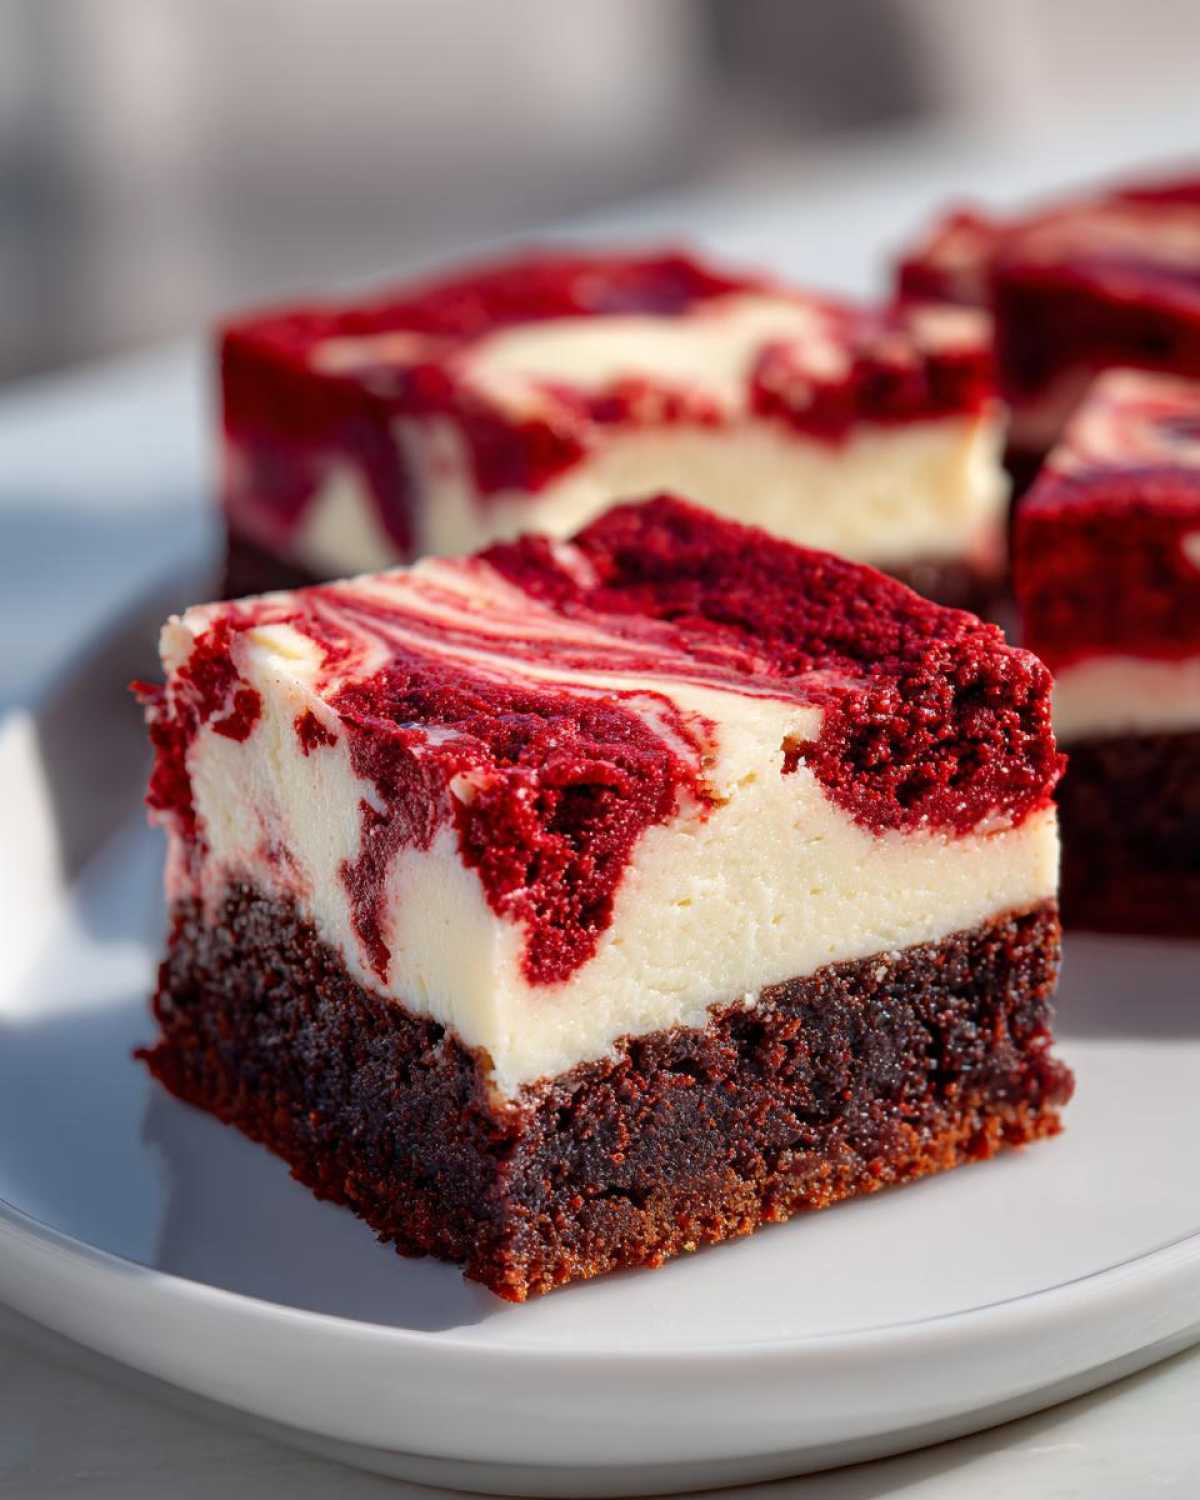
I’ve handled a lot of bar recipes over the years, and layered ones always give me a little nervous thrill. You worry about the layers sinking or the swirl vanishing during the bake, right? Well, I finally cracked the code on getting that distinct visual pattern and texture contrast without any sinking drama. This recipe is my tried-and-true method for bakery-quality squares that disappear instantly at any gathering. Get ready, because this is the batch you’ll be raving about.
We’re going to make sure that fudgy red velvet base stays rich, even when paired with that smooth topping. And don’t worry if you’re not a pro; the swirling technique is super easy, I promise. We’ve even got an amazing internal link coming up that shows off another one of my favorite layered creations, brownie-bottom-cheesecake, if you want even more bar inspiration!
Why You Will Bake These Red Velvet Cheesecake Brownies
Honestly, there are so many reasons not to love these bars, but here are the ones that win every time:
- The base is perfectly fudgy—none of that dry, cakey nonsense here! It melts in your mouth.
- That bright red velvet flavor is beautifully offset by the cool, slightly tangy cream cheese swirl.
- Visually stunning! The contrast between the dark red and the creamy white is just show-stopping for any party table.
- They hold up beautifully. You can prep these a day ahead, and they stay as decadent as the day you baked them.
If you’ve ever loved my sweet potato brownies, you’ll appreciate how much texture matters. These bars deliver on every sensory level.
Ingredients Needed for Perfect Red Velvet Cheesecake Brownies
Okay, listen up! When you’re dealing with two powerful dessert components like this—fudgy brownies and creamy cheesecake—you absolutely cannot mess around with the ingredients. Every measurement has to be right because we are aiming for maximum flavor payoff here. I laid out exactly what you need for both layers below. Check your pantry, and if you’re missing anything, run to the store now! You will want everything totally ready before you even think about turning on the oven.
Also, if you’re a cream cheese fan like me, make sure you check out my recipe for the smoothest cream cheese frosting—it uses a similar technique to get that perfect tang!
For the Fudgy Red Velvet Brownie Base
This part is where we get that dense, rich chocolate base, colored a beautiful deep red. Pay attention to the butter being melted—that’s key for fudginess!
- 1 cup (2 sticks) unsalted butter, melted
- 1 3/4 cups granulated sugar
- 3/4 cup unsweetened cocoa powder
- 1 teaspoon salt
- 1 teaspoon vanilla extract
- 4 large eggs
- 1 cup all-purpose flour
- 1 teaspoon red food coloring (gel preferred for that vivid color!)
For the Cream Cheese Swirl Layer
This layer needs to be super smooth so it folds nicely into the red batter without clumping. Make sure your cream cheese isn’t cold!
- 8 ounces cream cheese, softened (this is non-negotiable for smoothness!)
- 1/2 cup granulated sugar (for the cheesecake layer)
- 1 large egg (for the cheesecake layer)
- 1/2 teaspoon vanilla extract
Essential Equipment for Making Red Velvet Cheesecake Brownies
Okay, friend, let’s talk tools! You can’t make beautiful, show-stopping layered desserts like these red velvet cheesecake brownies without having the right equipment ready to go. Trust me, nothing throws off my groove faster than realizing halfway through I forgot to grab the right pan size. When you set everything out beforehand, the whole process flows so much better, especially when you’re dealing with two separate batters that need layering.
Here’s my list of must-haves. I like to use my biggest, sturdiest mixing bowls for the brownie batter because we’re mixing quite a bit of stuff, and I absolutely cannot deal with spills!
- A 9×13 inch baking pan. This is the only pan size that gives us the perfect thickness for both the fudgy base and the cheesecake topping.
- Parchment paper. This is your secret weapon for easy cleanup! Make sure you cut a piece big enough so it hangs over the long sides—that’s how we lift the whole thing out later.
- Two decently sized mixing bowls. One for the brownie batter, one for the cheesecake batter. Keep them separate!
- A good whisk and a sturdy rubber spatula. You need the whisk for getting air into the cheesecake mix and the spatula for gently folding the flour in the brownie bottom.
- A butter knife or small offset spatula. This is crucial for the final swirling step. You want something thin to cut through both layers easily.
Having these items ready means you can move quickly from mixing the rich red velvet batter to dolloping on that beautiful cream cheese swirl without missing a beat. Go gather your gear—we’re about to get messy in the best way!
Step-by-Step Instructions for Swirled Red Velvet Cheesecake Brownies
Alright, here we go! This is where the magic happens and where my years of testing layered bars really pays off. We need to move methodically here because we’re sandwiching a creamy topping onto a rich, chocolatey base. Don’t rush the mixing, but don’t take all day either—time is the enemy when we’re working with melted butter!
We’re going to follow these eight steps precisely to get that perfect texture. If you want the absolute best cream cheese swirl, you need precision right now. Let’s get baking!
Preparing the Pan and Brownie Batter
First things first: get that oven heating up! We need it ready when the batter is. Then, we tackle the base, which is super easy if you follow the order.
- You absolutely must start by preheating your oven to 350°F (175°C). Then, grab that 9×13 inch pan. Line it with parchment paper, making sure you leave a good overhang on the sides—I always fold the edges over a little bit just so I know they won’t droop when I pour the batter in. Give that paper a quick light grease, too.
- Now, for the brownie batter! In a big bowl, whisk together your melted butter, the main sugar (the 1 3/4 cups), the cocoa powder, and the salt until it looks like smooth chocolate mud. That’s your foundation!
- Next, whisk in the vanilla extract, and then add those 4 large eggs—one at a time! Make sure each one is fully incorporated before you add the next one. It should look glossy.
- Here’s the fun part: add your red food coloring. I preach using the gel color because it gives you that deep, vibrant red velvet look without watering down your fudgy batter. Mix it until the batter is one beautiful, uniform red color.
- Finally, gently fold in your cup of flour. And I mean gently! Stop mixing the second you don’t see any more white streaks. Overmixing the flour is how you accidentally end up with cakey brownies, and we definitely don’t want that flavorless texture today.
Once that red batter is mixed, scrape it evenly into your prepared pan. Smooth out the top quickly, because the cheesecake layer is next!
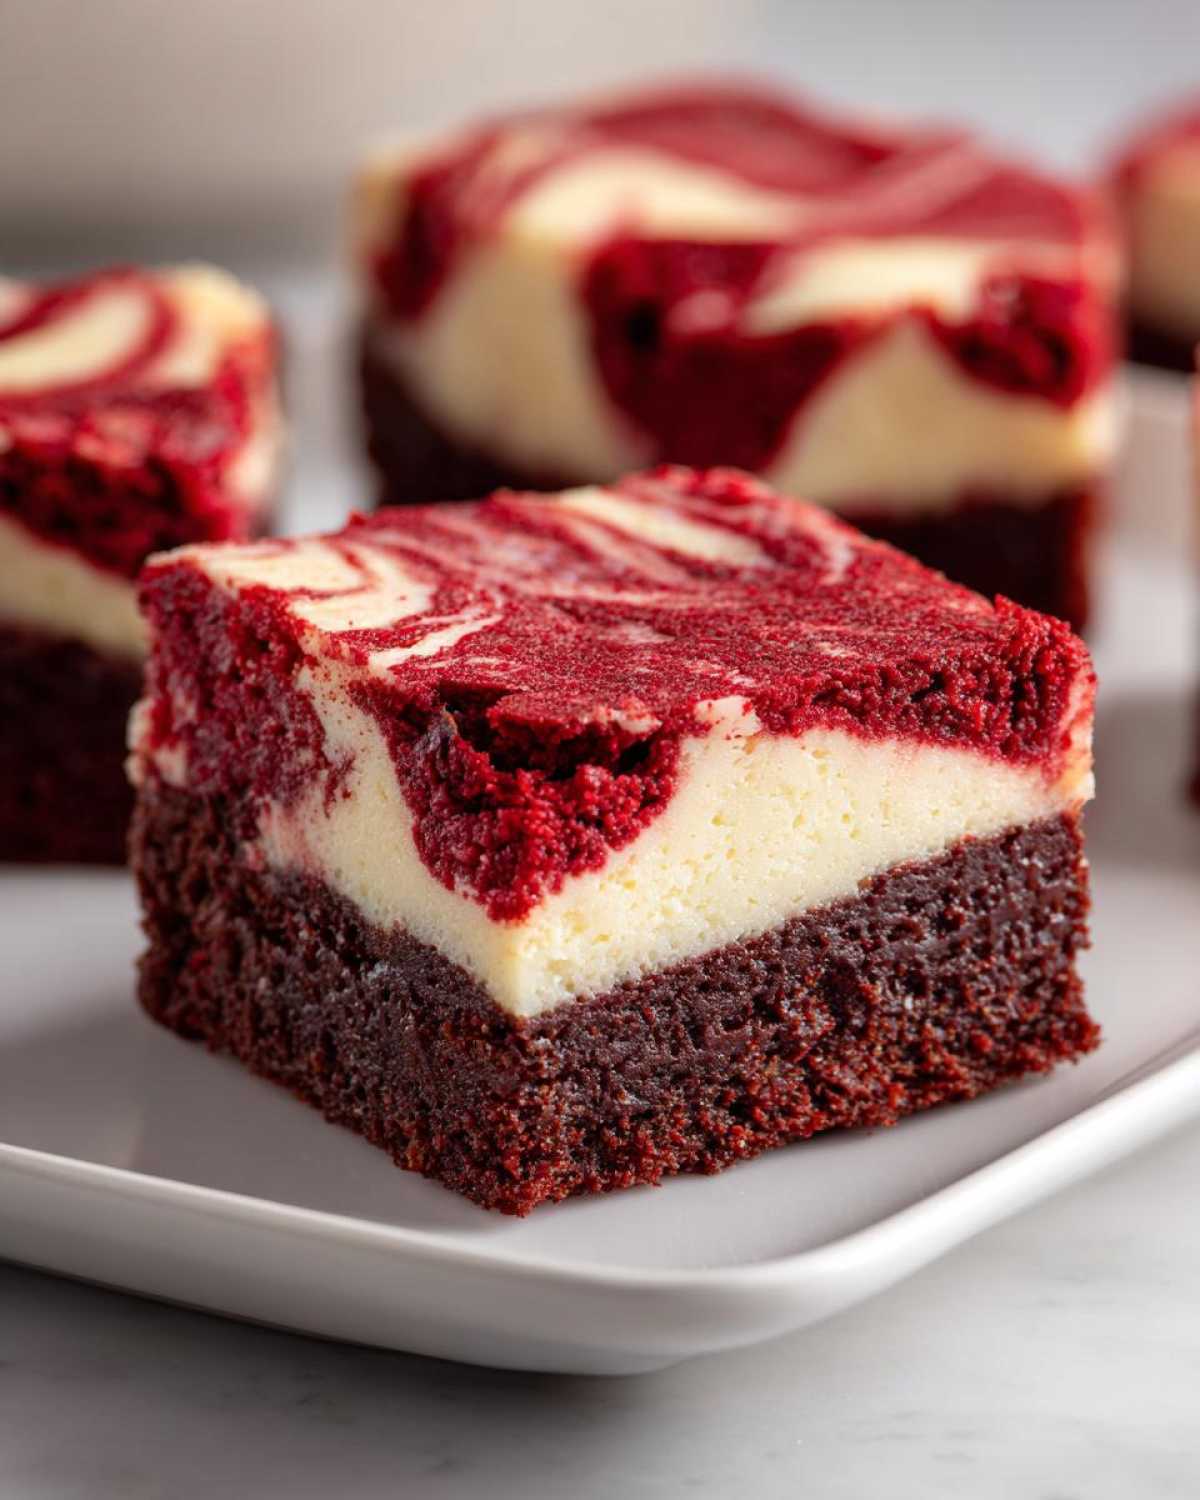
Creating the Cream Cheese Layer and Marbling
We need this layer to be light and fluffy so it sits nicely on top without sinking straight to the bottom, which is why softening that cream cheese is so important!
- In a separate bowl—don’t mix this with the red batter!—beat your softened cream cheese with the 1/2 cup of sugar until it’s perfectly smooth. No lumps allowed!
- Beat in that final egg and the 1/2 teaspoon of vanilla until the mixture looks creamy and light, kind of like fluffy frosting.
- Now, take big spoonfuls of this cheesecake mix and dollop them randomly all over the surface of the red velvet batter. Don’t try to cover every inch; we need spots of red showing through.
- Time for the swirl! Take your thin butter knife or offset spatula, and very lightly drag it through the two batters in wiggly lines—think big figure eights or S-shapes across the pan. The secret here is to go slow and only move about an inch deep. If you dig too far down, you’ll just mix everything into a muddy brown, and we want that stunning contrast!
Baking and Cooling the Red Velvet Cheesecake Brownies
Resist the urge to check them constantly! Patience during the bake and the cool-down is the other flavor secret here.
- Slide that pan into the preheated oven and bake for 30 to 35 minutes. Keep an eye on the edges; they should look set and slightly firm.
- When testing for doneness, forget the clean toothpick test! For these Layered Cheesecake Brownies, you want a toothpick inserted near the center to come out with moist, gooey crumbs clinging to it. If it comes out totally wet, give it three more minutes. If it’s bone dry, you’ve gone too far! The edges should pull slightly away from the pan slightly when they are ready.
Once they are done, take them out and let them cool completely in the pan on a rack—this takes about two glorious, agonizing hours. If you try to cut them warm, they will just collapse into a beautiful, messy puddle. Once totally cool, use those parchment paper handles to lift the whole slab out, and then you can cut them into perfect squares before serving!
Tips for Achieving the Best Cream Cheese Swirl in Red Velvet Cheesecake Brownies
Okay, achieving that perfect swirl is sometimes more art than science, but honestly, it’s all about a few tiny tweaks that make a huge difference between a pretty dessert and a *jaw-dropping* one. I spent way too long figuring out why my cheesecake layer kept sinking into the fudgy red velvet!
If you follow the steps above, you’ve already done 90% of the work, but here are the last few things I always do to ensure my Cream Cheese Swirl Brownies look professional every single time. You can even use what you learn here when tackling other layered bars, like my famous carrot cake!
- Chill Your Cheesecake Batter Quickly: After you mix up the cheesecake topping (Step 5), I sometimes put that bowl in the freezer for about five minutes while I finish spreading the red velvet batter in the pan. If the cheesecake mixture is slightly colder than the brownie batter, it holds its shape better when you dollop it on top, making it less likely to instantly sink.
- Use the Right Tool for Swirling: Don’t use anything fat or sharp like a regular kitchen knife! A thin offset spatula is my favorite because it glides over the top without cutting too deep into the brownie layer underneath. If you only have a butter knife, drag it just barely under the surface—we want marbling, not mixing.
- Less is More with the Swirl Motion: This is the biggest pitfall! If you go over the same spot three or four times trying to make the pattern bigger or neater, you are just mixing the two batters together. Do one slow pass in each direction (north-south, then east-west) and then STOP. The pattern will look perfectly uneven and gorgeous after baking.
- Don’t Skimp on the Cool Down: I mentioned this in the steps, but I have to say it again: Cooling is structurally important! If you try to cut these Decadent Brownie Bars while they are even slightly warm, the cheesecake layer hasn’t fully set, and it will smear everywhere. Refrigerating them for an hour after they’ve cooled on the counter guarantees you get those clean, sharp squares that look so amazing on a party platter.
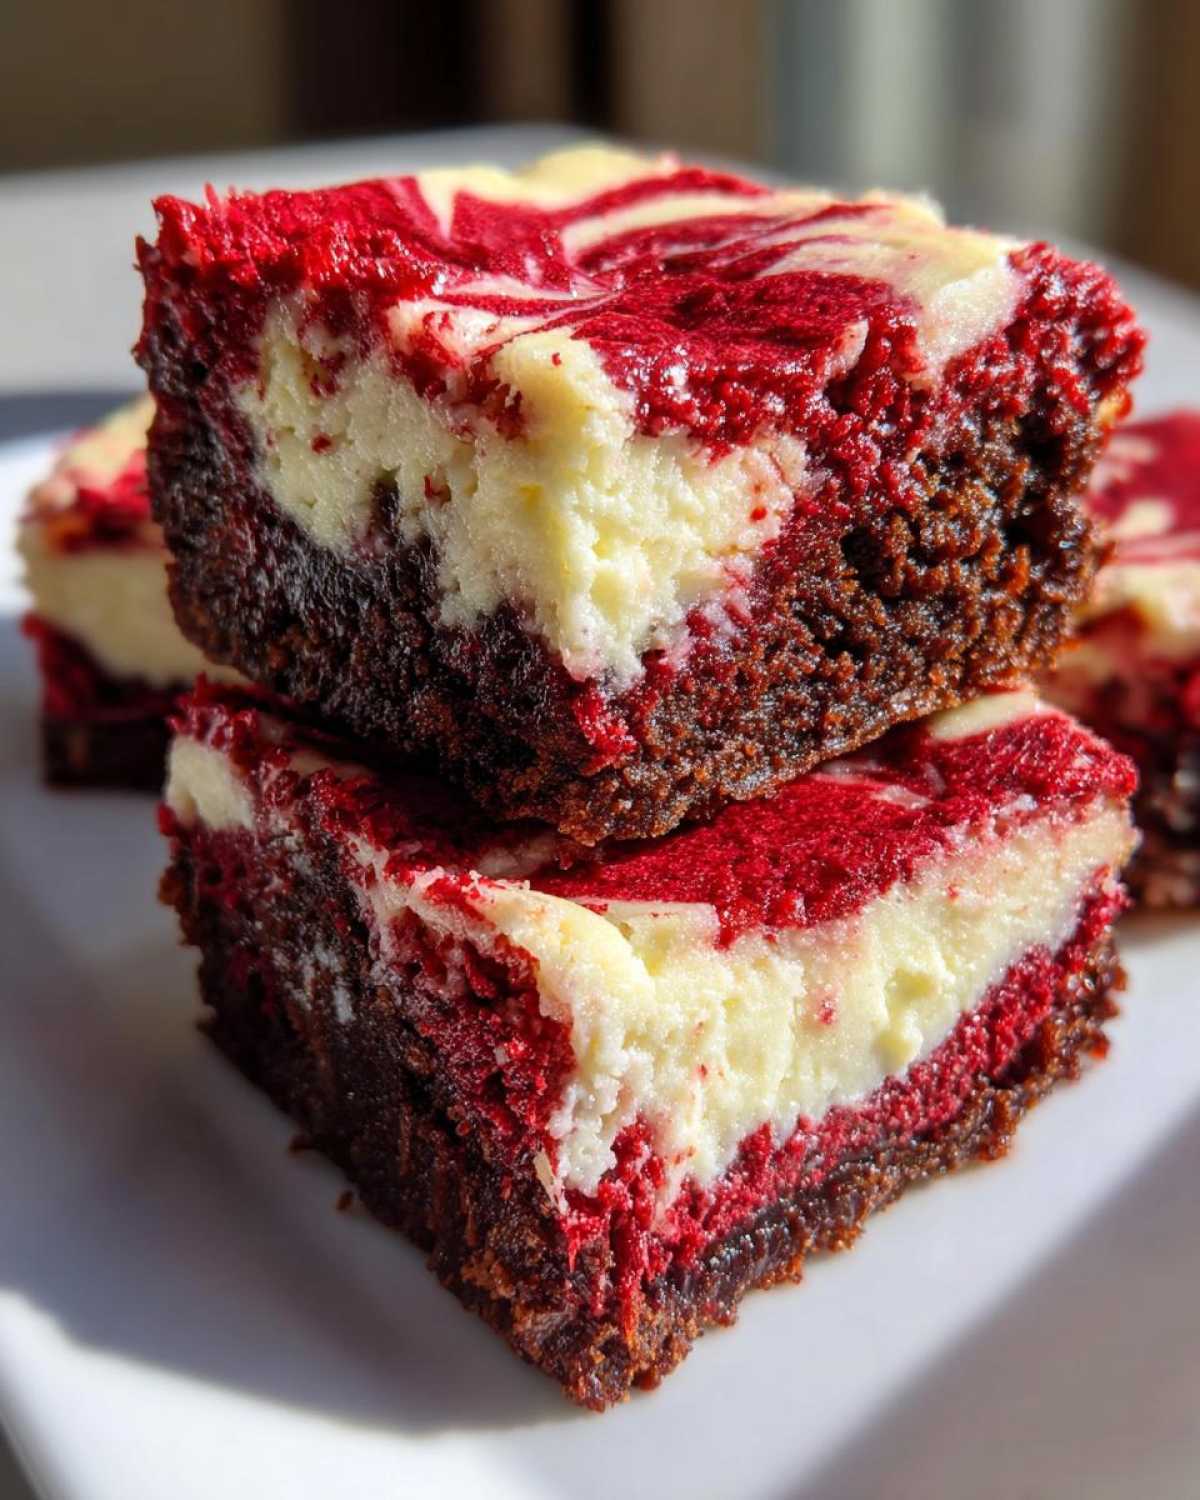
Tackle these little details, and you’ll have the most stunning, multi-textured dessert bars around!
Storage and Reheating Instructions for Red Velvet Cheesecake Brownies
Now that you’ve made these gorgeous, rich wonders, the next big question is: how do I keep them perfect so I can enjoy my chocolate dipped coconut bars tomorrow too, ha!
Because these red velvet cheesecake brownies have that cream cheese layer, they need a little more care than your standard fudgy brownie. I wish I could just keep them on the counter forever, nestled in their pan, but for safety and best texture, the fridge is their happy place once they’re completely cooled down.
Room Temperature Storage
If you plan on devouring this entire batch within about a day (which, let’s be honest, is my usual goal!), you can keep them fine on the counter. The high sugar content protects them a bit, but you need an airtight container. Because they are so rich, I find the texture is best when they aren’t super cold, so pulling them out of the fridge about 30 minutes before serving is a good bet for keeping them soft but safe.
Refrigerating for Longer Freshness
To really keep that cheesecake layer happy and avoid any funny business, storing them wrapped tightly in the refrigerator is better for keeping them fresh for up to five days. I usually cut them first—it’s much easier to wrap up individual squares than the whole slab. Make sure each square is wrapped snugly in plastic wrap before placing them in a sealed container. This keeps the fridge smells out and stops them from drying out.
A Quick Note on Reheating?
Reheating isn’t really necessary for these bars, and honestly, I discourage it! You risk melting that beautiful cheesecake swirl if you microwave them too long. If you absolutely insist on serving one warm, a very short 5 to 10 seconds in the microwave is all you need, but I much prefer them served cool from the fridge or tempered to room temperature. They perform best when they have that slight chill!
Serving Suggestions for Your Decadent Red Velvet Cheesecake Brownies
Now that you’ve pulled off the seemingly impossible—perfectly fudgy, brilliantly swirled, bakery-worthy red velvet cheesecake brownies—how on earth do you serve them? They honestly don’t need anything extra because they are a whole decadent experience themselves! But since we’re going all out for flavor, here are a few ways I like to present these for maximum impact, especially when they are the star of the show at your next gathering.
These bars just scream “special occasion,” don’t they? They look perfect for Valentine’s Day, sure, but honestly, they rock any holiday dessert table. Imagine them next to some beautiful easy honey bran muffins (just kidding, swap those for something chocolatey!) at Christmas or Easter. When you bring these to a party, people stop talking. They are showstoppers!
Simple Ways to Elevate Your Bars
If you want to keep the focus squarely on that creamy, tangy swirl and the rich red color, simple additions are always best:
- A Dusting of Snow: Seriously, sometimes less is more. Once they are completely cut and set on a platter, a very light, casual dusting of powdered sugar makes the red color absolutely pop. It looks like little snow-capped mountains.
- Perfect with Vanilla: Serving these slightly chilled alongside a scoop of intensely high-quality vanilla bean ice cream? Forget about it. The cold creaminess of the ice cream against the slightly chewy brownie bottom is heaven.
- Morning After Treat: I know, I know, they’re dessert, but a small square with a strong, black cup of coffee the next morning is a personal weakness of mine. The coffee cuts through the richness perfectly.
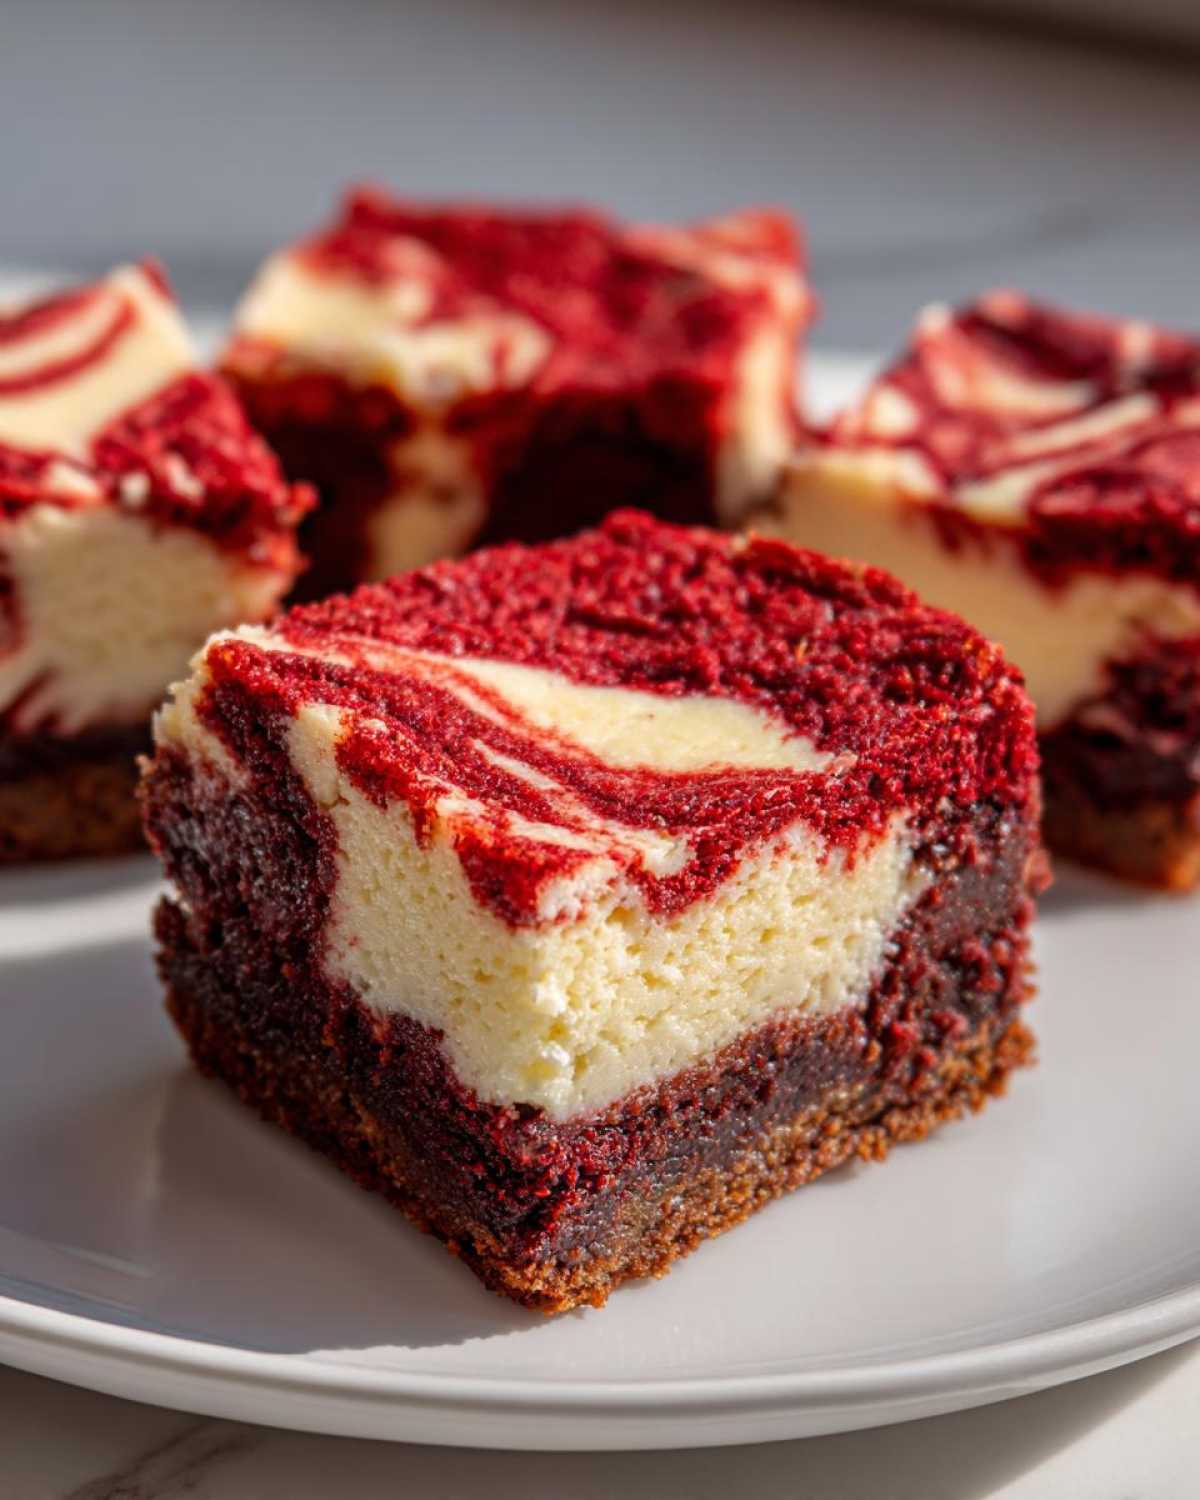
Don’t overthink the garnish here; the visual beauty of the swirl does most of the heavy lifting for you. Just cut them cleanly, let them chill a bit for those neat edges, and watch them disappear!
Frequently Asked Questions About Red Velvet Cheesecake Brownies
I always get questions about bar recipes because people are nervous about getting the layers right, and that’s totally fair! These Red Velvet Brownies Recipe bars are worth a few extra checks, I promise. Here are some of the things I hear most often when folks are gearing up to bake these wonders.
If you’re thinking about taking this flavor profile further, you might want to check out my guide on how to make red velvet cheesecake from scratch!
Can I make these Cream Cheese Swirl Brownies without red food coloring?
You totally can, if you prefer! The flavor won’t change one bit. The only thing you’ll sacrifice is that signature, dramatic deep red color that makes them special for Valentine’s Day or Christmas parties. If you skip the coloring, you will end up with a lovely, rich *chocolate* cheesecake brownie swirl instead! To make sure the texture stays fudgy, just ensure you still use the specified amounts of butter and eggs, and absolutely avoid overmixing the flour—that’s what keeps any brownie fudgy, colored or not.
What is the secret to fudgy Red Velvet Dessert bars?
Ah, the big question! For a truly fudgy Red Velvet Dessert experience, the secret lies in two places: the fat-to-flour ratio and how gently you treat that flour. We use more fat (melted butter!) relative to almost all-purpose flour. That high fat content keeps everything dense and moist instead of airy. Crucially though, once you add that flour to the wet ingredients, you must fold it in *just* until combined. If you keep mixing, you activate the gluten, and suddenly your rich bar turns into tough cake. Minimal stirring after the flour goes in is key for that perfect, gooey center.
Can I skip chilling the brownies before cutting?
Oh, I know the temptation is strong, but please, please don’t skip the mandatory cooling time! These are not cut like regular chocolate fudge brownies. Because we have that creamy cheesecake layer sitting right on top, if you try to slice them while they’re still warm, the knife will drag the cheesecake layer right off the bottom layer, making a huge, sad mess. They need at least two full hours on the counter to set up before you can even consider refrigeration. Chilling them makes for those incredibly clean, professional-looking squares.
Do I need to use gel food coloring?
I highly recommend it! I love using gel coloring because you only need a tiny dab—maybe a teaspoon, like the recipe calls for—and you get this incredible, intense red color. If you use the liquid drops you buy at the grocery store, you often have to pour in huge amounts to get that deep velvet hue, and all that extra liquid messes up the perfect fudgy batter balance we worked so hard to create. Stick to gel for the best color and texture!
Nutritional Estimate for Red Velvet Cheesecake Brownies
Look, let’s be real for a second. When we’re making something as unbelievably decadent as red velvet cheesecake brownies, we really aren’t baking them for the health benefits, are we? We’re baking them for joy, for celebrations, and for that incredible chocolate-cream-cheese moment. But, because I believe in transparency (and you might need to tell your dentist where you got these from later!), I’ve put together a rough nutritional estimate based on the ingredients list.
Remember, this is just a helpful guide, not a strict medical breakdown! Since every pan bakes differently, and how you cut your squares matters—are you going for 9 small squares or 25 tiny bites?—these numbers will flutter around a bit. This estimate assumes a standard cut into 16 squares.
Here’s what the numbers look like if you try to track your indulgence:
- Serving Size: 1 square
- Calories: 320 (It’s a treat, hug it!)
- Fat: 18g (That’s the butter and cream cheese working hard!)
- Saturated Fat: 11g
- Carbohydrates: 38g
- Sugar: 35g (Those two types of sugar are worth every gram!)
- Protein: 4g
- Sodium: 180mg
Please keep in mind that these values are estimates derived from the standard ingredients listed in the recipe. If you substitute butter for oil or use dark chocolate chips, things will shift. But hey, if you’re making Gourmet Brownie Recipes like this on a weekend, just enjoy the moment and maybe go for an extra walk tomorrow, okay?
Print
The Ultimate Fudgy Red Velvet Cheesecake Brownies with Perfect Cream Cheese Swirl
- Total Time: 2 hours 55 min
- Yield: 16 squares
- Diet: Vegetarian
Description
Make rich, fudgy red velvet brownies topped with a tangy, creamy cheesecake layer, marbled for a stunning visual effect.
Ingredients
- 1 cup (2 sticks) unsalted butter, melted
- 1 3/4 cups granulated sugar
- 3/4 cup unsweetened cocoa powder
- 1 teaspoon salt
- 1 teaspoon vanilla extract
- 4 large eggs
- 1 cup all-purpose flour
- 1 teaspoon red food coloring (gel preferred)
- 8 ounces cream cheese, softened
- 1/2 cup granulated sugar (for cheesecake layer)
- 1 large egg (for cheesecake layer)
- 1/2 teaspoon vanilla extract
Instructions
- Preheat your oven to 350°F (175°C). Line a 9×13 inch baking pan with parchment paper, leaving an overhang on the sides for easy removal. Lightly grease the paper.
- Prepare the Brownie Batter: In a large bowl, whisk together the melted butter, 1 3/4 cups sugar, cocoa powder, and salt until combined. Whisk in 1 teaspoon vanilla extract. Beat in the 4 eggs one at a time until fully incorporated.
- Stir in the red food coloring until the batter is uniformly red. Gently fold in the flour until just combined; do not overmix. Spread the red velvet batter evenly into the prepared pan.
- Prepare the Cheesecake Layer: In a separate medium bowl, beat the softened cream cheese with the 1/2 cup sugar until smooth. Beat in the remaining egg and 1/2 teaspoon vanilla extract until the mixture is creamy.
- Dollop spoonfuls of the cheesecake mixture evenly over the red velvet batter in the pan.
- Create the Swirl: Using a butter knife or a thin offset spatula, gently drag the knife through the batters in an S-shape or figure-eight pattern to create swirls. Do not over-swirl, or the colors will blend completely.
- Bake for 30 to 35 minutes. The edges should look set, and a toothpick inserted near the center should come out with moist crumbs attached, not wet batter.
- Cool completely in the pan on a wire rack (about 2 hours). Once cool, use the parchment overhang to lift the brownies out of the pan. Cut into squares before serving.
Notes
- Use gel food coloring for the deepest red color without adding excess liquid to the batter.
- For cleaner cuts, chill the cooled brownies in the refrigerator for at least one hour before slicing.
- These bars are excellent served slightly chilled for a firmer texture.
- Prep Time: 20 min
- Cook Time: 35 min
- Category: Dessert
- Method: Baking
- Cuisine: American
Nutrition
- Serving Size: 1 square
- Calories: 320
- Sugar: 35
- Sodium: 180
- Fat: 18
- Saturated Fat: 11
- Unsaturated Fat: 7
- Trans Fat: 0.5
- Carbohydrates: 38
- Fiber: 1
- Protein: 4
- Cholesterol: 75


Comments are closed.