
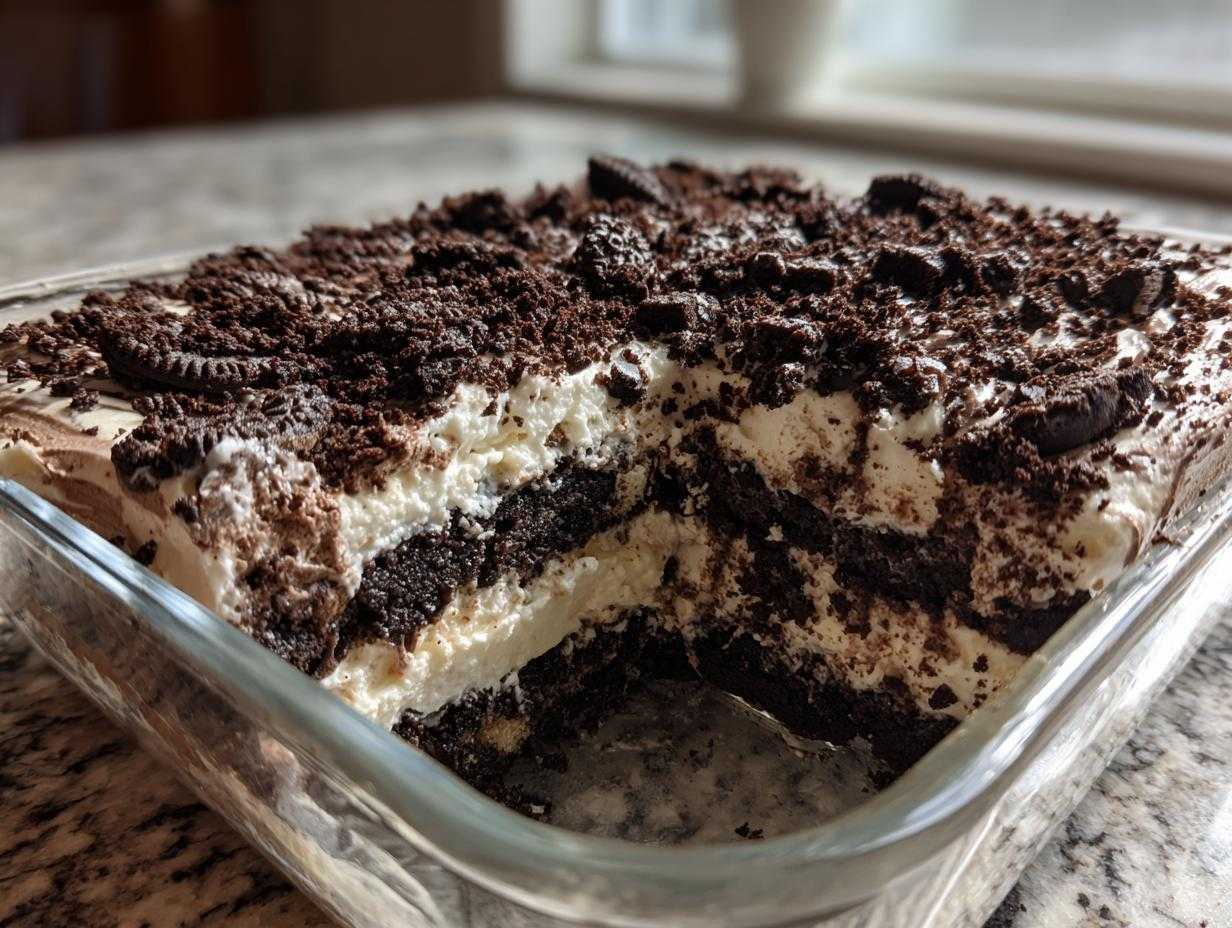
Oh, you know those desserts that instantly whisk you back to childhood birthday parties? The ones that require zero oven time and zero fuss, but everyone crowds around them anyway? That’s exactly what we’re making today with my ultimate **dirt cake** recipe. Seriously, this layered monster—with its crunchy cookie crust and impossibly creamy filling—is my absolute go-to for potlucks, neighborhood barbecues, or just when I need a quick, amazing treat.
I don’t know who first thought of smashing Oreos and mixing them with sweet, luxurious cream cheese and pudding, but bless their heart! This isn’t Martha Stewart’s fancy version I’m sharing; this is the real deal—the family favorite that always disappears first. It’s rich, it’s nostalgic, and trust me, it’s the easiest crowd-pleaser you’ll ever whip up. We’re talking about a completely no-bake dessert that tastes absolutely spectacular after sitting in the fridge for a few hours.
If you’ve been looking for a foolproof, dreamy, make-ahead option, you’ve found it! I promise you’ll want to check out my guide for making creamy peanut butter pie too, because when it comes to no-bake wonders, I’ve got the goods!
Why This Ultimate No-Bake Oreo Dirt Cake Reigns Supreme
Honestly, I keep coming back to this recipe year after year because it checks every single box a busy cook needs checked! It’s the King of simplicity, and yet it looks so impressive piled high in a glass dish. You really can’t beat the results for the effort you put in.
Here’s why people always ask me for the recipe when I bring this **Oreo Dessert** to an event:
- It requires absolutely no baking time—seriously, fire up the oven for anything else!
- It’s the definition of easy party food; just crush, mix, layer, and chill.
- The ingredient list is short, sweet, and uses things I usually have on hand anyway.
- It’s beloved by kids and adults alike—a true family favorite dessert that brings everyone back to the good old days.
Gathering Your Simple Ingredients for Classic Dirt Cake
Okay, let’s talk about what goes into this legendary **dirt cake**. The beauty of this recipe is that it relies on powerhouse staples we all keep stocked. You don’t need fancy extracts or exotic spices; you just need good quality versions of the basics. Since this is a **Simple Ingredients Dessert**, the quality of what you use really shines through, so grab the best Oreos you can find!
Here’s the full lineup you’ll need to gather before you start mixing:
- One package (14.3 ounces) of those wonderful Oreo cookies—the star of the show!
- 8 ounces of cream cheese, and listen, make sure it is fully softened!
- 1 cup of unsalted butter, also softened—we need this creamy foundation strong.
- 1 cup of powdered sugar, not granulated, so don’t confuse them!
- One container (12 ounces) of frozen whipped topping, completely thawed; I usually take this out the morning I plan to assemble.
- Two packages (3.9 ounces each) of instant chocolate pudding mix.
- 3 cups of cold milk—super cold is best for pudding setting.
- And, of course, gummy worms for decoration, if you’re feeling festive!
It’s worth noting that if you want that extra smooth base, I have a fantastic recipe for the best cream cheese frosting that shares the same foundation techniques we use here to get things perfectly velvety.
Ingredient Notes and Substitution Tips
When this dessert is chilling, those layers firm up beautifully, and the ingredients have to play nicely together. If you are out of Oreos, you can certainly try chocolate wafers, but honestly? It just won’t hit the same note. Stick to the Nabisco originals for the real textural payoff!
Now, about that whipped topping—I usually buy the frozen tub of generic whipped topping, and it works just fine. Just make sure it’s completely thawed before you fold it in, or you’ll end up with icy pockets in your creamy layer, and nobody wants a cold surprise in their **dirt cake**!
And listen, don’t skip the gummy worms! While they are optional for flavor, they are mandatory for presentation. If you are making individual **Dirt Cups** for the kids, you have to stick a few wiggly worms right in the top layer of crumbs when you decorate. It just completes the look!
Step-by-Step Instructions for Perfect No Bake Dirt Cake
Okay, friends, this is where the magic happens and we turn ingredients into a truly legendary **Layered Dessert**. Don’t feel intimidated by the number of bowls involved; it’s really just a lot of easy mixing followed by patience—which is the hardest part, I admit! The key here is keeping the mixtures light and airy before we put everything together.
Before you even start measuring, make sure your butter and cream cheese have been sitting out for at least an hour, maybe two. If they’re cold, your creamy base won’t blend smoothly, and you’ll end up fighting lumps. That’s my biggest expert tip right there: fully softened fat creates that cloud-like texture we are aiming for in a great **dirt cake**! If you’re looking for other great ideas while this chills, you can check out my baking tips for easy honey bran muffins.
Preparing the Crushed Cookie ‘Dirt’
First things first, we need that signature dirt texture. You’ve got to process all those Oreos—yes, every last bit of the creme filling goes in! I toss them into my food processor and pulse until they look like fine, dark soil. If you don’t have a processor, put them in a heavy-duty zip-top bag and just whack them mercilessly with a rolling pin until you’re satisfied!
Now, this is critical: you *must* remember to scoop out about 1 cup of those fresh crumbs before you start assembling. This reserved pile is what we use for our beautiful, perfect topping later on. Don’t accidentally use it all in the base layers, or your final layer won’t look convincing!
Creating the Creamy Chocolate Pudding Dessert Filling
Time to build the creamy structure. In your biggest bowl, we’re beating the softened butter and the softened cream cheese together until they are totally seamless. It should look pale yellow and fluffy—no lumps allowed! Next, stream in the powdered sugar while mixing until it’s incorporated.
For the next part, grab another bowl. Whisk the two packages of instant chocolate pudding mix with the 3 cups of cold milk. You only need to mix that for about 2 minutes, just until it starts to thicken up beautifully. That instant pudding is what gives us that stable, sweet base for this amazing **Chocolate Pudding Dessert**.
Now, gently fold your thawed whipped cream topping into your sweetened cream cheese mixture. Once that’s uniform, carefully fold in the thickened pudding mixture. I stress *folding* here, not mixing! We built air into the butter and the whipped topping, and we don’t want to knock it all out. Just mix until you don’t see any streaks of plain pudding remaining.
Layering and Setting Your Dirt Cake
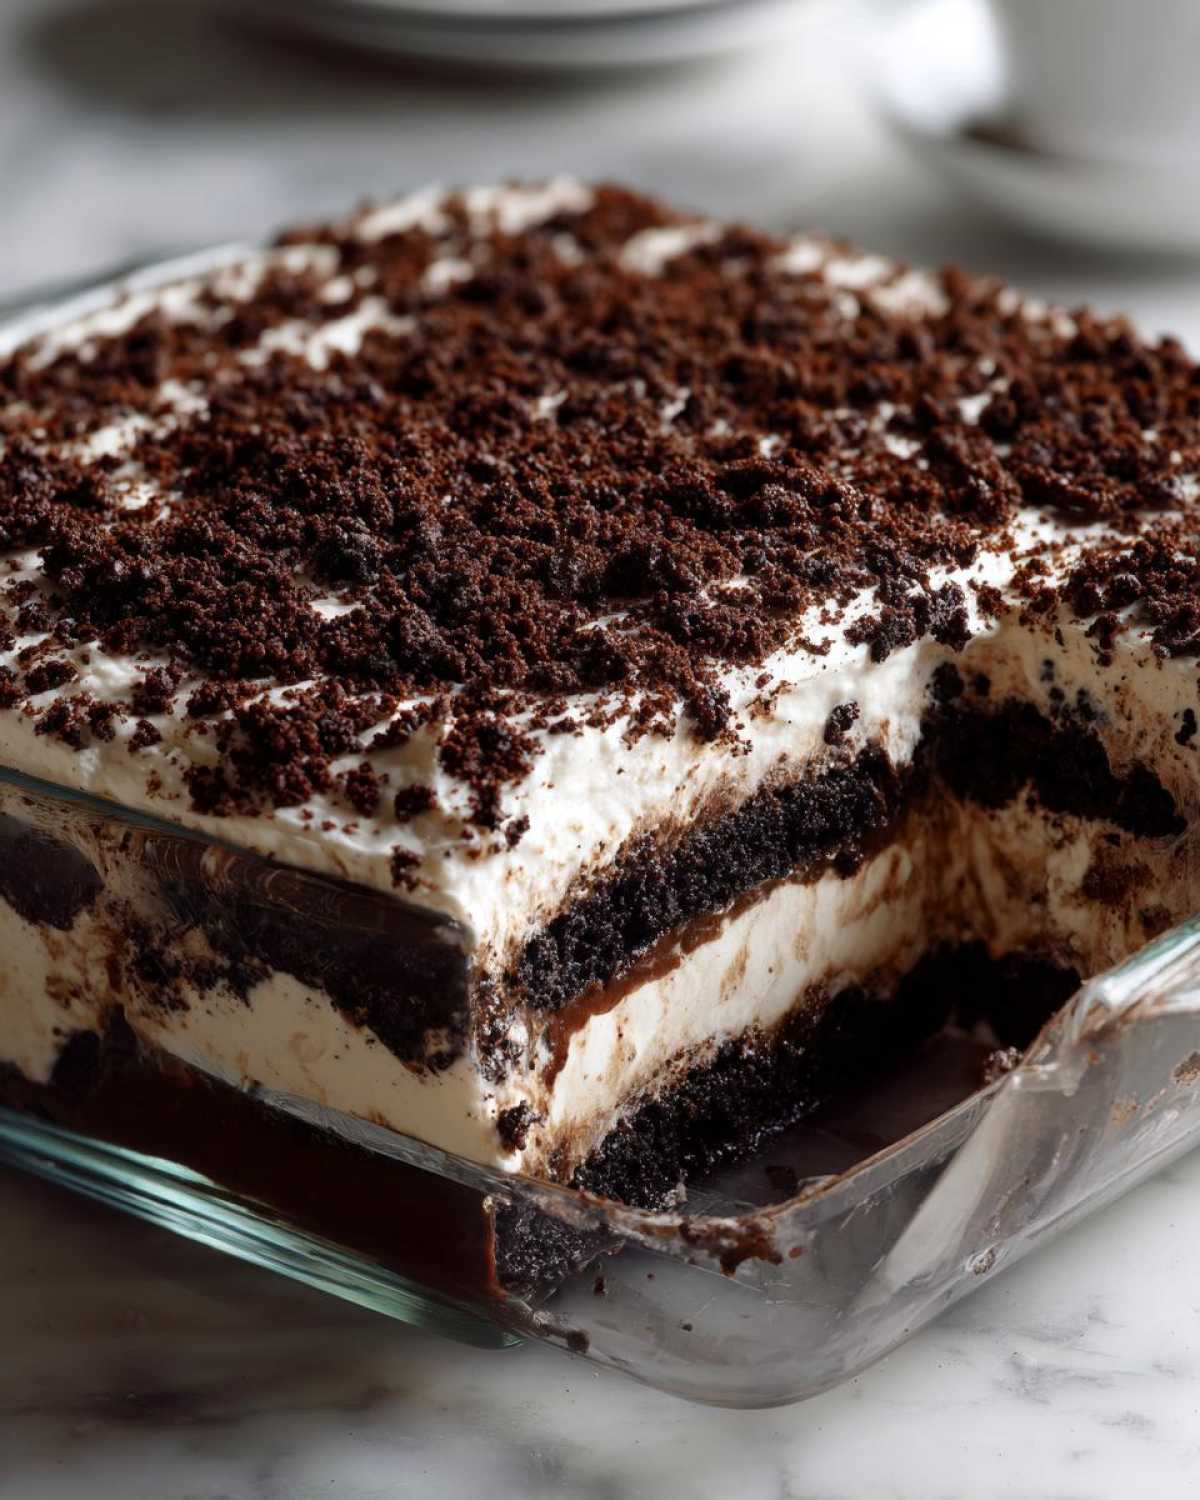
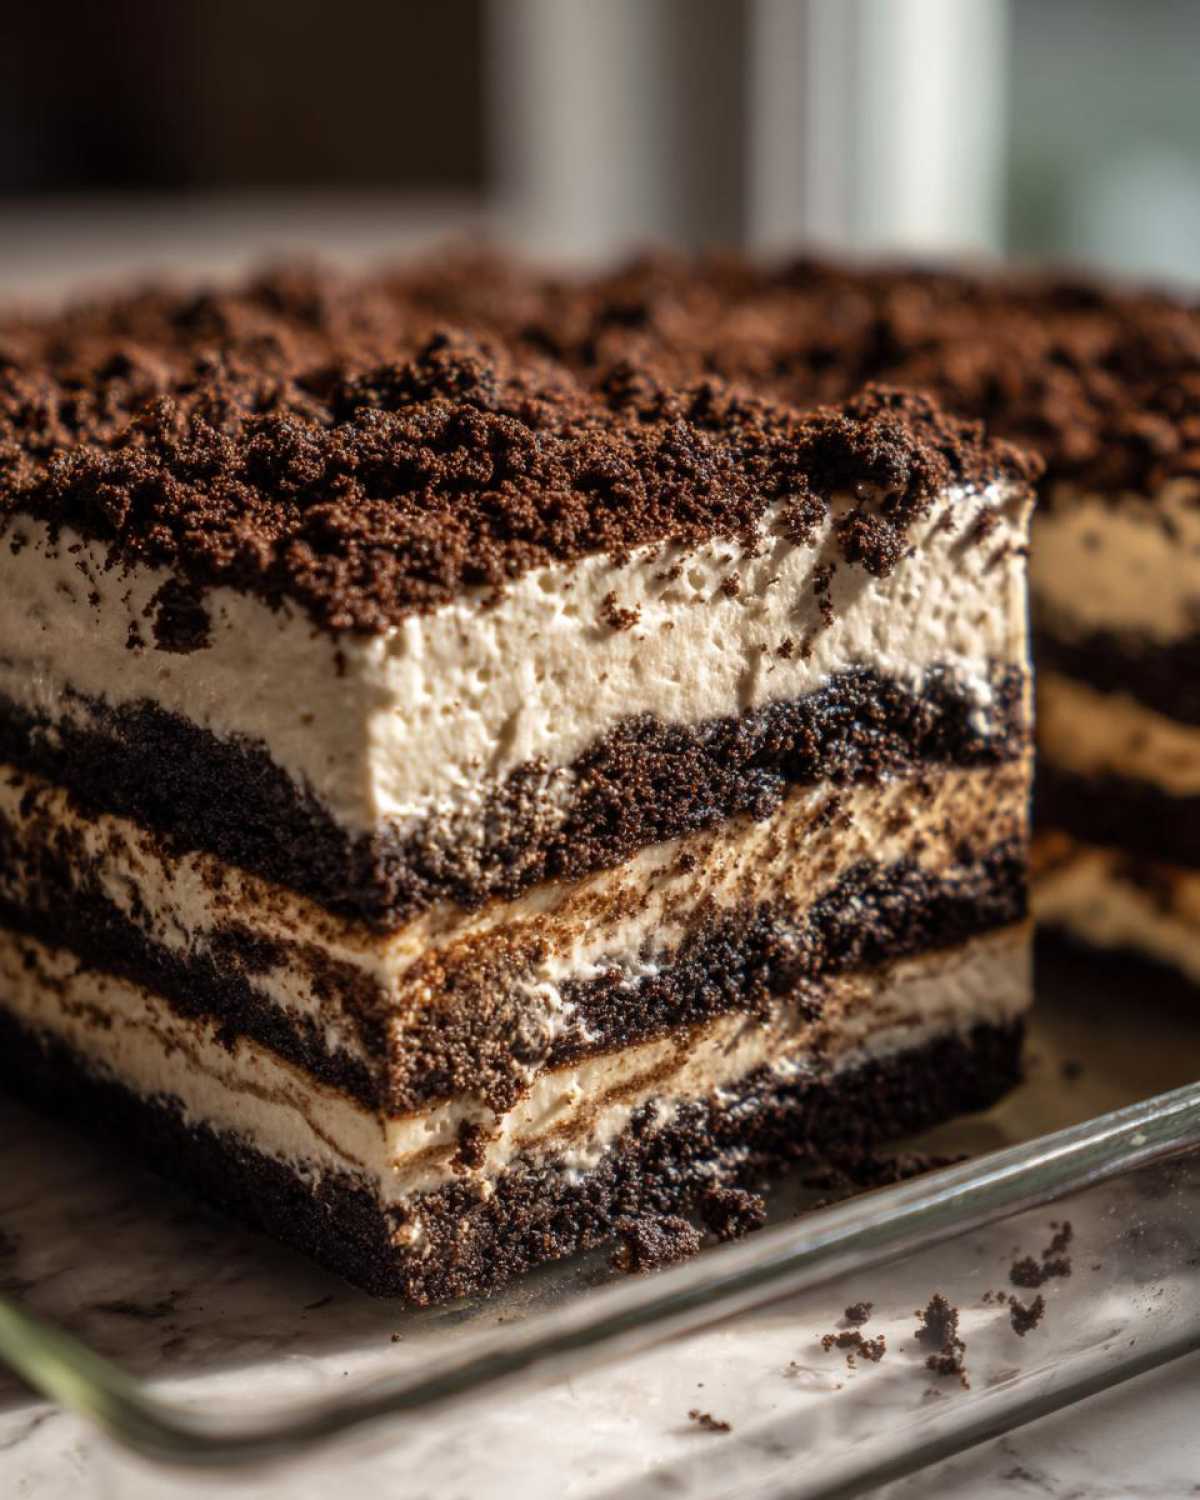
We assemble this like a very simple, very dirty trifle! Grab your 9×13 pan or your big glass bowl. Spread half of your Oreo crumbs evenly across the bottom. Pack it down just a tiny bit so it stays put, but don’t compress it too much!
Next, dollop half of that incredible creamy filling right on top. Spread it out carefully over the cookies. Then, you just repeat the whole thing: the remaining crumbs go down, followed by the remaining filling on top. Isn’t this the easiest **Make Ahead Dessert**?
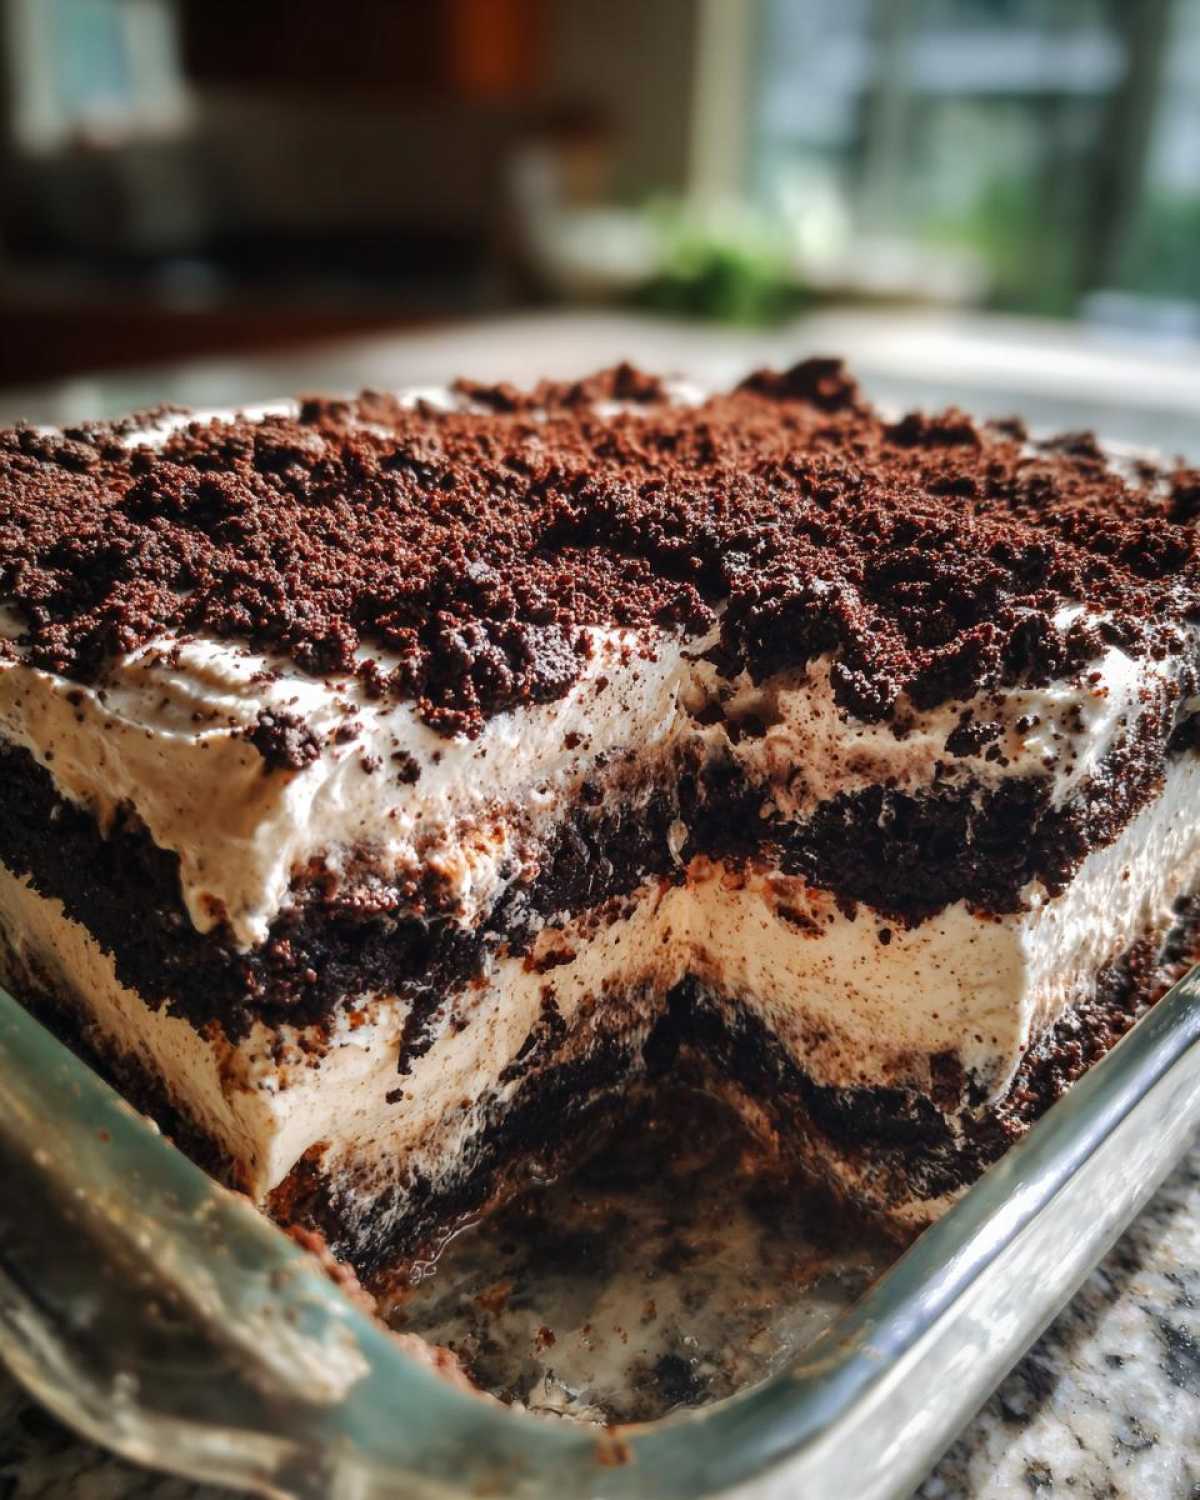
Here’s the crucial final step before you enjoy it: cover the dish tightly. This **dirt cake** has to chill! You are looking for a minimum of 4 hours, but honestly, if you can wait until the next day, it sets up so much firmer and the flavors just meld perfectly. Patience pays off!
Presentation Tips: Making Your Dirt Cake Look Amazing
Alright, the waiting game is over, and your masterpiece has chilled! Now we get to the fun part—making this **dirt cake** look as deliciously messy as it tastes. Remember that reserved cup of crushed Oreos we set aside earlier? This is their moment to shine.
Gently sprinkle those crumbs evenly right over the top layer of creamy filling. Don’t press down hard; we want it light and fluffy, just like freshly turned soil! This final layer is what sells the whole “dirt” concept, and it looks fantastic in a large glass trifle dish because everyone can see those neat layers underneath.
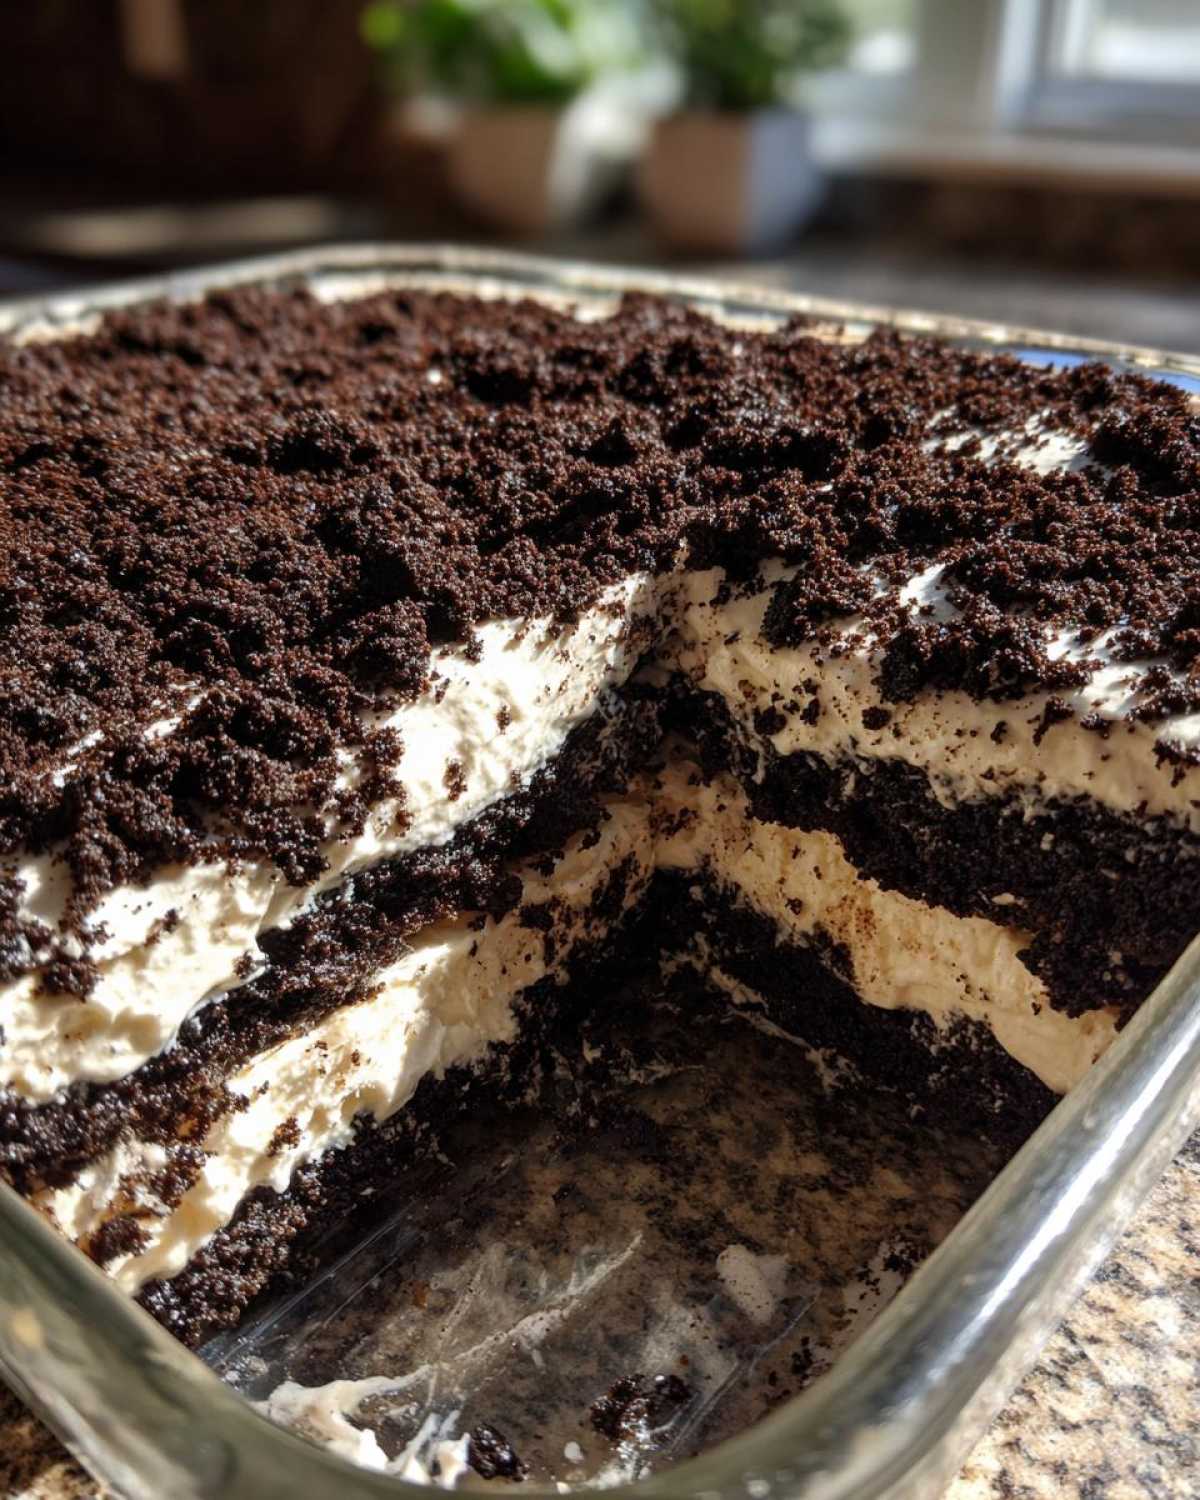
If you’re worried about serving a huge pan at a party, you absolutely have to try making individual **Dirt Cups**! Scoop the layers right into clear plastic cups or small mason jars. It makes serving a breeze, especially for kids!
And for the true showstopper moment, stick those gummy worms in! I always try to have a few poking out near the edge or wriggling semi-submerged in the topping. It’s so silly and fun! If you love easy, no-fuss presentation like this, you should totally look at my recipe for chocolate dipped coconut bars—they look fancy but take almost no effort!
Make Ahead Dessert Strategies for Your Dirt Cake
Because this is purely a no-bake situation, the chilling time isn’t just suggested—it’s mandatory! That chilling time is what firms up the pudding and allows the butter and cream cheese filling to solidify around the crumbs. If you rush it, you end up with a delicious, sweet soup, and we absolutely do not want that structure failure.
The great news, though, is how fantastic this is for planning ahead. I usually make mine the night before I need to take it to a gathering. Giving it a full 12 hours allows it to set up perfectly firm, making it the ultimate **Potluck Desserts** option because you can do all the work on Tuesday for a Friday event!
It holds up beautifully in the fridge for about three days. Any longer and the cookies might start getting a little too soft for my liking, even though the flavor is still great. If you’re looking for other make-ahead magic that’s just as simple, my recipe for no-bake chocolate coconut balls is another winner you can prep way in advance!
Troubleshooting Common Dirt Cake Issues
Even though this is a no-bake wonder, sometimes things can go just a little sideways! Don’t panic if you run into a snag; almost every recipe has a little hiccup now and then. Since this is such a simple **Oreo Dessert**, the fixes are usually just as simple!
Here are the two most common things people worry about when making this dessert, and how I fix them in my kitchen:
My Creamy Filling Seems Too Runny After Mixing
This usually happens for one of two reasons: either you didn’t beat the cream cheese and butter long enough to incorporate air, or maybe your milk wasn’t cold enough when you whisked the pudding. If you follow the steps and it still looks too loose after folding everything together, don’t stir in more pudding mix—that’ll give you a weird texture!
The best fix is time! Cover it up tight and stick it in the fridge for an extra hour or two. The cold will help firm up that butter and pudding base beautifully. Trust me, waiting is always better than trying to doctor a runny mess.
My Oreo Crumbs Are Too Coarse or Too Sandy
If your “dirt” looks more like small pebbles than fine soil, it won’t stick together nicely on top, and it won’t give you that perfect melt-in-your-mouth texture in the layers. If you used a food processor, you probably pulsed too briefly. If you used the rolling pin method, you might need better technique (and maybe a stronger rolling pin!).
For the base layers, don’t stress too much—coarse crumbs still taste great! But for that top finishing layer, if it’s too chunky, just dump the whole batch back into the food processor for 10 more zaps. You want that fine powder that looks truly dark and even.
The Cookie Layer is Soggy Instead of Crunchy-Soft
This is the sign that your **dirt cake** sat too long, usually more than 3 days in the fridge, or you spread that creamy filling on a little too heavily against the bottom cookies. The moisture from the filling eventually soaks into the bottom layer.
To avoid this next time, always use the firmest base layer you can manage, and try to make sure the chilling only lasts 1 to 2 days maximum for the absolute best texture contrast. If you’re prepping for a huge event, make the filling and crush the cookies separately, and only layer them the day before you plan to serve!
Frequently Asked Questions About Oreo Dirt Cake
Can I freeze this dirt cake recipe?
That’s a great question, especially if you’re trying to conquer your holiday baking list early! Because this recipe relies so heavily on the texture of the whipped topping and butter, I really don’t recommend freezing the finished, layered dessert. When it thaws, the filling tends to separate a bit and can become weepy or watery, and nobody wants a soggy **dirt cake**!
However, you *can* freeze the crushed Oreo layer! Just put your reserved crumbs (or even all of them) into a freezer-safe bag. When you’re ready to assemble, just let them sit on the counter for about 15 minutes to lose the deep chill, and then proceed with layering as normal. It keeps them nice and fresh!
What if I want this to be an extra rich Cream Cheese Dessert?
I hear you there! If you want to really amp up that tangy, velvety texture, you can absolutely increase the cream cheese element. I wouldn’t suggest messing with the butter ratio, as that’s key to the structure, but you can easily bump up the cream cheese from 8 ounces to 12 ounces. You might need to add just a splash more milk when you mix the pudding to keep that overall filling consistency balanced. This makes it even more of a substantial **Cream Cheese Dessert**!
We love the worms! Are there any other fun ways to decorate this layered dessert?
Yes! If you aren’t feeling the gummy worm vibe, or maybe you’re making this for a grown-up crowd, I have a few ideas. First, you can use crushed toffee bits as a topping for a crunchy texture contrast. Or, if you want to make it look more sophisticated, use a piping bag to make little swirls of extra whipped cream on top instead of the cookie crumbs, and add a single chocolate-covered strawberry to the center!
Is there a way to make this without using instant pudding mix?
You absolutely can skip the instant mix, but you’ll need to cook a proper chocolate pastry cream from scratch, and that takes time and careful whisking—so it defeats the whole “no-bake” simplicity goal! If you insist on making your own, you’d be looking at mixing egg yolks, cocoa powder, sugar, and milk, cooking until thick, and then chilling it completely before folding it into your cream cheese base. For this classic **dirt cake**, I really encourage the instant mix because it sets up so fast and reliably for us busy cooks.
How soon before I serve should I assemble this dessert?
As I mentioned before, chilling is crucial, so you shouldn’t plan to assemble it less than 4 hours before serving. But if you want the very best texture—where the cookies are soft but still have a little texture, and the filling is perfectly firm—the sweet spot is definitely making it the evening before you serve it. This ensures it’s the best **No Bake Dessert** possible for your party guests. If you’re heading to a cookout and need ideas that go with savory mains, you should check out these easy crockpot steak bites for what to serve alongside this sweet treat!
Storage and Reheating Instructions for Leftover Dirt Cake
If, by some miracle, you have any of this amazing **dirt cake** left over, saving it is simple! Because this is a no-bake creation that sets up nicely in the cold, you just need to cover your dish tightly with plastic wrap or a tight-fitting lid. Pop it right back into the refrigerator.
It will stay perfectly good for about three days, though I think the texture is best enjoyed within the first 48 hours. Now, here’s the most important part: you absolutely do not reheat this dessert! It’s intended to be served cold and creamy, so popping it in the microwave would just turn your beautiful layers into a puddle. Keep it chilled, and it’s ready to go whenever a craving strikes!
Estimated Nutritional Snapshot for This Dirt Cake
Now, I always say you shouldn’t think too much about the nutrition when you’re eating something this glorious, but sometimes folks just want a heads-up! Since this **dirt cake** is packed with butter, cream cheese, and those wonderful chocolate cookies, it is definitely a rich treat, not a light salad, okay?
The numbers below are just estimates based on standard formulations for this recipe serving 12 portions. Remember, if you scoop bigger portions, or if you use richer ingredients, these numbers will naturally change a bit. But for a typical serving of this decadent **Oreo Dessert**, here’s what you can generally expect:
- Calories: Roughly 450 per serving. Yep, this is a satisfying slice!
- Fat: Around 28 grams, mostly coming from the butter and cream cheese base.
- Carbohydrates: About 48 grams, thanks to all that sugar and those cookies.
- Protein: A modest 5 grams.
It’s a fantastic **Simple Ingredients Dessert** that really packs a punch flavor-wise! I always serve this cold, straight from the fridge, maybe alongside a fruit salad if I want to pretend I’m balancing things out. If you want another amazing, balanced meal idea for when you actually want veggies, you’ve got to try my recipe for easy chicken fried rice!
Print
Ultimate No-Bake Oreo Dirt Cake
- Total Time: 4 hr 25 min
- Yield: 12 servings
- Diet: Vegetarian
Description
This is a simple, no-bake layered dessert featuring crushed Oreos and a creamy filling, perfect for parties or family gatherings.
Ingredients
- 1 package (14.3 ounces) Oreo cookies
- 1 package (8 ounces) cream cheese, softened
- 1 cup unsalted butter, softened
- 1 cup powdered sugar
- 1 container (12 ounces) frozen whipped topping, thawed
- 2 packages (3.9 ounces each) instant chocolate pudding mix
- 3 cups cold milk
- Gummy worms for decoration (optional)
Instructions
- Crush all Oreo cookies in a food processor or by placing them in a sealed bag and crushing them with a rolling pin. Set aside about 1 cup of crumbs for topping.
- In a large bowl, beat the softened cream cheese and softened butter together until smooth.
- Gradually add the powdered sugar to the cream cheese mixture and beat until fully combined.
- Fold in the thawed whipped topping until the mixture is uniform.
- In a separate bowl, whisk together the instant chocolate pudding mix and cold milk for about two minutes until it begins to thicken.
- Gently fold the pudding mixture into the cream cheese mixture until just combined. Do not overmix.
- In a large trifle dish or 9×13 inch pan, create the first layer by spreading half of the crushed Oreos on the bottom.
- Spread half of the creamy filling mixture over the cookie layer.
- Repeat the layers: remaining cookies, then remaining filling.
- Cover the dish and chill in the refrigerator for at least 4 hours, or preferably overnight, to allow it to set.
- Before serving, sprinkle the reserved 1 cup of crushed Oreos over the top layer to resemble dirt. Add gummy worms if desired.
Notes
- You can make this dessert in individual cups instead of one large dish for easy serving; these are often called Dirt Cups.
- For the best texture, ensure your cream cheese and butter are fully softened before mixing.
- Chill time is important; the longer it chills, the firmer the layers become.
- Prep Time: 25 min
- Cook Time: 0 min
- Category: Dessert
- Method: No Bake
- Cuisine: American
Nutrition
- Serving Size: 1 serving
- Calories: 450
- Sugar: 45
- Sodium: 350
- Fat: 28
- Saturated Fat: 15
- Unsaturated Fat: 13
- Trans Fat: 0.5
- Carbohydrates: 48
- Fiber: 2
- Protein: 5
- Cholesterol: 55


Comments are closed.